This post may contain affiliate links. Please see our full Disclosure Policy for details.
What is needlepoint? Needlepoint is a type of embroidery where you stitch yarn or thread through a stiff, open-weave canvas until the entire canvas is covered. Unlike cross stitch, which places small X shapes on fabric (and often leaves the background bare), needlepoint typically uses a single slanted stitch, called a tent stitch, and nothing is left uncovered. The finished piece looks like a tiny woven mosaic, and the canvas disappears completely.
If you can thread a needle and follow a colored map, you can do needlepoint. Mini kits like the ones in this guide are one of the easiest ways to start, and you can finish one in a handful of relaxed evenings.
Why I started with two famous paintings?
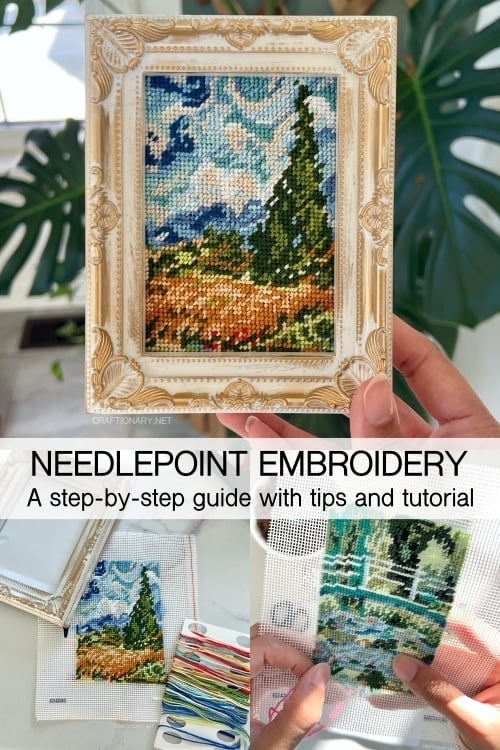
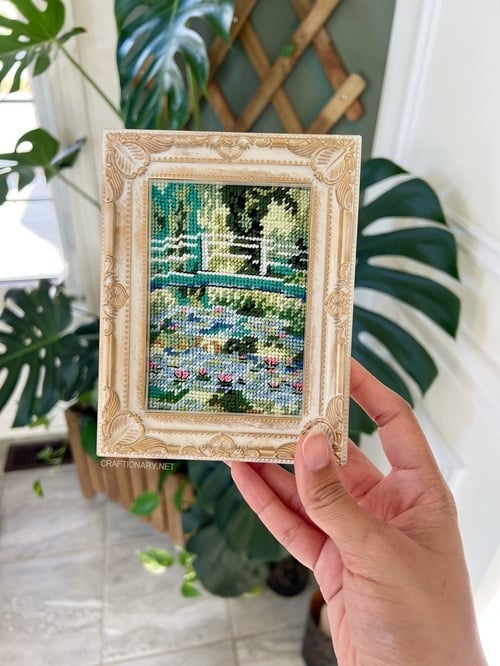
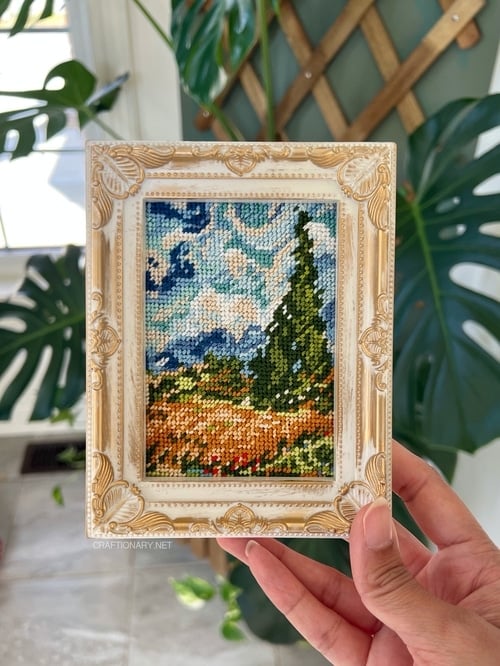
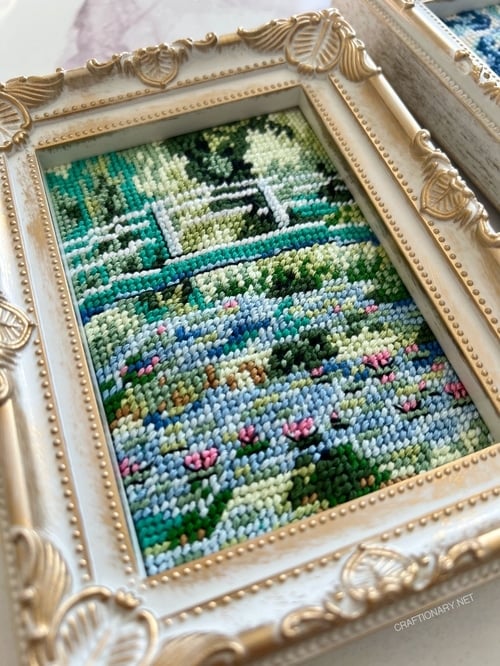
I picked up two small Loops & Threads needlepoint kits from Michaels: one showing Van Gogh’s Wheat Field with Cypresses (the swirling blue sky, the dark flame-shaped cypress, the orange-gold wheat) and one showing Monet’s Water Lilies (Nymphéas).
These are tiny. The finished size is 3 in x 4 in (7.6 cm x 10.1 cm), and they come with a 4.5 in x 6 in easel-back frame so you can display them on a shelf the moment you finish. That small size is the secret: you get the full needlepoint experience without a six-month commitment. Like I had for my cross stitching landscape art.
Some of my favorite kits worth-trying in order of recommendation include:
- Needlepoint: 50 Creative Stitches Card Deck
- Flower Basket Tote Bag Beginners Kit
- Pink Hydrangea Vase Needlepoint Beginners Kit or Blue Hydrangeas
- Chinese Christmas Tree Needlepoint Kit
- Irises Needlepoint Throw Pillow Kit
- Strawberry Thief Needlepoint Throw Pillow Kit
- Watercolor Poppy Eyeglass Case
- Butterfly and Blossom Simple Needlepoint Kit
What makes needlepoint different from other embroidery?
People use embroidery, needlepoint, tapestry, and cross stitch interchangeably, and that confuses everyone. Here is how they actually differ.
| CRAFT | What you stitch on? | Main Stitch | Coverage | Typical look |
| Needlepoint
|
Stiff open-weave canvas (mesh with holes or printed bars)
|
Tent stitch family (half cross, continental, basketweave)
|
Entire canvas covered
|
Dense, textured, mosaic-like, durable
|
| Cross stitch
|
Evenweave or Aida fabric
|
X stitch
|
Often background left bare
|
Pixelated, crisp, flat
|
| Surface/hand embroidery
|
Any fabric (linen, cotton, denim)
|
Many freeform stitches (satin, stem, French knot, backstitch)
|
Partial, designs sit on top of fabric
|
Illustrative, flowing lines
|
| Crewel
|
Linen twill
|
Freeform stitches in wool
|
Partial
|
Raised, woolly, traditional florals
|
| Plastic canvas
|
Rigid plastic grid
|
Various, usually yarn
|
Often full
|
Chunky, 3D crafts like boxes
|
| Punch Needle
|
Stretched fabric on a frame
|
Loops pulled through
|
Full or partial
|
Fluffy, rug-like
|
The three things that make needlepoint unique:
- The canvas does the structural work. Because the canvas is stiff, your stitches stay evenly spaced and the finished piece can be framed, turned into a pillow, or used as a bag panel without sagging.
- Everything gets covered. In needlepoint the background is stitched too. That is why it behaves more like painting with thread than drawing with it.
- It works at any scale. The same technique makes a 3 x 4 inch frame-able miniature or a full-size rug. Higher mesh counts (more stitches per inch) give finer detail; lower counts give a chunkier, faster result.
A quick note on the word tapestry: You will see needlepoint kits labeled tapestry (the French on this kit says Trousse de Tapisserie sur Canevas, and the needle is called a tapestry needle). True tapestry is actually a woven textile made on a loom. In stitching, tapestry is just the traditional name that stuck, and the needle name too.
Understanding the basics before you stitch:
1. Mesh count (the number that sets your detail level)
Mesh count is the number of canvas threads or bars per inch. Your kit uses 14-count canvas, so you have 14 stitches per inch. You can calculate your finished size by dividing the stitch count by the mesh count. A 3 x 4 inch piece at 14 count works out to roughly 42 stitches wide by 56 stitches tall, or about 2,350 stitches in total. That number is encouraging when you are starting out: it is a finite, doable project.
Common canvas counts you will run into: 10 and 12 (big, beginner-friendly, quick), 13 and 14 (the most popular all-round counts), and 18 (fine detail, more patience).
2. Printed canvas vs. blank canvas
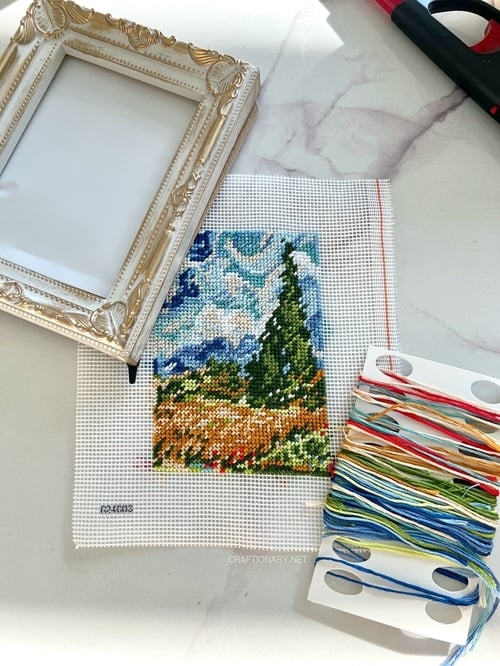
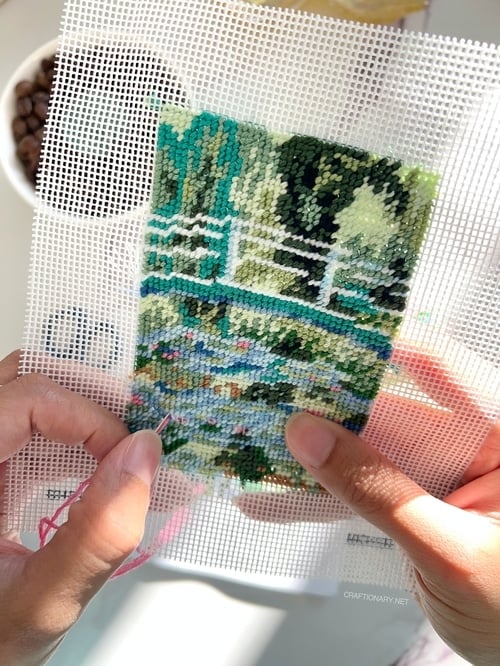
This is the most important thing to understand about these kits. The kit includes a printed 14-count canvas, which means the colors are already printed on the canvas. The instructions are clear that the 14 refers to the number of bars per inch, not holes per inch, and that you stitch over the bars as directed. The printing shows where each color goes. The paper chart is only a backup to check when the printing is hard to read.
This is different from a blank canvas where you plot every stitch from a chart, and it is a big reason these kits are so beginner-friendly.
3. Floss and strands
Each length of floss in the kit is made of 6 separate strands. For this project you do not separate them. You stitch with all 6 strands together. If you are used to cross stitch, where you pull out 2 strands at a time, this will feel generous. The thick thread is what covers the canvas fully.
4. The needle
The Van Gogh kit includes a tapestry size 24 metal needle. Tapestry needles have a blunt tip and a large eye. The blunt tip slides between canvas threads instead of splitting them, and the big eye handles thick thread. Remember that a higher needle number means a finer needle.
What’s in the needlepoint kit (supply list):
Based on the kit packaging and instruction sheet:
- 1 100% cotton printed 14-count canvas
- 1 easel-back frame, 4.5 in x 6 in (11.5 cm x 15 cm)
- 13-16 colors of 100% cotton floss
- 1 tapestry 24 metal needle
- Instructions
Things I recommend adding (not in the box):
- Small sharp scissors
- A floss organizer card (the kind with oval holes) or even a piece of cardboard with holes punched in it
- Masking tape or painter’s tape to wrap the canvas edges
- A small pencil for marking the chart
- Good lighting: This is non-negotiable with tiny printed bars
How to do needlepoint: step-by-step tutorial
The following steps follow the kit instructions, with extra tips from stitching experience.
1. Prep your workspace and canvas
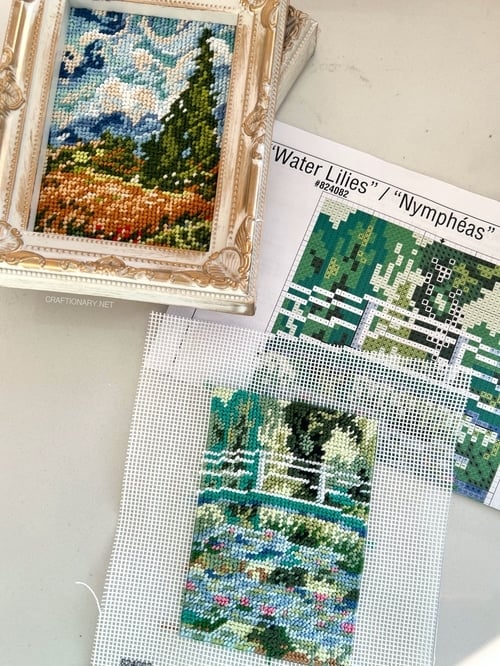
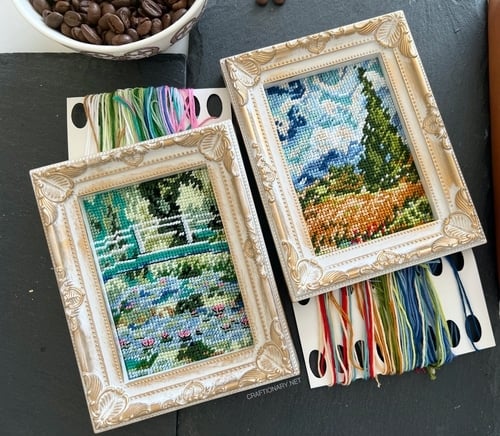
Wrap the raw canvas edges with masking tape so they do not fray and snag your floss. Then sort your floss. In my photos above you can see how quickly 13 to 16 colors of 6-strand floss become a tangled green and blue river on the table. Do yourself a favor: loop each color through the oval holes of a floss card and label it with the symbol from the color key (the Water Lilies key uses symbols such as a dot for white, an X for light green, a star for blue, a heart for pink, and a filled square for black).
2. Read the chart and printed canvas together
Look at the printed canvas as your main guide and the color chart as the backup. The Water Lilies color key lists 13 colors: White, Pale Green, Light Green, Green, Dark Green, Darkest Green, Brown, Pink, Dark Turquoise, Light Blue, Blue, Dark Blue and Black. The chart also marks a center arrow on each side, which helps you orient the design if you ever get lost.
The instruction sheet also reminds you that no two finished needlepoint pieces will be exactly the same. Use your judgment, the canvas, the chart and the front photo, and make it your own. That is real permission to improvise when a stitch is ambiguous.
3. Cut and thread your floss
Cut a length of about 18 inches (45 cm). Longer than that and the floss frays and tangles as it passes through the canvas repeatedly. Keep all 6 strands together.
The kit’s threading method works very well with thick floss:
- Fold the floss over the shaft of the needle.
- Pinch the fold tightly between thumb and forefinger.
- Slide the needle out of the fold.
- While holding the fold, place the eye of the needle over the fold and push it through.
4. Start the first stitch
Bring the needle up from the back at the start of your first stitch, leaving about 1 inch (2.5 cm) of floss as a tail on the back. Hold that tail in the direction you will be stitching and cover it with your first few stitches so it locks in place. No knots.
5. Learn the half cross stitch
This kit uses the half cross stitch, one of the simplest needlepoint stitches. It makes a small diagonal stitch that slants in one direction, usually from bottom left to top right.
- Bring the needle up from the back at the bottom left hole of your stitch.
- Insert the needle down at the top right of the next hole.
- Repeat for each stitch, keeping every slant going the same direction.
Work across a row, then turn the canvas around and stitch back in the other direction so your slant stays consistent. Keep your tension even and snug but never tight. Pulling hard warps the canvas and makes the colors look streaky.
6. Work one color area at a time
Stitch all the stitches of one color in a section before changing. For Water Lilies, a good plan is to begin with the bold, high-contrast structures (the white and black horizontal shapes near the upper middle) so you can quickly see that you are on track, then fill the greens, then the blues of the water, and save the tiny pink lily blossoms and brown accents for the end so they pop.
For the Van Gogh kit, many stitchers start with the cypress (the darkest, largest shape) and the wheat field, then work the sky last. The sky swirls are a lot of small color changes, and having the rest of the picture finished makes them easier to place.
7. Starting and ending new threads
To start a new thread, pass the needle through several stitches on the back of your work before bringing it up. To finish a thread, slide the needle through several stitches on the backside and snip close to the surface. The kit warns not to pull too tightly and to avoid knots, because knots make the finished piece bumpy and it will not lie flat.
8. Add backstitch details (Water Lilies)
The Water Lilies chart includes backstitch lines (shown as bold black lines, especially around the lily pads). The color key says all of these lines use 1 strand of black, not all six. These outlines are what make the lily pads and flower shapes readable, so do not skip them. Finish all the half cross stitching first, then add the backstitch on top.
9. Finish and frame
When your canvas is fully stitched, the kit’s tip is to iron the finished piece on the wrong side and stretch the canvas to make it square. The instructions note that extra blocking is not needed when you have used the half cross stitch. Then fit it into the included easel-back frame.
Finishing note: printed canvases can have colors that react to moisture, so avoid spraying or soaking. Stick to the kit’s dry iron method.
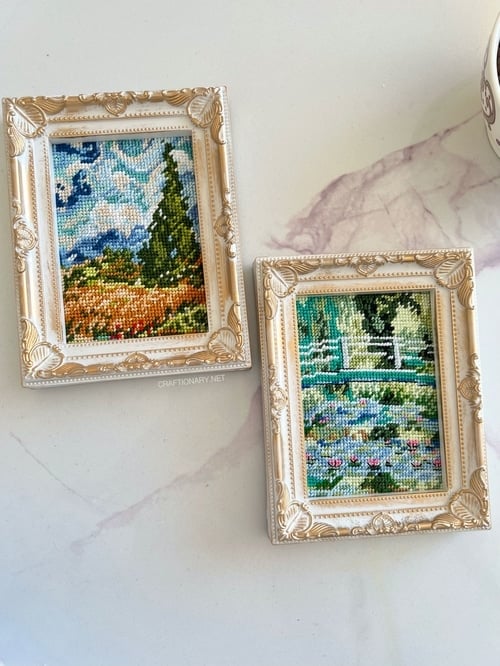

Van Gogh’s Wheat Fields and Cypresses Needlepoint Art
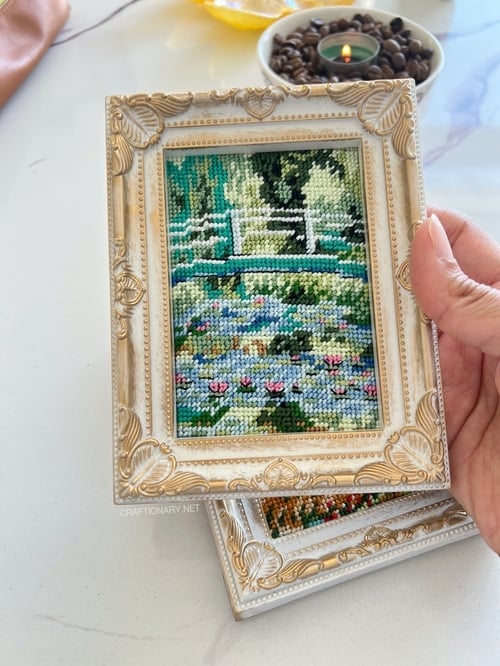
Monet’s Water Lilies Needlepoint Art
Troubleshooting: common beginner problems
- My thread keeps twisting: Let the needle hang and unwind every few stitches.
- The canvas looks see-through between stitches: You may be using fewer strands than the kit says. Use all 6 for this kit, and check that every stitch slants the same direction.
- I ran out of a color: Never panic, the kit includes enough for the pattern, but if you pull long lengths and waste floss you can come up short. Keep your tails short and avoid long jumps across the back.
- My piece is crooked: Stitching too tightly distorts canvas. Relax your hand, then follow the kit’s ironing and stretching tip.
- I can’t see the printed bars: Use bright light and a magnifier lamp.
Half cross stitch vs. other needlepoint stitches
Half cross is the right stitch for this kit, but it is worth knowing what else is out there:
| Stitch | Half Cross Stitch | Continental Stitch | Basketweave Stitch |
| How it looks
|
Slanted stitch on the front, small vertical stitch on the back
|
Slanted stitch on front, longer diagonal on back
|
Woven look on the back
|
| Pros
|
Uses the least thread, simple to learn
|
Good coverage, great for outlines and single lines
|
The most durable and least distorting, the standard for large areas
|
| Cons
|
Less sturdy and can slip on loose canvas; not ideal for items that get heavy use
|
Can pull the canvas off-grid when used on large areas
|
Takes some practice to learn
|
If you fall in love with needlepoint, basketweave is the next stitch to learn. It is the traditional choice for pillows, belts and anything that will be handled.
Learn more: Needlepoint: 50 Creative Stitches Card Deck
Kit vs. doing your own needlepoint project: pros and cons
1. Needlepoint kit
- Pros:
- Everything is in the box: canvas, floss, needle, instructions and frame.
- The printed canvas removes guesswork and chart-counting.
- Colors are matched to the artwork for you.
- Low cost and low risk to try a new craft.
- Small kits can be completed quickly, which builds confidence.
- Cons:
- You have no control over the design, size or thread type.
- You get only the floss you need, with very little left over.
- The finished piece will look like everyone else’s version of that kit.
- Printed canvas limits you to the printed colors.
2. Your own project (custom design)
- Pros:
- You choose the image, mesh count, thread type (cotton, wool, silk, metallic) and size.
- You can personalize with names, dates, pets, a favorite photo.
- You learn skills like charting, color planning and stitch selection.
- The finished piece is truly one of a kind.
- Cons:
- You need to source canvas, needles, threads and a way to finish it.
- Estimating thread amounts is hard, and running out partway through is common.
- Color matching is trial and error.
- It takes much longer and the learning curve is steeper.
My recommendation: Start with a kit. Do one or two. Then move to a blank canvas design once you have the rhythm and know what you like.
Useful Tips:
- Work in daylight. Printed bars are tiny and colors are close, especially the greens in Water Lilies.
- Keep a pencil handy. Mark completed areas on the chart so you never lose your place.
- Stitch in the same direction. If one stitch slants the opposite way, it shows. Pick a direction and stick with it.
- Do not carry floss long distances across the back. It shows through lighter colors.
- Store leftover floss in a small zip bag with the color key so you can use it for the next project.
- Take it with you. A small canvas fits in a pouch, so it is a perfect commute or waiting-room project.
Variations and ideas to try:
Once you have finished your first kit, here are specific ways to take the idea further.
- Enlarge it into a pillow: Rework the chart on 10 or 12 mesh canvas to nearly double the size without adding stitches. A bigger canvas means thicker thread (wool or perle cotton), so you stitch faster and it becomes a cozy statement pillow. Use basketweave for durability.
- Turn the mini into jewelry or a keepsake: Finish a tiny piece as a brooch, a keychain, a pendant, or a zipper pull by backing it with felt or leather and trimming close to the stitches. Choose a stiffer finishing method for pieces that get handled.
- Create a gallery wall set: Stitch a Monet, a Van Gogh and a Hokusai-style wave in matching 3 x 4 frames. A row of three or four tiny stitched masterpieces looks surprisingly high end, and it makes a great gift set.
- Stitch your own photo: Upload a favorite photo to a pattern generator, reduce it to 10 to 14 colors, and chart it for a 14-count blank canvas. Pet portraits, landscapes, and the view out your window all convert well. The trick is to pick photos with strong contrast and simple backgrounds.
Frequently asked questions about needlepoint
Basics of Needlepoint:
- What is needlepoint? Needlepoint is a form of embroidery in which thread or yarn is stitched through an open-weave canvas so that the whole surface is covered with stitches.
- Is needlepoint hard for beginners? No. The basic stitch is simple, and a printed-canvas kit removes most planning. The hardest part is patience and keeping tension even.
- How is needlepoint different from cross stitch? Cross stitch uses X-shaped stitches on fabric like Aida and often leaves background fabric visible. Needlepoint uses a slanted tent stitch on stiff canvas and covers the entire canvas.
- How is needlepoint different from embroidery? Embroidery decorates the surface of fabric with free-form stitches, so the fabric shows. Needlepoint is a counted technique that completely covers a canvas.
- Is needlepoint the same as tapestry? In stitching, the terms are often used interchangeably, but true tapestry is a woven textile made on a loom.
Materials and Supplies:
- What does 14 count mean in needlepoint? It means 14 stitches per inch. On this kit, the count refers to the number of bars per inch on the printed canvas, not holes.
- What is a half cross stitch? A single diagonal stitch slanting from bottom left to top right. It uses the least thread of the tent stitches.
- How many strands of floss do you use? For this kit, all 6 strands, without separating them. Backstitch details use 1 strand of black.
- What size needle is used for needlepoint? A blunt tapestry needle. This kit includes a size 24 metal tapestry needle.
Needlepoint kits:
- Do you need a hoop or frame? Not for a tiny kit. Many stitchers hold a small canvas in hand. For larger pieces, a scroll frame or stretcher bars keeps the canvas taut.
- How long does a mini needlepoint kit take? It depends on your pace and detail level, but 3 x 4 inch kits have roughly 2,300 stitches, so most beginners finish over several sessions or a couple of weeks of casual stitching.
- How do you finish your needlepoint? Per the kit, iron the piece on the wrong side, stretch it gently square, and place it in the included easel-back frame.
- Can you use your own thread instead of the kit floss? Yes on a custom project. Wool, perle cotton, silk and metallics all work, but match the thread thickness to your canvas mesh.
Needlepoint rewards patience in a way few crafts do. Every stitch is tiny, but together they build something that feels like a real painting you can hold. A small kit with a famous artwork gives you a clear finish line, and the finished piece is something you can actually display. Start with a kit, learn half cross stitch, then branch out into your own palettes and designs.
Written by: Hani Shabbir