This post may contain affiliate links. Please see our full Disclosure Policy for details.
Why I Picked Up a Needle (and Why You Might Too): I am a crafter by habit. Glass painting, scrapbooking, slow stitching, crochet, the lot. But I had never done a proper counted cross stitch until I opened a DMC kit called Montmartre, designed by Anna Matvieieva, and decided I would finish it start to end.
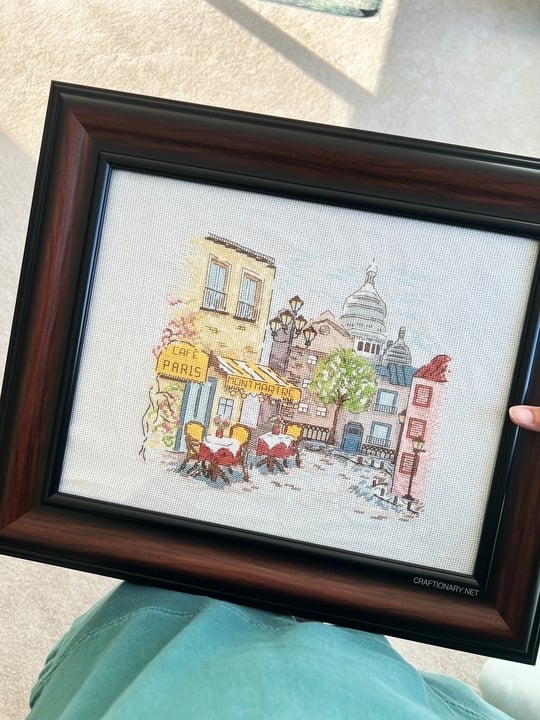
The finished piece is a little Paris street: a yellow Café Paris sign, a striped Montmartre awning, two bistro tables with red cloths, a street lamp with five lanterns, a pink building with red shutters, a blossoming tree, and the white domes of Sacré-Cœur sitting in a soft blue-grey sky.
I will be honest. The kit is rated Expert (four dots on the box). That is a bold first project. But because I did it, I can tell you exactly what works, what trips people up, and how to make cross stitching feel doable even if you have never threaded a needle for anything but a button.
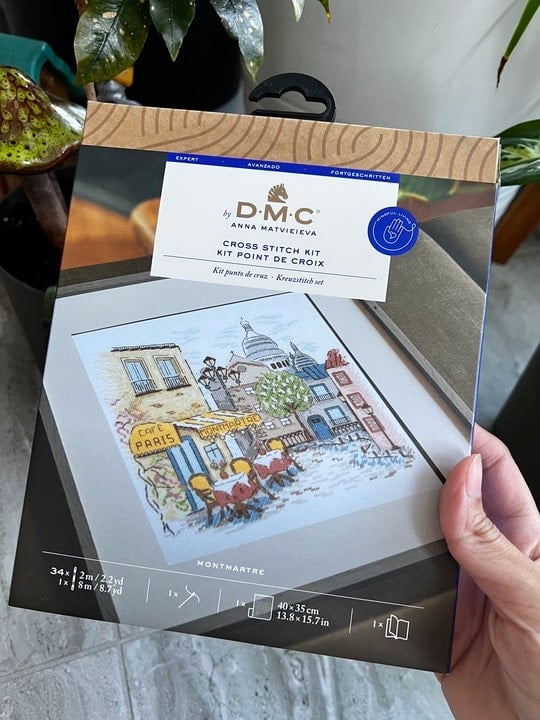
This one is no longer available but here are a few I recommend trying as your first:
- DMC – Eiffel Tower
- Merejka – Telephone Booth London Street
- DMC – Flowers Watering Can
- Janlynn – Joy In The Journey
- Christmas stocking kit
If you want a slow, screen-free hobby that leaves you with something you can hang on a wall, cross stitch is one of the best there is. Every stitch is a tiny X. Thousands of tiny Xs make a picture. That is the whole secret.
What Is Cross Stitch?
Cross stitch is a form of counted thread embroidery. You stitch small X-shaped stitches on a fabric with an even grid of holes, following a chart where each symbol stands for a thread color. The fabric most beginners use is Aida, a stiff cotton cloth woven so the holes are easy to see and count.
You might also see these related terms:
- Counted cross stitch: you count squares on the chart and match them to squares on the fabric. This is what a kit like mine uses.
- Stamped cross stitch: the design is printed on the fabric and you just stitch over it. Easier, but the look is less detailed.
- Half stitch: only one diagonal of the X, used for soft shading and fine detail.
- Backstitch: a straight line stitch used on top of the cross stitches to outline, write letters and add crisp detail.
Anatomy of My First Project
Here is what was in the box, because knowing the specs helps you judge if a kit is right for you.
- Kit: DMC Cross Stitch Kit Montmartre by Anna Matvieieva
- Level: Expert (four of four dots on the box)
- Finished design size: about 23 x 21 cm (9.1 x 8.3 in)
- Fabric: one piece of 14 count Aida, 40 x 35 cm (13.8 x 15.7 in), 100% cotton. That is 5.5 stitches per centimeter. For this size, the design works out to roughly 127 stitches wide by 116 tall.
- Thread: 34 skeins of Mouliné Spécial cotton at 2 m (2.2 yd) each, plus one longer 8 m (8.7 yd) skein
- Needle: one cross stitch needle (blunt tip, big eye)
- Chart and instructions: a fold-out chart with a symbol key, plus a stitch guide
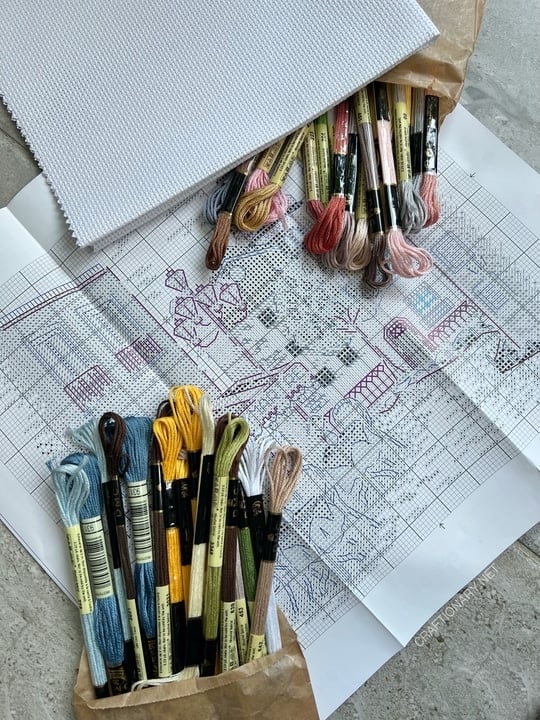
The key on the chart listed 29 colors for the cross stitches (white, a range of greys, browns, blues, yellows, greens, pinks and reds), a dark brown for most of the backstitch, and a handful of colors used as half stitches for the soft sky and cobblestones.
Why so many similar colors? Look at the stone buildings and the Sacré-Cœur dome in the photo. The shading is done by placing close shades side by side. That is what gives the piece its painted look, and it is also why keeping your threads organized matters so much. More on that below.
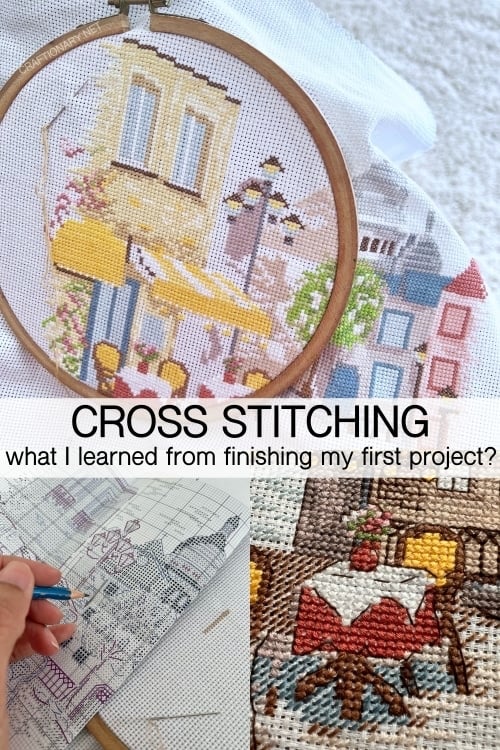
My Cross Stitch Tutorial: The Exact Method I Used
This is the routine I settled into. It is simple and it works.
1. Start at the center
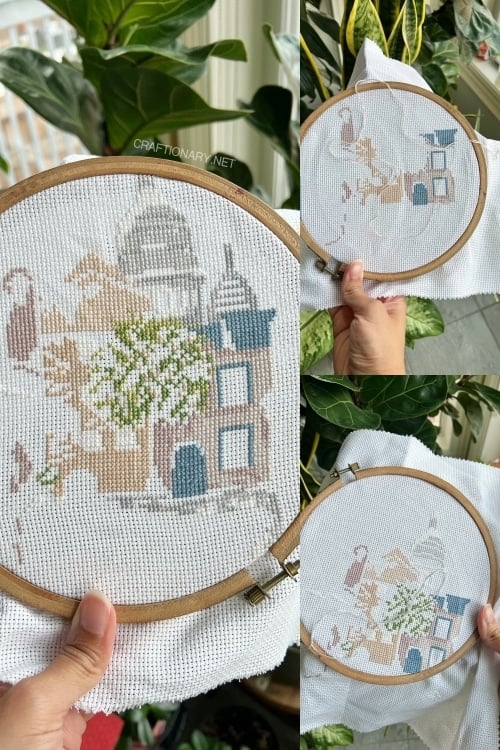
Start in the middle of the design and work outward. The center of the chart and the center of the fabric are usually marked with arrows on the chart edges. Starting from the center keeps your design from drifting off the fabric or ending up crooked, and you will never run out of room on one side.
A practical trick: fold the fabric in half, then in half again, and the crease crossing point is your center. Match it to the center arrows on the chart.
2. Work in the order of the color codes, and mark as you go
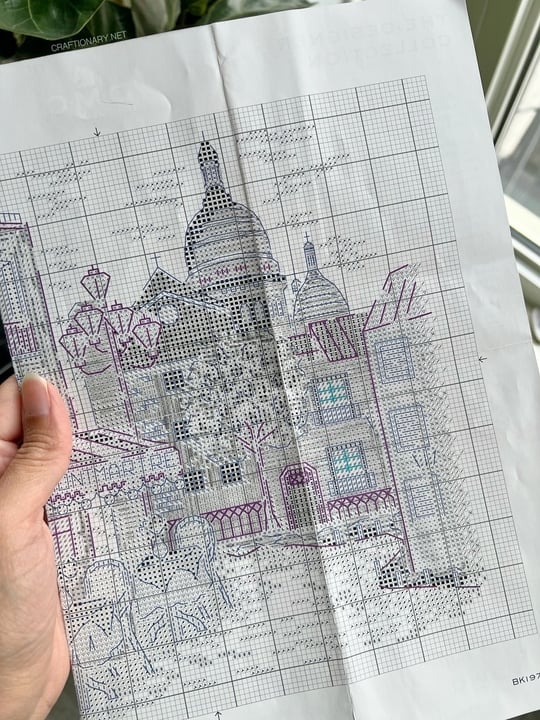
I went through the colors in the order they were listed in the key. Every time I finished a color, I struck it through with a pencil on the chart key (you can see this in the photo of my chart, where the codes are crossed out as they were completed). I also shaded the stitched squares on the chart so I could see at a glance what was done.
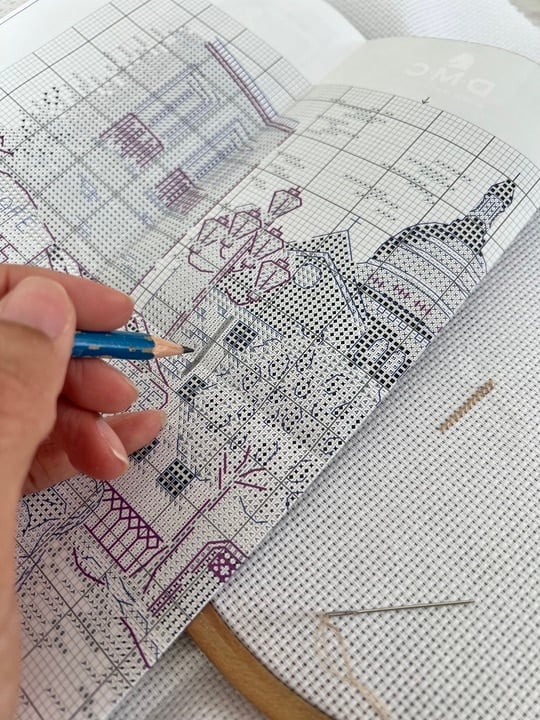
Two things this saves you from:
- Stitching the same section twice or skipping a block.
- Losing your place when you pick the project up after a few days.
If you leave an area unfinished on purpose, write a note on the chart. On mine I noted one color that I left incomplete below the large tree and the building with the blue door, so I would know to come back to it. Future you will be grateful.
3. Keep your thread a reasonable length
Cut floss about 45 cm (roughly 18 inches). Longer than that and it tangles, frays and gets fuzzy by the time you reach the end. Shorter than that and you waste time re-threading.
DMC Mouliné is a six-strand floss. For cross stitch on 14 count Aida you use 2 strands, so you separate the strands one at a time and put them back together. Pulling the strands apart one by one, then recombining, helps them lie flat and cover the fabric better. The kit instructions for backstitch showed 1 strand for fine lines and 2 strands for a few bolder lines.
4. Always make sure the whole thread has been pulled through
Before you start the next stitch, check that the entire length of thread has passed through the fabric. It sounds obvious. It is also the number one cause of loose stitches and little loops on the front.
5. Keep a steady, comfortable speed and avoid knots
I stitched at a steady, moderate speed. Rushing makes the thread twist and knot; going painfully slow is tiring. Let the needle hang every so often and the thread will untwist itself. Do not tie knots at the back. Anchor the start by leaving a short tail and stitching over it, or use the loop start (more below). Knots make bumps and show through the finished piece.
6. Stitch in rows, then come back
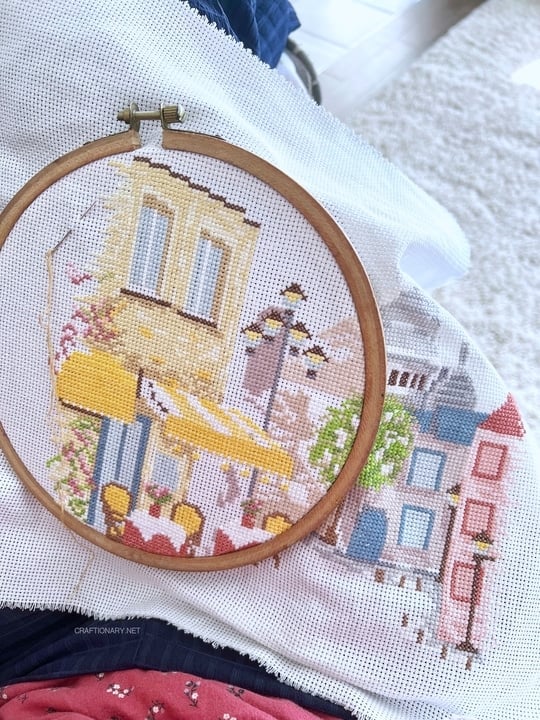
Work a row of half stitches in one direction (the first diagonal, like this: / / / ), then come back and complete the other diagonal (\ \ \ ) to finish each X. This is called the row method or the danish method, and it is much faster than completing each X individually, especially in solid blocks of color like the yellow café sign and the red table cloths. For single scattered stitches (the tree blossoms, for example) complete the X as you go.
7. Always cross in the same direction
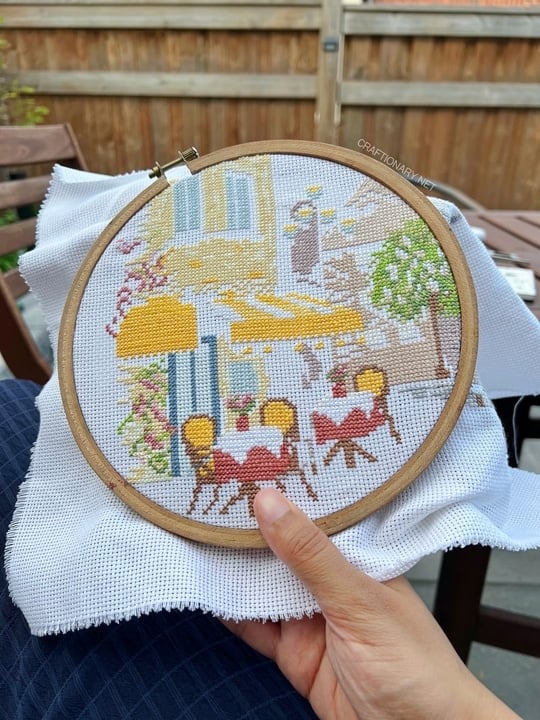
This one rule makes your finished piece look professional. Pick which diagonal goes on top (the “cross” direction) and use it for every single stitch in the whole project. If some Xs go one way and some go the other, the light catches them differently and the surface looks patchy and uneven.
8. Push the hoop, not the needle
A small habit that made a big difference for me: instead of pushing my needle far through the fabric, I pushed the embroidery hoop away from me a little to pass the thread through. It is gentler on the fabric, keeps your hand position more relaxed, and reduces strain on your wrist during long sessions.
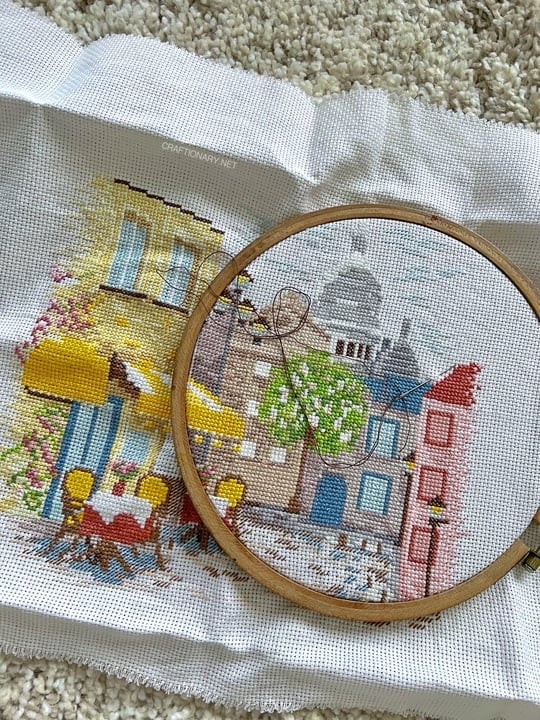
9. Put leftover floss back where it belongs
When I finished with a color, I put the leftover thread back into its labelled sleeve (the code flap) so I always knew which color was which. In this design several shades are very close, such as the stone browns, the greys on the dome, and the blues of the windows. If you mix them up in the middle of a project, you will not notice until you have stitched the wrong shade into the wrong place.
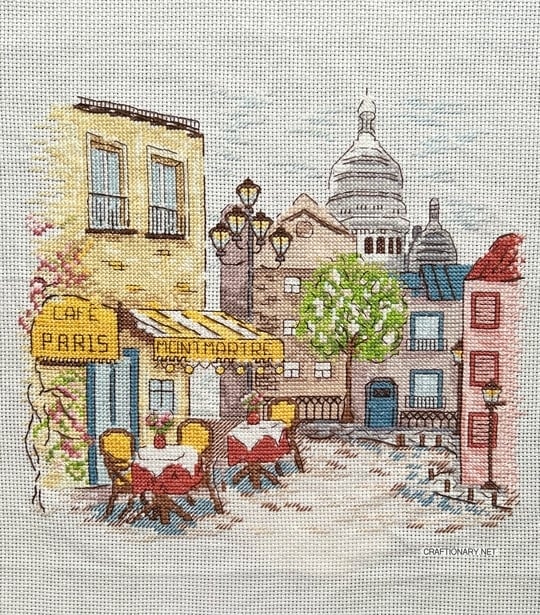
When the project is done, keep the leftover thread in its sleeve. You now have a small stash of correctly labelled DMC colors for your next project, which is a lovely bonus.
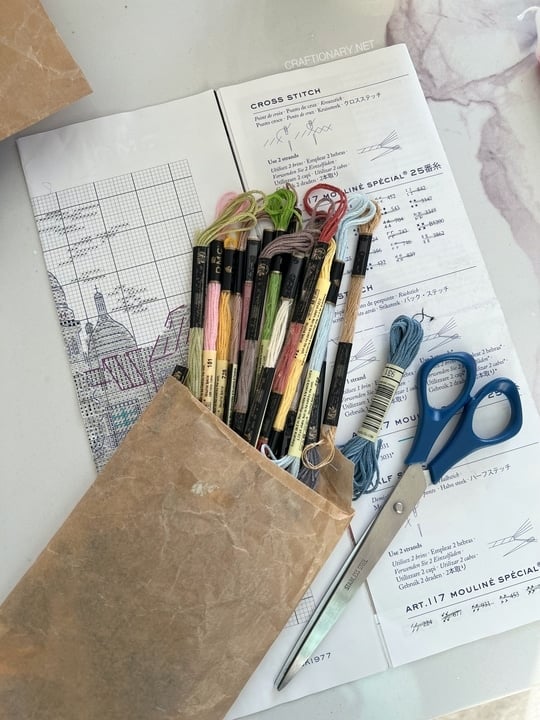
How to Read a Cross Stitch Chart?
The chart can look like a page of tiny symbols. It is really just a map.
- Each square = one stitch on your fabric.
- Each symbol = one thread color. The key links each symbol to a DMC number (for example 453, 931, 3862 or the white called Blanc).
- Heavy lines every 10 squares help you count. Use them to find your position.
- Colored or dark lines over the symbols are backstitch lines (outlines, lettering, window frames, lamp details).
- Small symbols with a diagonal line in the key are half stitches, used for soft areas like the sky and cobblestones.
- Arrows on the edges mark the center of the chart.
Tip: if your chart is small print, photocopy or photograph it and enlarge it. A sticky note or a ruler under the row you are working on helps your eyes keep the line.
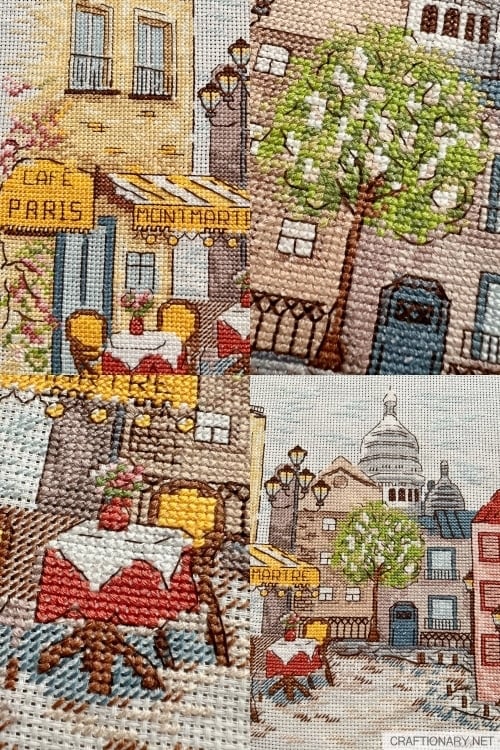
The Stitches You Will Use (With Real Examples From This Project)
- Full cross stitch: the backbone. Used for walls, awnings, chairs, tree leaves, the red tablecloths.
- Half stitch: used for the sky, the cobblestones and the soft, fading edges of the yellow building, which gives that dreamy blurred look on the left side of the picture.
- Backstitch: done last, over the finished cross stitches. It makes the text on the sign (CAFÉ PARIS and MONTMARTRE) readable, outlines the windows and balconies, adds the lamp posts and gives the tree its branches.
Backstitch is where the whole picture suddenly clicks. It is the best part. Save it for last, and it will transform a flat color map into an illustration.
Cross Stitch Kit vs. Planning Your Own Project From Scratch
This is the question I see most often from beginners, so here is a fair, honest comparison:
1. Cross stitch kit
Pros
- Everything is in the box. Fabric, correct amount of thread, needle and chart. You just start. This removes the biggest barrier for a first-timer, which is not knowing what to buy.
- Colors are matched. The designer has already chosen a palette that works together.
- The thread is counted for you. You will not run out halfway, in theory.
- Fabric size fits the design. There is enough margin for framing.
- Great for learning. You can focus on technique rather than planning.
- Often cheaper than buying 30 individual skeins.
Cons
- Limited choice. You stitch what is in the box.
- Contents may vary. The box says so, and it is worth checking you have everything before you begin.
- Fabric and needle are basic. Many stitchers eventually upgrade to a nicer needle and their preferred fabric.
- Difficulty labels are not always generous. My kit was Expert level. If you are a total beginner, start with a lower-level kit.
2. Planning from scratch (your own design, your own materials)
Pros
- Total creative freedom. Any image, any size, any colors.
- Personalized gifts. Names, dates, pets, wedding venues, a child’s drawing.
- You choose quality. Linen, evenweave, hand-dyed floss, bamboo hoops.
- Better long-term value if you stitch often, because you can reuse leftover supplies.
Cons
- Lots of decisions. Fabric count, thread brand, how many skeins, how large the fabric should be.
- Pattern creation takes time. You will need pattern software or an app, plus patience to edit the result.
- Easy to under- or over-buy. Floss and fabric add up.
- More chances for mistakes when you do not yet know how much thread a given area uses.
Related: How to Make Your Own Cross Stitch Pattern?
My honest verdict: for your first project, buy a kit. Finish one. Once you know how your hands like to stitch, move to designing your own. A kit teaches you the whole workflow with no guessing.
Supplies You Need (If You Are Not Using a Kit)
- Fabric: 14 count Aida is the standard beginner choice. Cut it at least 5 cm (2 in) larger than your design on every side.
- Floss: DMC stranded cotton is the most common. Buy extra of the colors used for large areas.
- Needle: a tapestry needle, size 24 for 14 count, blunt tip so it does not split fibers.
- Hoop or frame: keeps the fabric taut and the stitches even. A 6 to 8 inch hoop works for small designs.
- Small sharp scissors
- Pencil and highlighter to mark the chart
- Thread organizer: a card with holes, a small box, or a labelled sleeve
- Good light: a daylight lamp prevents eye strain and color mix-ups
Beginner Mistakes to Avoid
- Starting with a huge or detailed project. Start small.
- Mixing up similar shades. Keep them in their labelled sleeve.
- Crossing in different directions. Choose one direction and stick to it.
- Pulling too tight. The fabric will pucker and the holes will distort.
- Carrying floss across long gaps at the back. Dark threads can show through light fabric. End the thread and start again for gaps of more than a few stitches.
- Not frying your eyes. Take breaks.
- Not marking progress on the chart. You will get lost.
How Long Does a Cross Stitch Take?
It depends on the size, the number of colors and your pace. As a general guide, a small, simple design can take a few evenings. A detailed piece with around 127 x 116 stitches and nearly 30 colors, like the one I did, is a multi-week project if you stitch regularly, and longer if you stitch in short sessions. Do not compare your speed with anyone else. The point is to enjoy it.
If you are curious, it took me 7 months on and off working on this project some weeks not doing at all and some weeks 2 hours everyday so I have lost track but I enjoyed the process.
Finishing: Washing, Pressing and Framing
- Check the back: Trim loose tails. Do not trim too close.
- Wash gently if needed (optional): Hand wash in cool water with a mild soap. Do not wring or scrub. Test dark reds for color bleeding before you soak the whole piece. If it bleeds, rinse in cold water until the water runs clear.
- Press face down on a thick towel so the stitches are not flattened. Use a cool iron.
- Frame it: A mat and a simple frame makes a big difference. Leave a border around the design, like the box photo shows.
Cool Cross Stitch Ideas and Variations to Try Next
Once you finish your first piece, here are fresh directions to explore.
- City scenes and travel memories. A tiny Paris street, a Tokyo alley, your hometown. Stitch a place you have been or want to go.
- Your own house portrait. Great for housewarming gifts.
- Pet portraits. Convert a photo into a pattern using free pattern software or apps.
- Mini hoop art. Stitch a 3 to 4 inch design, leave it in the hoop and hang it as an ornament or gift.
- Seasonal ornaments. Pumpkins, snowflakes, hearts.
- Modern and minimalist cross stitch. Simple geometric shapes, botanical line art, pixel art.
- Subversive and funny cross stitch. Witty phrases are big on social media.
- Cross stitch on clothing and tote bags. Use waste canvas (a removable grid) to stitch on fabric without a grid.
- Add beads and specialty threads. Metallic floss and seed beads give sparkle.
- Try linen or evenweave for a more refined look. This is a step up once you are comfortable counting.
- Combine techniques. Cross stitch plus backstitch embroidery, or cross stitch with a painted background.
- Pixel art from games and cartoons. Safe, fun and very beginner friendly, because the chart is just blocks of color.
- Stitch a pattern for someone’s birth: name, date, and a small motif for a baby gift.
Related: 30 Practical Craft Uses for Cross Stitch Artwork
A thought: if you also like pixel art crafts such as bead patterns, a cross stitch chart is basically a pixel grid. Any 8-bit style image can become a cross stitch design.
Why Cross Stitch Is Good for You?
Cross stitching is repetitive, rhythmic and quiet. That is why it is often described as a mindful hobby, and why DMC even labels this kit under Mindful Living. I would not claim it cures anything, but it does give your hands something to do while your mind slows down. For me, it was the satisfaction of watching the picture build up color by color.
Frequently Asked Questions About Cross Stitching
- Is cross stitch hard for beginners? The basic stitch is easy. The challenge is counting and keeping track of colors. Choose a small, low-color-count design first.
- Where do you start on a cross stitch pattern? Start at the center of the chart and the center of the fabric, then work outward.
- How many strands of floss do you use for cross stitch? Two strands on 14 count Aida for cross stitch. Backstitch is usually done with one strand, and sometimes two for bolder lines, as the kit instructions say.
- Do you need a hoop to cross stitch? Not strictly, but a hoop or frame keeps the tension even and makes stitching easier, especially for beginners.
- What does 14 count mean? There are 14 squares per inch of fabric (about 5.5 per centimeter). A higher count means smaller stitches and finer detail.
- Should you knot the thread? No. Avoid knots. Leave a short tail at the back and stitch over it, or use the loop method with an even number of strands.
- Can you mix different brands of floss? Yes, but check the color carefully in daylight. DMC numbers are the most common reference.
- How do you stop floss from tangling? Use shorter lengths (about 45 cm), let the needle dangle to untwist the thread, and separate and recombine strands before stitching.
- How do you keep my floss organized? Keep each color in its labelled sleeve or on a floss card with the code written on it. Return it after every color.
- What can you do with leftover floss? Keep it in its labelled sleeve for future projects. Small amounts are perfect for mini designs, ornaments or backstitch details.
- Is a kit or a pattern from scratch better? A kit for your first project. A custom design once you are confident.
- How do you wash cross stitch? Hand wash gently in cool water with mild soap, rinse well, roll in a towel and press face down.
How do you make my own cross stitch pattern?
Use a pattern generator or cross stitch software to convert an image into a chart, then reduce the number of colors and clean up stray stitches before you start.
The biggest lesson from my first project is simple: you do not need to be good at it. You need a chart, a needle, a little patience and a method. Start at the center, mark your progress, keep your threads organized, cross in one direction, and keep going. One stitch at a time, a Paris café appears.
If you try your first cross stitch after reading this, I would love to see it. Share your project, tag it and tell me what you stitched.
Happy stitching.
Written by: Hani Shabbir
You will also like:
Beginner’s Guide: Embroidery Journaling Your Threaded Story
Scrap Fabric Projects – Upcycling, Crafting, and Scrap Busting
Safety Pin Bead Craft: Beaded Safety Pin Brooch Patterns (9×9 Pixel Art)