This post may contain affiliate links. Please see our full Disclosure Policy for details.
Here’s the problem with most matchbox craft ideas articles: they’re the same five projects rewritten with different adjectives. A matchbox car, drawer, or a holder in a nicer box. If you searched for this topic, you’ve probably already scrolled past those.
This list skips the filler. Every idea here has a real, finished use — something you’d actually keep on a shelf, give as a gift, or use every day — and every one comes with the actual steps to build it, not just a photo and a caption. A standard matchbox (about 5cm x 3.5cm x 1.5cm) is small enough to feel fiddly but big enough to hold a genuine miniature world, and that’s exactly the sweet spot this list works from.
Save a few empty boxes before you start — most of these projects use the outer sleeve and the inner drawer separately, so one matchbox often gives you two usable pieces.
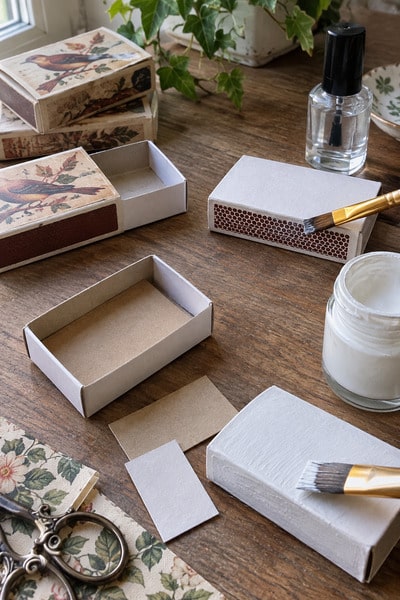
Before You Start: Prepping a Matchbox for Any Craft
A few habits will save every project on this list from looking flimsy or smelling like sulfur six months later:
- Air it out: Leave empty boxes open for 24–48 hours before crafting — this clears the phosphorus smell from the striker strip.
- Seal the striker strip: If you’re not removing it, paint over it with a thin layer of Mod Podge or clear nail polish so it doesn’t flake red dust onto your project.
- Reinforce before you decorate: A layer of thin cardstock glued inside the drawer adds real structural strength — matchbox card is thinner than it looks once you start opening and closing it repeatedly.
- Prime for paint: A coat of gesso or white acrylic gives you a true base color instead of fighting the box’s original printing showing through.
Materials for Matchbox Crafts
Check your craft supplies first and reuse whatever you already have at home. Small scraps and leftover embellishments are often perfect for miniature crafts.
- Essential supplies:
- Empty matchboxes
- Decorative Paper
- Acrylic paint and Fine-tip brushes
- For joining items: E7000, tacky glue, hot glue gun, and wood glue
- For sealing: mod podge
- Scissors and a craft knife
- Fine-tip Tweezers
- For Decorating: Use whatever small pieces you have, such as fabric scraps, ribbon, twine, buttons, beads, sequins, toothpicks, cardboard, or popsicle sticks. For certain miniature scenes, you can also add moss, faux plants, or tiny battery-powered lights.
- Handling tiny pieces
- Use fine-tip tweezers to place beads, paper details, and other small pieces.
- Apply glue with a toothpick when you need just a tiny drop.
- Paint cardboard with thin coats to keep it from becoming soggy or warped.
- For very detailed work, a magnifying lamp can make small pieces much easier to see.
- Cutting techniques
- Use a sharp craft knife for clean, precise cuts. Always cut on a self-healing mat.
- A metal ruler makes a sturdy cutting guide for straight edges.
- Mark measurements before cutting, particularly when making miniature doors, windows, or furniture.
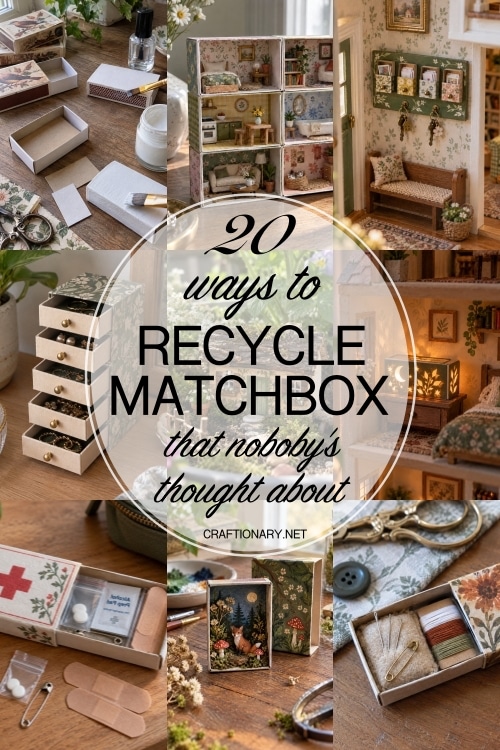
20 Matchbox Recycling Ideas Actually Worth Making
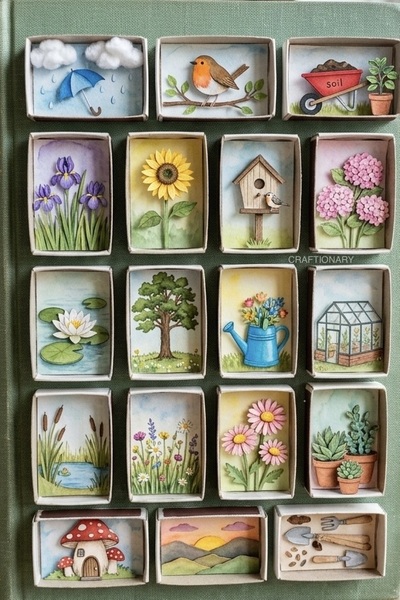
1. Hand-Painted Nature Diorama
The classic done properly: a tiny scene sealed inside the drawer, viewed through the open end like a shadow box.
You’ll need: matchbox drawer, acrylic paint (fine brush), air-dry clay or polymer clay, small dried flowers or moss, toothpick, clear varnish.
- Paint the interior back wall and floor of the drawer as your backdrop — a sky gradient, a forest floor, or an underwater scene.
- Let it dry fully (30–40 minutes for acrylic), then build your scene forward: clay mushrooms, a paper-thin moon, a folded paper animal.
- Anchor small elements with a dot of tacky glue on a toothpick tip — full-size glue bottles are too clumsy at this scale.
- Seal the whole interior with a light varnish coat once dry, and leave the box open-faced or add a thin acetate window glued to the front lip.
- Tip: Paint the outer sleeve to match the scene’s season — this turns a random box into a themed keepsake, not just a decorated container.
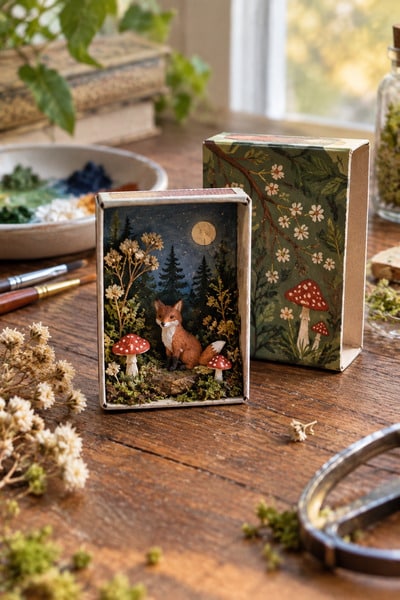
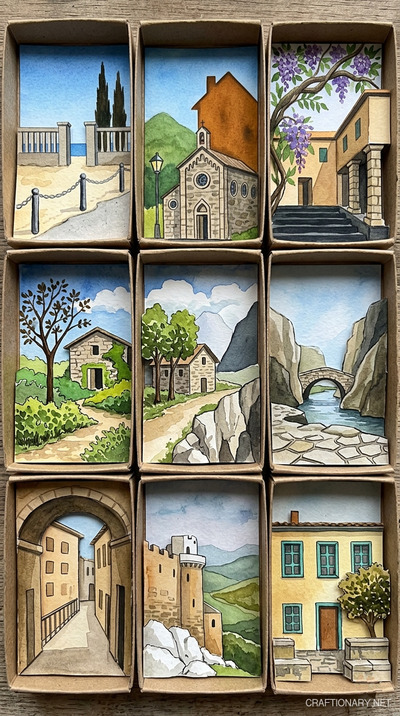
Framed Mini Traveling Dioramas: Paint a scenic backdrop inside the sleeve and glue miniature travel souvenirs/cuttings to the tray.
Nature Diorama Gallery: Make nature diorama by gluing matchboxes on an old book cover.
2. Stackable Matchbox Dollhouse
Not a pretend dollhouse — a real stacked structure with separate furnished rooms, built from matchboxes glued in a grid.
You’ll need: 6–9 matchboxes (drawers only), craft glue or hot glue, patterned scrapbook paper, mini furniture (polymer clay or found objects), cardstock for flooring.
- Glue drawers together in a 3×2 or 3×3 grid, open ends all facing the same direction, using the outer edges as shared walls.
- Line each room with a different scrapbook paper — this instantly reads as wallpaper and separates rooms visually.
- Cut cardstock floor inserts sized to each drawer’s base and glue down before adding furniture.
- Furnish each room: a matchbox lid cut in half makes a tiny bed frame, a bead on a toothpick makes a lamp, a folded paper square makes a rug.
- Mount the whole grid on a sturdy cardboard backing so it can stand upright like a real dollhouse facade.
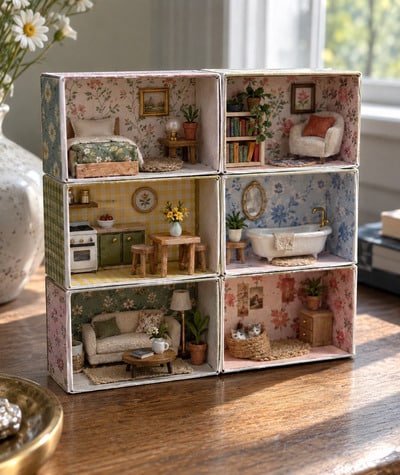
Here’s another take on it!

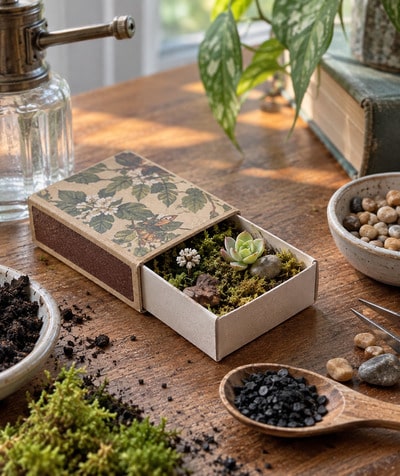
3. Living Matchbox Terrarium
A genuinely living miniature — moss and a single tiny succulent cutting growing inside a sealed or vented box. This is perfect for shipping and packaging for temporary or small amounts of time.
You’ll need: matchbox drawer, small pebbles, activated charcoal (aquarium grade), potting soil, live moss, a tiny succulent cutting, pin or needle tool.
- Line the drawer base with a thin layer of pebbles for drainage, then a pinch of activated charcoal to prevent mold.
- Add a thin layer of soil (about 5mm), press moss on top, and tuck in one small succulent cutting.
- Mist lightly with a spray bottle — don’t pour water directly, the box has no drainage hole.
- Keep in indirect light and mist every 4–5 days. This works best as a temporary “living decoration” rather than a long-term planter, since the box will eventually soften with moisture.
- Tip: Line the interior with a scrap of plastic wrap under the pebbles first if you want the box to last longer against moisture.
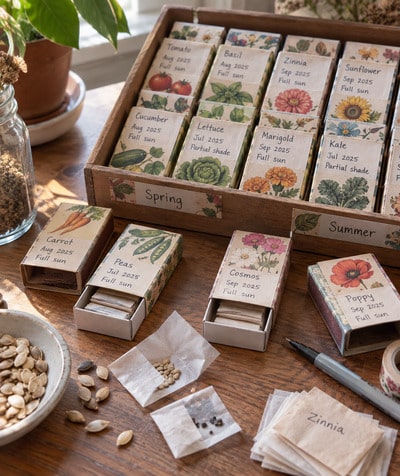
4. Seed-Saving Library
A practical one for gardeners: a labeled, stackable system for storing and organizing saved seeds by variety and season.
You’ll need: multiple matchbox drawers and sleeves, small paper envelopes or folded wax paper, fine-tip marker, washi tape.
- Fold small squares of wax paper into mini envelopes sized to fit inside a matchbox drawer.
- Fill each envelope with one seed variety, seal, and slide into a drawer.
- Label the outer sleeve with the plant name, harvest date, and light/water notes using a marker or a small printed label.
- Store boxes upright in a small shoebox, sorted by planting season — this becomes a genuinely useful seed catalog, not just a craft object.
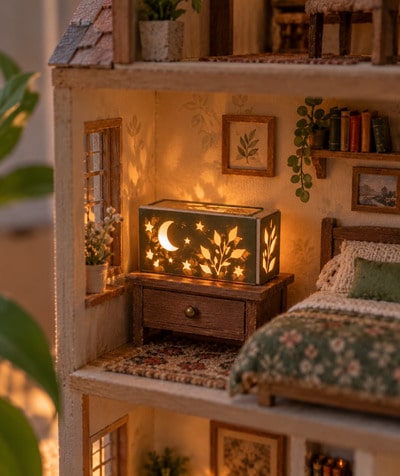
5. Cut-Out Miniature Lantern Nightlight
A tiny battery tea light glowing through hand-cut patterns — genuinely functional as a soft accent light.
You’ll need: matchbox sleeve, craft knife, thin vellum or tracing paper, LED tea light (battery, flameless), glue.
- Cut a pattern into all four sides of the outer sleeve — stars, leaves, a moon shape, whatever suits the design. Keep cuts small; the cardboard needs to hold its shape.
- Glue a layer of vellum or tracing paper inside the sleeve, behind the cutouts, to diffuse the light evenly.
- Remove the inner drawer entirely (it won’t be needed) and set the sleeve over a small flameless LED tea light.
- Turn off the room lights to test the pattern glow — adjust cutout size if any area is too dark or too bright.
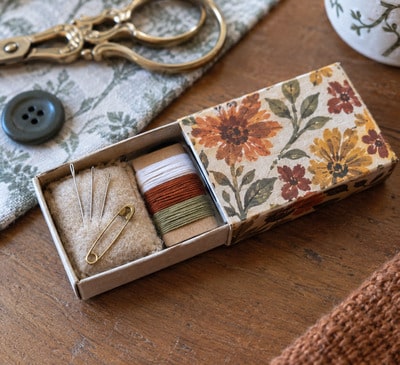
6. Travel Sewing and Pincushion Kit
A genuinely pocket-sized sewing kit — one that actually holds what you need and closes securely.
You’ll need: matchbox, small scrap of felt or fabric, cotton stuffing or scrap batting, a few needles, thread wound on a small card, one safety pin.
- Cut a felt rectangle slightly larger than the matchbox drawer’s opening, fill the center with a small pinch of stuffing, and glue the edges down inside the drawer lid to form a built-in pincushion.
- Wind 2–3 thread colors around a small scrap of cardstock cut to fit inside the drawer alongside the pincushion.
- Tuck 3–4 needles into the felt pincushion and add one safety pin for emergency fixes.
- Slide the drawer shut — this fits in a jacket pocket, makeup bag, or glovebox for genuine travel repairs.
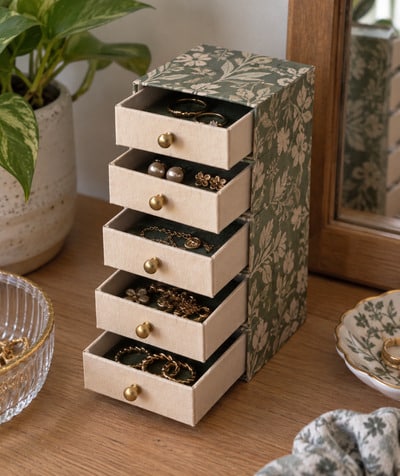
7. Stacked Jewelry Drawer Tower
A real desktop organizer: matchboxes stacked and glued into a tower of small drawers for rings, studs, and charms.
You’ll need: 5–8 matchboxes, strong glue or wood glue, paint or wrapping paper, small ceramic or wooden knob (optional), felt for lining.
- Stack the outer sleeves directly on top of each other, gluing each layer to the one below along the flat top and bottom edges.
- Once dry, paint or wrap the entire stacked exterior as one unit, leaving the drawer fronts clear so they can still slide.
- Line each individual drawer with a small felt square to keep small jewelry from sliding around.
- Add a tiny knob or a ribbon loop to each drawer front for an easier grip, and label each drawer by jewelry type if you like.
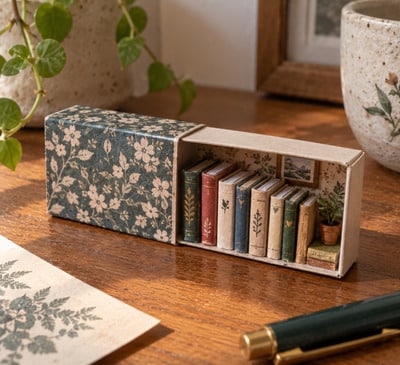
8. Miniature Book Library Box
Tiny handmade books, shelved inside a matchbox bookcase — a favorite for dollhouse builders and desk decor alike.
You’ll need: matchbox drawer, thin cardstock, small strips of paper, fine marker, glue.
- Cut small rectangles of cardstock (roughly 1.5cm x 2cm) and fold each in half to form a tiny book cover.
- Slide a few folded paper pages inside each cover and glue the spine fold closed.
- Write tiny spine titles with a fine-tip pen, and vary the cover colors for a real shelf look.
- Stand 8–10 finished books upright inside the matchbox drawer, turned on its side, to form a miniature bookshelf.
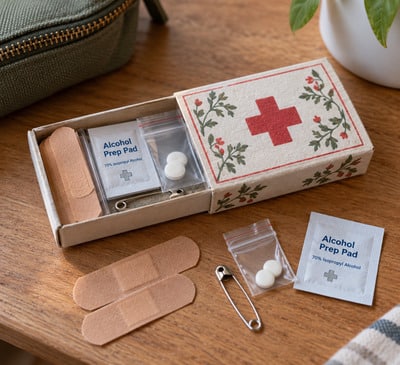
9. Compact Travel First-Aid Kit
An actually stocked emergency kit small enough for a purse, backpack, or car glovebox.
You’ll need: matchbox, a few adhesive bandages, alcohol wipe (individually packaged), 2 pain relief tablets in a tiny sealed bag, safety pin.
- Fold 2–3 adhesive bandages flat to fit inside the drawer without their packaging bulk.
- Add one individually wrapped antiseptic wipe and a small zip bag with 1–2 pain relief tablets.
- Tuck in a safety pin for makeshift fixes (a torn strap, a loose hem).
- Label the outer sleeve clearly as First Aid so it’s recognizable in a bag at a glance.
- Tip: This makes a genuinely thoughtful stocking-stuffer or party-favor gift when a few are made at once — useful, not decorative.
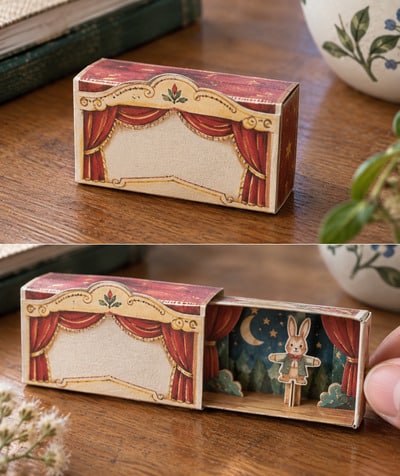
10. Pop-Open Puppet Theater Diorama
A tiny stage scene with a paper character that slides forward when the drawer opens — genuinely surprising to open.
You’ll need: matchbox, cardstock, thin wire or a toothpick, small paper character cutout, paint.
- Paint the inside of the drawer as a stage backdrop (curtains, a painted set).
- Cut a small paper character and glue it to a stiff toothpick or wire pole.
- Anchor the pole loosely at the back of the drawer so the character stands upright when the drawer is fully open, and folds flat when closed.
- Decorate the outer sleeve like a tiny theater marquee, with the show’s name lettered on front.
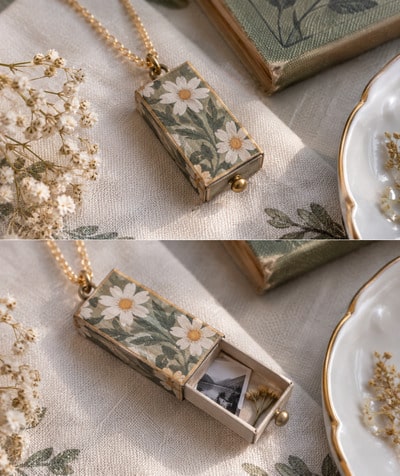
11. Locket-Style Charm Necklace
A miniature matchbox drawer converted into a wearable, opening locket with a tiny photo or note inside.
You’ll need: matchbox drawer only, small photo or note cut to fit, decorative paper, jump ring, small eye screw or punched hole, chain or cord.
- Cut the drawer down if needed so it’s small and light enough to wear comfortably (many matchbox drawers work as-is).
- Decorate the exterior with paper, paint, or fabric, and let it dry fully.
- Glue a tiny photo, pressed flower, or folded note inside the drawer before closing it.
- Attach a small eye screw or punched hole with a jump ring to the sleeve, and thread a cord or chain through — the drawer still opens and closes while worn.
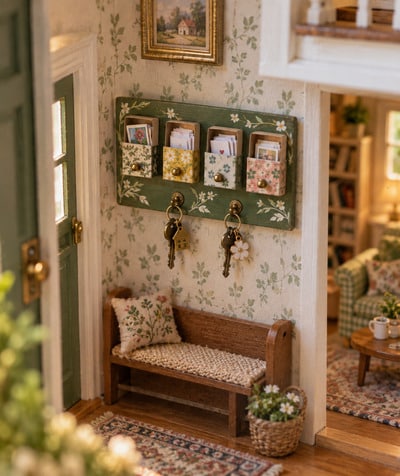
12. Wall-Mounted Mail and Key Organizer
A genuinely useful entryway piece — small labeled slots for keys, stamps, coins, or reminder notes by the door in a dollhouse.
You’ll need: 4–6 matchbox sleeves, a wooden board or thick cardboard backing, strong glue, small hooks (optional), paint.
- Arrange the outer sleeves in a row or grid on the backing board and glue firmly, leaving the drawer openings facing outward.
- Screw or glue 1–2 small hooks below the grid for hanging keys.
- Paint the whole board as one unified piece, then label each drawer (stamps, coins, receipts, spare buttons).
- Mount near the front door with wall adhesive strips or picture hooks.
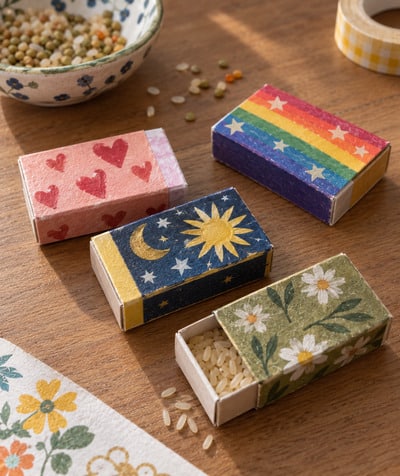
13. Matchbox Shaker Instrument
A simple, sturdy percussion toy — genuinely good for kids’ craft sessions or a classroom music activity.
You’ll need: matchbox, dried rice, lentils, or small beads, tape, paint, stickers.
- Fill the inner drawer about one-third full with dried rice or beads — this is what creates the sound.
- Slide the drawer most of the way shut and seal the remaining gap firmly with tape so nothing spills.
- Decorate the outer sleeve with paint or stickers.
- Shake to test the sound; adjust the fill amount for a sharper or softer rattle.
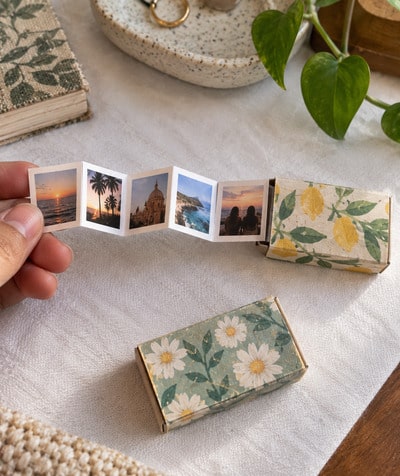
14. Miniature Photo Album Locket Box
A tiny accordion-fold photo album that unfolds out of a matchbox sleeve like a pull-out scroll.
You’ll need: matchbox sleeve, long strip of thin cardstock (accordion-folded), small printed or hand-drawn photos, glue.
- Cut a long strip of cardstock and accordion-fold it into small panels sized to fit inside the matchbox sleeve when compressed.
- Glue a small photo or drawing to each panel.
- Fold the whole strip flat and tuck it into the sleeve so one end can be pulled out to unfold the full album.
- Decorate the sleeve exterior to match the album’s theme (a trip, a birthday, a relationship timeline).
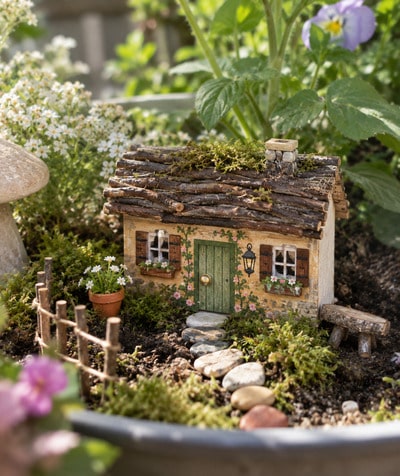
15. Fairy Garden Cottage
An outdoor-friendly miniature house for a garden bed or potted plant, built from a weatherproofed matchbox.
You’ll need: matchbox, waterproof outdoor sealant or Mod Podge Outdoor, small twigs, moss, acrylic paint, tiny pebbles.
- Paint the outer sleeve as a small cottage — a door, shutters, a painted brick or wood pattern.
- Glue small twigs along the top edge as a thatched or shingled roof line.
- Seal the entire exterior with at least two coats of an outdoor-rated sealant so it survives light rain and soil moisture.
- Nestle the finished cottage into a garden bed or large potted plant, surrounded by moss and pebbles for a path.
- Tip: This one won’t last outdoors permanently — treat it as a seasonal decoration and bring it in during heavy rain or winter.
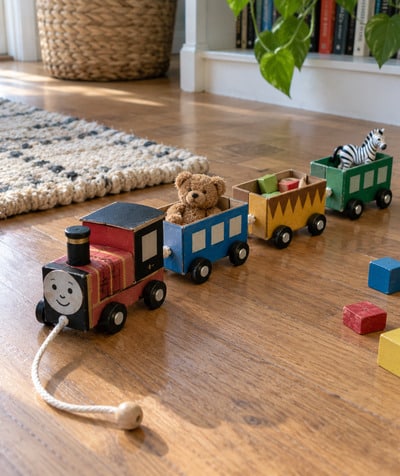
16. Kinetic Sliding Train Set
Connected matchbox drawers that slide independently to form a simple pull-along train — an actual moving toy.
You’ll need: 3–4 matchboxes, thin string or ribbon, small wheels (beads or bottle caps), skewer for axles, paint.
- Push a skewer through the base of each matchbox sleeve to form an axle, and thread a bead on each end as a wheel — repeat for each train car.
- Connect each car to the next with a short length of string tied through small holes punched in the front and back of each sleeve.
- Paint each car a different color and add a front engine face to the first one.
- Attach a longer pull-string to the front car so the whole train can be dragged along the floor.
17. Nesting Gift Box with Ribbon Pull
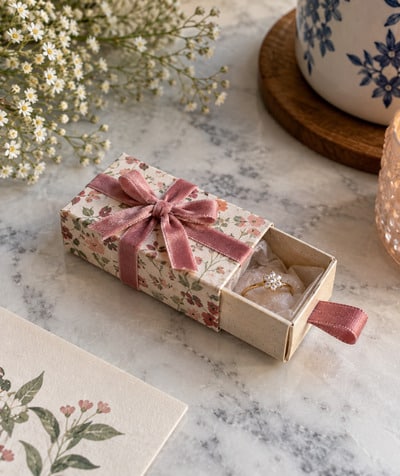
A genuinely elegant small gift box — the drawer slides open using a ribbon instead of a finger pull, for a cleaner finished look.
You’ll need: matchbox, decorative wrapping paper, thin ribbon, small item to gift (a ring, a folded note, a charm), glue.
- Wrap the outer sleeve neatly in decorative paper, folding corners cleanly like a tiny present.
- Glue a short loop of ribbon to the front edge of the inner drawer to act as a pull tab, replacing the usual finger-notch.
- Place the gift item inside the drawer, padded with a small scrap of tissue paper if needed.
- Tie a second decorative ribbon around the whole closed box as a final bow, so the recipient unties it, then pulls the ribbon tab to reveal the gift inside.
18. Vintage Collection Display
Scored two full boxes of vintage matchboxes at a yard sale and sorted to decorate a set of two keepsake frames.

Matchbox Keepsakes and Gifts
Tiny gifts are always special. Matchboxes make perfect little treasure boxes for memories or sweet surprises — small enough to fit in a pocket but meaningful enough to cherish.
19. Mini Floral Quote Keepsake Box: Decorate a matchbox sleeve with delicate floral doodles and quotes, then hide any miniature charm inside for a sweet keepsake. Add tiny things that matter to you.

20. Miniature Matchbox Love Letter and Bouquet: Doodle playful scenes on matchbox sleeves that open to reveal hidden pop-up notes, tiny bouquet charms, and sweet personalized messages inside. Include a QR-scan prepaid tea and book.

Frequently Asked Questions About Recycling Matchboxes
1. What can you make out of an empty matchbox?
Realistically, almost anything that needs to be small, sturdy, and have a sliding compartment: miniature dioramas, jewelry and spice storage, gift boxes, dollhouse rooms, puzzle boxes, and travel kits (sewing, first-aid) are the most functional categories, as covered above.
2. How do you get rid of the matchstick smell before crafting?
Leave the box open in a ventilated area for 24–48 hours. If the smell lingers, wipe the interior with a barely damp cloth and let it dry fully before sealing with paint or Mod Podge — sealing over a lingering smell tends to trap it rather than mask it.
3. Is the striker strip on a matchbox safe to leave on?
It’s safe to leave in place for most crafts, but it’s mildly abrasive and can shed a fine red dust over time. For anything handled often — jewelry boxes, kids’ toys — either sand it down lightly or seal it under a layer of paint or paper.
4. Can matchbox crafts hold up to daily use, or are they just decorative?
Reinforced properly, several of these (the spice rack, jewelry tower, sewing kit, and mail organizer) hold up well to regular use. Reinforcing the drawer with a thin cardstock liner before decorating is the single biggest factor in whether a matchbox craft lasts.
5. What’s the best glue for matchbox crafts?
A thick tacky craft glue works for most paper and fabric elements — it grips fast without warping thin cardboard the way white glue can. For structural joins (stacking boxes, attaching magnets or hardware), a hot glue gun or a wood glue gives a stronger, faster-setting bond.
6. Are matchbox crafts good for kids?
Yes, with adjustments — the shaker instrument, the seed library, and simple painted dioramas are all kid-friendly. Skip projects involving craft knives (the puzzle box, the lantern) unless an adult is doing the cutting, and always check that the matches have been fully removed and the box aired out first.
7. How many matchboxes do you need to save for a bigger project like the dollhouse or advent calendar?
The stacked dollhouse needs 6–9 boxes, and the advent calendar needs 24–25. Both are easy to build up over a few months if you’re saving boxes as you naturally use them, rather than buying empty ones in bulk.
Why Matchboxes Work So Well for Miniature Crafts
Part of what makes this material genuinely useful — not just cute — comes down to its proportions. A matchbox drawer is close to the scale used in many dollhouse and miniature hobbies (roughly 1:12 to 1:24 depending on the box), it already has a functioning sliding mechanism built in, and the cardboard is thin enough to cut with household tools but rigid enough to hold a shape once reinforced. That combination is genuinely hard to find in any other free, upcycled material — which is why so many of the ideas above lean into the drawer mechanism itself rather than just treating the box as a small block to decorate.
Mistakes to Avoid
- Using too much glue — apply with a toothpick.
- Skipping primer before painting.
- Using dull blades that tear cardboard.
- Not letting paint dry between coats.
- Gluing the tray shut by accident.
- Forgetting to remove the striker strip.
- Using regular scissors for tiny cuts.
How to Keep Matchbox Crafts Clean?
- Dust gently with a soft makeup brush.
- Seal with Mod Podge for protection.
- Store in glass domes or acrylic cases.
- Keep away from direct sunlight.
- Handle minimally to avoid skin oils.
Uses for Matchbox Crafts
- Gift toppers instead of bows.
- Party favors filled with candy.
- Home decor shelf collections.
- Dollhouse accessories.
- Journal embellishments.
- Teacher gifts with thank-you notes.
- Stocking stuffers.
- Classroom projects.
- Wedding favors.
- Online shop products.
Written by: Hani Shabbir
Drafted by: Sabah Waqas
You will also like:
25 New things made with DIY cardboard box anyone can make