This post may contain affiliate links. Please see our full Disclosure Policy for details.
You will find pictures and instructions for paper folding technique and Japanese art of origami to make Origami tulips paper flowers in this tutorial.
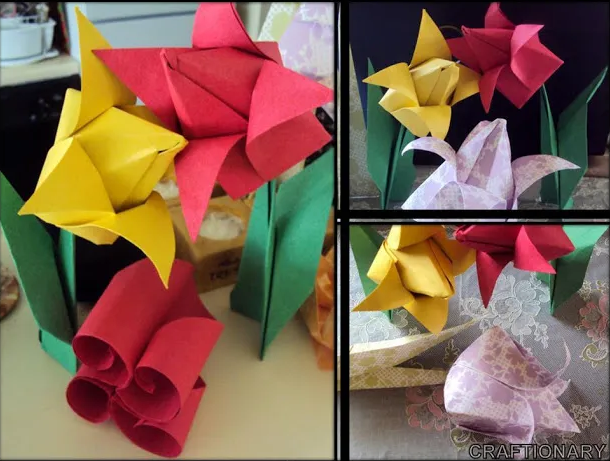
Origami tulips paper flowers tutorial
So, here goes the tutorial for all those people who think colors are vital and flowers are life.
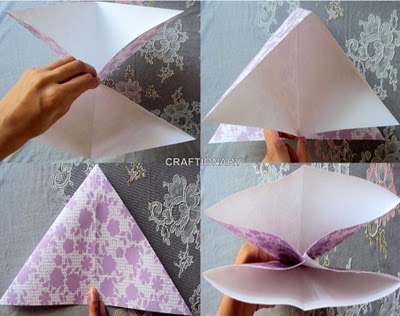
Start by folding the square paper into rectangle and triangle on both sides. This will give us pre-creased lines.

Fold the square at the center folding the middle sides and bring the folds down forming a triangle as shown below:
Now fold the right flap up, such that it overlaps the top. Repeat with the left flap. Now turn over and do the same
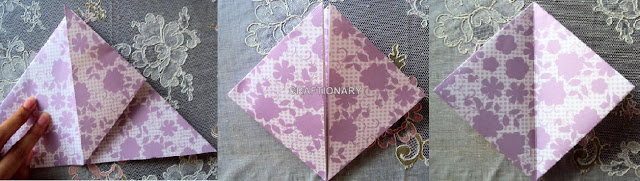
Fold the left and right flaps of the diamond and tuck the right flap into the left. Crease to smooth the flaps. Repeat on the other side.
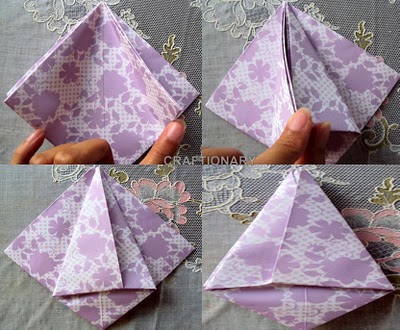
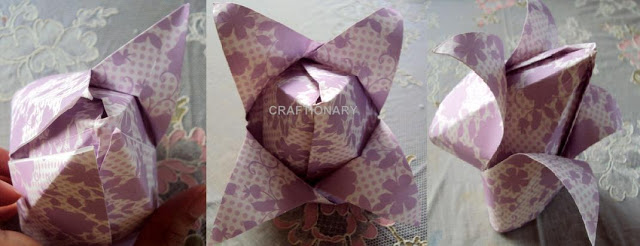
Now for the fun part. Once all the folds are done, you will see a small opening down the triangle. Blow air to inflate the tulip. Open the four flaps to make the petals of the flower.
Make Origami flower stem and leaf
Fold the diamond in half to form a pre-creased line. Now fold the left and right flaps such that they meet at the center. Repeat at the bottom. Now again fold the bottom left and right flaps to form a narrow tube-like model.
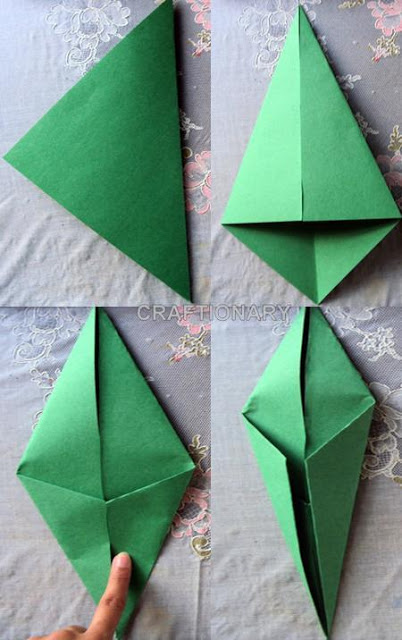
Turn over to reveal the plain side. Fold it in half so that the top and bottom tips meet. Then fold from left to right to squeeze all the folds in.

Open the second fold above and carefully fold the right side creasing it only till the middle and open. Repeat on the right. This will form the leaves.
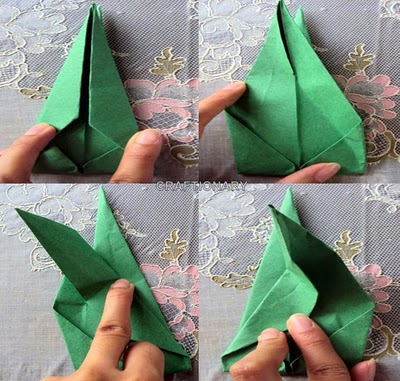
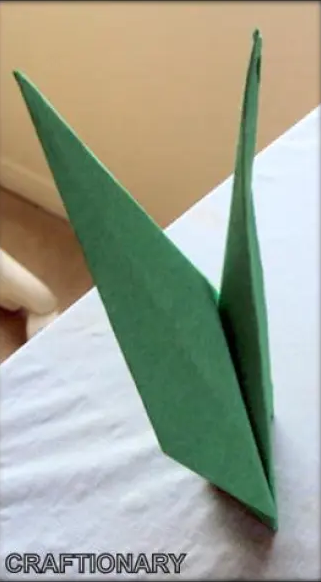
Now fold it in back in half to squeeze in all the folds. See the picture below to understand it better.
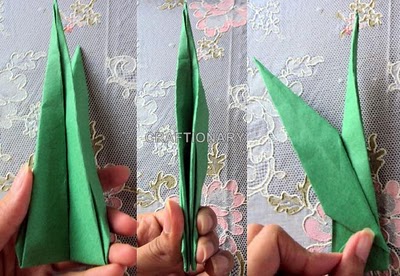
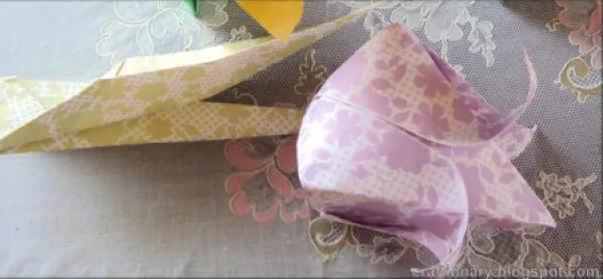
There you have your free stand paper stem.


These are really pretty. for my friend's wedding we made origami sea animals( she was married at a Aquarium) they took the place of place cards. They took forever to make, but they were cool. great post. Blessings, Joanne
thanks.. 🙂 thats such a cool idea.. must have looked great!!Lovehani
Gorgeous flowers. Thanx for sharing i wud definitly try them.. SkD!
Gorgeous flowers. Thanx for sharing i wud definitly try them.. SkD!
I love this! I think I'll surprise my husband with flowers for our anniversary! Thank =s for the idea 😀
I really like your tulip project! thanks for sharing. The explanations were useful for me.
SOOOO cute!!! Thanks for sharing, I always enjoy your tutorials 🙂 Dunno if you've noticed, but I'd featured your work on my blog, under the label “net stocking flowers” :-)Love,
Hi!!!I just gave you an award for your amazing blog
thanks friends! you all make my day with your appreciative comments..
at jammyjam good luck!! 🙂
Hi hani…They look lovelyHope you would like to spare a little bit of your time for my new post, it’s something different I hope you will enjoy …
This is awesome.I tried this and got better received better results than I expected from an artless person like me.THANK YOU for you Awesomeness and your useful cool posts…:)
loved going thru ur posts.. u got a fantastic blog with a lot of ideas for crafters..loved ur paper craft a lot..am following you from now on.:)have a nice day Hani
These are my favorite flowers to fold, they are so simple and easy, great for spring!
love these! such a wonderful harbinger of SPRING!
Great tutorial and I linked this to my paper flowers post too, well done!
AMAZING work dear hani, i really love ur blog .u r v creative minded n telented girl
It's awesome articles. I learn some new information through this blog. It's simple and perfect one.
Best web hosting company
It's excellent hard work for this blog. i inspire this blog. Every topic is simple and cool comments. every day i learn some new things.