This post may contain affiliate links. Please see our full Disclosure Policy for details.
Polymer clay is a synthetic modeling clay that stands as one of the most adaptable, malleable, and versatile mediums for crafting unique and trendy items such as jewelry, charms, figurines, picture frames, flowers, and other decorative items. Due to its non-toxic properties, high adaptability, and a vast variety of colors, it is one of the most preferred clay for crafters.
What is Polymer Clay?
The primary component of the polymer clay is the Polyvinyl Chloride (PVC) base. In contrast, different ingredients, such as fillers, pigments, and bendable plasticizers, are added to impart specific properties to the clay. These non-toxic chemical additives give unique features such as flexibility, texture, softness, and vibrant colors, making it an ideal choice for modeling collectible items.
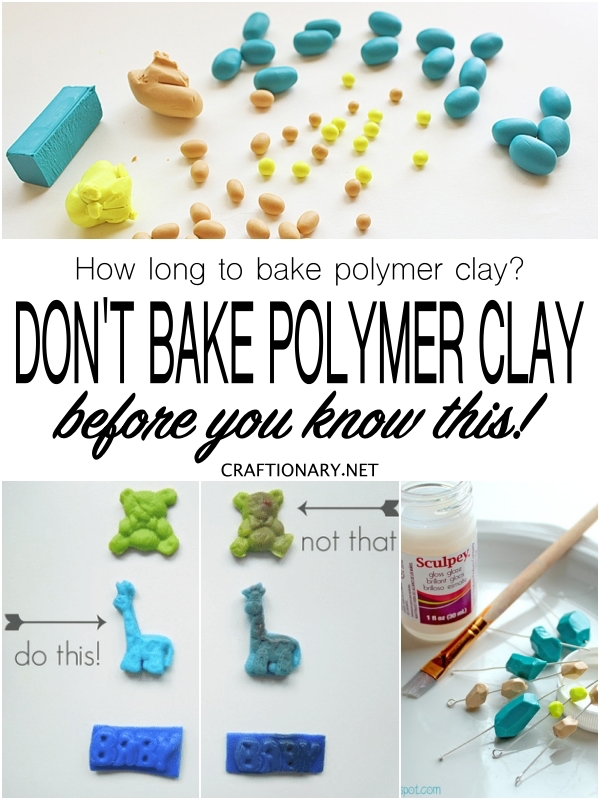
how long to bake polymer clay?
How long to bake polymer clay?
The baking time for polymer clay depends on the brand and thickness of the piece. Generally, it takes about 15-30 minutes per 6 mm (¼ inch) of thickness at 130°C (275°F).
Always check the manufacturer’s instructions for the specific brand you are using, as temperature and times can vary.
Related: The Ultimate Guide to Clay Crafts: Air-Dry Clay vs. Polymer Clay
General Baking Guidelines:
Selecting the right type of polymer clay to ensure design and baking success for a durable, detailed, and easy-to-handle design is important. Here are some common commercial polymer clay and their general baking guidelines.
| POLYMER CLAY BRAND | TEMPERATURE | BAKING TIME | NOTES |
| Sculpey III | 130°C (275°F) | 15 mins per 6 mm (1/4″) thickness | Becomes brittle if overbaked; not suitable for thin designs. |
| Sculpey Premo | 130°C (275°F) | 30 mins per 6 mm (1/4″) thickness | Flexible and durable, ideal for jewelry and detailed projects. |
| FIMO Soft | 110°C (230°F) | 30 mins per 6 mm (1/4″) thickness | Durable and versatile, with minimal color shift. |
| FIMO Professional | 110°C (230°F) | 30 mins per 6 mm (1/4″) thickness | Ideal for precise designs; avoid overworking to prevent stickiness. |
| Kato Polyclay | 150°C (300°F) | 10-30 mins per 6 mm (1/4″) thickness | Very strong and durable; suitable for detailed sculptures. |
| Cernit | 110-130°C (230-266°F) | 30 mins per 6 mm (1/4″) thickness | Translucent finish; great for blending and fine detailing. |
For Best Results:
- Always check the manufacturer’s instructions as temperatures and times may vary slightly by color or batch.
- Use an oven thermometer to ensure accurate temperature control.
- Preheat the oven to required temperature before baking.
- Avoid using a microwave as it can cause uneven heating and ruin the project.
Baking Methods and Techniques:
Once you have selected the right type of polymer clay for your projects, you cannot produce a resistant and intact artwork without baking. Baking polymer clay is crucial as it fully cures it from a soft, pliable material to a durable, hardened shape holding fine details without damage.
Yet, selecting the right temperature and duration is advisable for best results. Some of the most common baking techniques are listed below:
1. Oven baking:
Oven baking is the most common type of polymer clay baking technique that can be easily done in a standard home oven or a dedicated toaster oven at 110-135 degrees or 230-275°F for 15-30 minutes per 6mm (¼ inch) thickness. This method is conventional as it allows precise temperature control and even heating; however, it requires substantial control to reduce the risk of overheating and fumes.
2. Boiling method:
If you are dealing with some unforeseen situation (such as electricity or oven failure), you can also choose the boiling method for small projects to cure small polymer clay projects such as beads. Place the projects in simmering hot water for 20 minutes for temporary support and particle curing. This technique prevents burning and holds small, intricate or thin layers together. One must remember that this technique is unsuitable for larger projects as water can only reach a maximum of 100 degrees, therefore, it cannot provide oven-like durable strength.
3. Hair dryer method:
Baking polymer clay without a baking oven is also possible with a hair dryer. Use any hair dryer on a low setting to gently cure the projects. It might not provide 100 percent accurate results, but it can serve the purpose when needed.
4. Heat gun or embossing tool for spot heating:
If you want to do small touch-ups or quick curing, a heat gun is the right choice. It is ideal for layering or fixing details but might result in uneven curing or overheating.
Important things to remember before baking polymer clay:
1. Condition the clay:
- Hand Knead: Properly condition your clay before shaping into an item by thoroughly kneading the clay back and forth by hand, twisting it, and folding it over repeatedly.
- Use Pasta Machine: Pass the clay through the rollers on sequentially thinner settings and fold it in half between the passes. Continue passing it through the conditioning machine till it becomes soft and bendable.
Conditioning warms up the clay from friction of hands or the machine, and therefore prepares it for making projects with even consistency and low risk of cracking. Learn how to condition polymer clay with pasta machine?
2. Baking:
- Select a temperature and baking time specified by manufacturer and the type of polymer clay to reduce the risk of burning or overheating.
- Preheat your oven and use a baking sheet with parchment paper to avoid any damage to the project.
- One must also consider thickness, as thicker pieces require more baking and cooling before handling.
- Test a small sample before baking an entire piece for your satisfaction.
3. For safety take precautions:
- Use an oven thermometer for accurate temperature monitoring.
- Ventilate the area during baking time to avoid fumes.
- Prevent contamination by not using the same oven for food and polymer clay.
- Wear oven safety gloves to avoid burns or scorching.
How to bake polymer clay for best results?
Can I overbake polymer clay?
Yes, overbaking polymer clay is common, especially for beginners. The over-baked polymer clay projects may discolor, darken, develop bubbles, become brittle, and may potentially burn producing harmful fumes if left in the oven for a long time at an incorrect temperature. Place a foil tent over the clay to protect it from direct heat.
Follow the manufacturer’s instructions and constantly monitoring the project reduces the risk of overheating and burning. You can bake polymer clay for longer at the correct temperature without damage, and eventually enhance its strength. The key is to never exceed the recommended temperature.
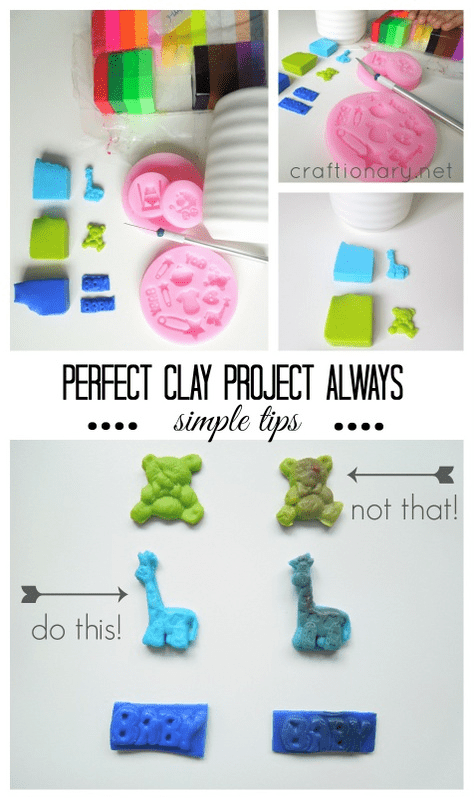
How can I know when polymer clay is fully baked?
It is fully baked when it reaches its maximum hardness and durability without being brittle or undercooked. Unlike regular clay, polymer clay doesn’t visibly change while baking. However, there are five ways to tell if your piece is properly baked:
- Follow the manufacturer’s recommended temperature and time for baking, and use an oven thermometer to ensure accurate temperature.
- Observe the color of the piece. A well-baked polymer item’s color will remain consistent, possibly slightly darker but not burnt.
- Observe the texture of the surface. A well-baked polymer clay project will have a smooth, matte surface, whereas an underbaked project will feel chalky, sticky, or shiny.
- Check the flexibility of thin pieces by gently bending your piece. The crumbling or snapping of those pieces shows the need for more baking, whereas properly baked clay will be flexible and bend slightly.
- Once the piece cools down, gently press into a hidden area with your fingernail. If it is correctly baked, pressing leaves no mark. If it feels soft or rubbery, then it is underbaked.
- Tap test a cooled piece, by gently tapping it. It should sound solid, not hollow.
- One can also check a baked piece by conducting a cutting test on a baked scrap piece. Once cooled, cut it with a crafting knife. When cut, a properly baked piece should feel firm but not brittle, whereas unbaked clay should feel raw or prone to crumbling.
- If you are still doubtful, bake for an extra 10-15 minutes at the correct temperature for a stronger and more durable project.
Common Baking Issues and Solutions
It is common to experience problems with polymer clay for various reasons; however, practice and compliance with the guidelines can help mitigate these risks over time. Here is a list of some most common polymer clay problems and their most appropriate solutions.
1. Cracks:
Cracking is the most common issue.
Cause:
- Inappropriate polymer clay conditioning, underbaking or rapid temperature changes.
- Sometimes, cracks also appear in the finished projects after glazing due to direct exposure to sunlight and glaze type.
Solution:
Prevent polymer clay from cracking:
- Ensure even clay conditioning
- Allow full baking time at correct temperature.
- Ensure even heating of the projects by keeping them in the center.
- Gradually cool pieces and avoid removing them from the oven too quickly.
- Avoid sudden temperature changes by placing them directly from hot oven to cold surfaces too quickly.
How to fix cracks in polymer clay?
Some people suggest using an additional layer of polymer clay to fill in the cracks and gaps after baking; however, this is inappropriate as the new clay will not adhere to the surface properly.
Instead, one can fix the minor cracks using a curing process using clay dust and glue. Make a paste of finely shaved clay particles with two-part epoxy glue to fill in the cracks.
One can also use a plumber’s putty for the purpose. Make sure to sand and smooth the surface after curing for a smooth finish.
2. Air Bubbles:
Sometimes air bubbles or blisters appear in the finished projects.
Cause:
- Due to air trapped in the clay, rapid heating, or using a thick coat of varnish or sealant.
Solution:
- One can prevent air bubbles in the clay by proper conditioning before shaping to eliminate air pockets.
- Let the project settle down before baking and pop any bubbles with a toothpick.
- Bake at a lower temperature for a longer time.
- Apply two thin coats of sealant for finishing.
3. Cloudy Finish:
Cause:
- Hazy or opaque appearance is due to moisture, dirt or oils in the clay.
Solution:
- One can heat the clay for a few minutes to overcome this issue before applying varnish or glaze for clear results.
4. Color Change or Burning:
Cause:
- Excessive heat or poor-quality clay may result in yellowing or darkening after baking.
Solution:
- Make a foil tent to minimize direct heat.
- Use an oven thermometer to ensure accurate temperature.
- Follow manufacturer’s baking temperature recommendations.
5. Uneven Baking:
Cause:
- Uneven oven heating or varying thickness in clay.
Solution:
- Use ceramic tiles or an oven-safe glass tray for even heat distribution.
- Maintain consistent clay thickness using rolling guides such as tiles on the sides of rollers.
- Consider bake thicker areas longer.
6. Glossy Spots:
Cause:
- Sometimes, matte pieces might dry to a high shine due to contact with shiny surfaces during baking.
Solution:
- Place pieces on plain paper or parchment paper.
- Lightly sand shiny spots after baking for a matte finish.
- Ensure thorough mixing of varnish before application.
7. Peeling, Separation, and Tacky Finish:
Cause:
- Varnish dries and peels away from the surface.
- The sealant might remain sticky or over-dried.
Solution:
- Make sure to use good quality varnish and sealant
- Check the expiry date to avoid this issue.
8. Glaze pooling:
Cause:
- Liquid sealant applied to the polymer clay piece pools in the low areas and recesses.
Solution:
- Let the baked piece cool down properly.
- Apply thin coats of glaze evenly.
How long can Polymer Clay sit before baking?
Polymer clay can sit for months or even years before baking, as it only cures when heated.
- Short-term projects can remain pliable for days or weeks if kept away from heat and sunlight, though covering them prevents dust buildup.
- For long-term storage, keep the clay in airtight containers made of polypropylene (#5 plastic) at room temperature (60–75°F/15–24°C) or wrap it with parchment or wax paper. If the clay becomes firm, soften it by kneading, adding a clay softener (like Sculpey Clay Softener or Fimo Mix Quick), using a heating pad, or mixing it with fresh clay. Proper storage ensures your clay stays workable until you’re ready to bake.
Related: How Long To Leave Polymer Clay Before Baking?
Types of Polymer Clay and Their Uses
Learn more about these common polymer clay brands and their uses:
1. Sculpey III: Soft and malleable polymer clay
Sculpey III clay is the finest quality polymer clay on the market due to its ease of use, fine texture, and adaptability for all skill levels. The best thing about Sculpey is that it never dries out without baking, allowing crafters to correct and conceal mistakes easily. In addition, this polymer clay is not too messy and comes in various bright colors. Sculpey clay requires minimal kneading and shaping; therefore, is best for making jewelry, figurines, keychains, and beginner’s crafts. The only problem with Sculpey III polymer clay is that it becomes brittle after baking; therefore, it must not be used for thin designs such as intricate flowers or petals.
2. Sculpey Premo: Durable and professional quality polymer clay
Sculpey Premo is a beginner-friendly polymer clay ideal for making jewelry due to its versatility and ability to hold details, faux stones, and accessories. It is relatively softer than other types of polymer clay, making it suitable for colder climates; however, it is important to protect it from scorching for good results. Its remarkable flexibility makes it ideal for professional quality polymer clay techniques and is ideal for blending colors. However, one must remember that it requires more conditioning due to its texture.
3. FIMO Soft: Best for strength
FIMO soft is the finest polymer clay due to its durability and versatile polymer clay that requires minimum preparation and can be used straight from its packaging. It comes in premixed colors and presents them beautifully after mixing. It is ideal for use in cold and warm temperatures, showing virtually no color shift between the baked and unbaked clay. FIMO clay is non sticky and has a pliable texture when conditioned properly. Most importantly, it is more resistant to breakage, making it ideal for intricate detailing.
4. FIMO Professional: Best for Precise and complex designs
Due to its definitive properties, FIMO Professional is the ultimate choice for designing precise and complex designs by advanced artists. It suits mildly cold and warm climates but might get sticky if overworked. This specialized clay can create layers without breakage or tearing and works well with all polymer clay techniques. Beginners must practice using other types of polymer clays before choosing FIMO Pro.
5. Kato Polyclay: Ideal for long-term projects
Looking for a polymer clay for sturdy designs? Kato poly clay will get you sorted. This polymer clay produces exceptional results for canning faux stones and is ideal for hot climates. Its malleable texture makes it perfect for precision projects and an ultimate professional choice. It stands as the strongest polymer type commercially available. It can be molded, shaped, blended, stamped, and layered into durable projects such as complex sculptures, highly detailed jewelry, and artwork.
6. Cernit Polymer Clay: Precise botanical clay
Struggling to find the best polymer clay for botanical details and jewelry making? Try Cernit Polymer clay. This translucent clay never gets messy and is perfect for blending and surface treatments such as paints, silk screening, alcohol inks, chalks, and varnishes. This polymer clay is odorless before and after baking and produces fine projects.
7. Liquid Polymer Clay
You might be intrigued to try liquid polymer clay which is oven-baked and comes in squeeze bottles was making intricate designs. It is ideal for jewelry, mixed-media art, window clings, holiday craft projects and home decor items.
Try these polymer clay techniques and make different types of fun projects.
Which polymer clay is the best for beginners?
I believe Sculpey III and FIMO soft are the most suitable beginner-friendly polymer clay due to its practicality and ease of use. The other listed clay options are not recommended for beginners due to their texture and require experience and practice to get fantastic results.
Jessama shares more details on best polymer clay to use.
FAQs
Common uses of polymer clay?
Whether you want to adopt a new hobby for personal use, craft unique things for your family or friends, or want to start a new business, polymer clay can help. It is extensively used for crafting jewelry and personalized articles. Some of the common applications are:
- Miniature art: If you love collecting miniature art or making dollhouses, polymer clay is an ideal medium for crafting detailed miniature food, dolls, and sculptures as collectibles and decorations.
- Custom Home decorations: Personalize your trays, vases, key chains, coasters, buttons, planters, and wall hangings using polymer clay
- Jewelry making: Due to its lightweight, polymer clay is an ideal medium for crafting extraordinary jewelry items to elevate your look.
How to avoid fingerprints in polymer clay?
Avoiding fingerprints in polymer clay requires careful handling and a few simple techniques:
- Wash Hands and Use Gloves: Clean hands before working with clay to remove oils and dirt. Wearing thin latex or nitrile gloves can prevent fingerprints altogether.
- Use Cornstarch or Baby Powder: Lightly dust your fingers with cornstarch or baby powder to reduce friction and prevent prints. A soft brush can help apply it evenly.
- Handle Clay with Tools: Instead of using fingers, use silicone-tipped tools, toothpicks, or rubber sculpting tools to shape and smooth the clay.
- Roll and Smooth with Plastic: Lay a piece of plastic wrap over the clay and gently press or roll it to smooth out any marks without leaving prints.
- Use Rubbing Alcohol: After shaping, dip a soft brush or cotton swab in 70-90% isopropyl alcohol and lightly brush over the surface to dissolve fingerprints.
- Work on a Smooth Surface: Using a clean, smooth tile or glass surface helps reduce unwanted marks.
- Warm Up Clay Properly: Overworked or too-warm clay is stickier and more prone to fingerprints. Let it rest if it becomes too soft.By combining these techniques, you can achieve a clean, fingerprint-free polymer clay finish!
Should I paint polymer clay before or after baking?
Paint polymer clay after baking for best results. This is especially recommended because paint adheres better to baked clay, preventing cracks and peeling of paint by providing a stable surface. It is also important to note that some paints change color or release harmful fumes when heated.
Use acrylic paints and sand the surface lightly for better paint adhesion after baking. Apply paint in thin layers and seal the paint with water-based varnish to protect the paint and add finishing shine.
You can also use alcohol inks, oil paints, mica powders, and chalk pastels.
How can we use polymer clay with other materials?
Due to its versatility and high adaptability, polymer clay can be integrated with other materials to craft unique trending projects in a budget-friendly manner. Here are two super easy and practical techniques to help you create spectacular items in no time.
1. Mixed media artwork: Using polymer clay in mixed media artwork is a fun way of creating captivating and finely detailed art projects. Artists worldwide use materials such as wood, metal, and resin with polymer clay to craft breathtaking sceneries on canvases and delightful custom projects such as pens, bookmarks, and journal covers.
2. Prototyping and model making: Polymer clay is a fantastic material for prototyping and model making as it doesn’t dry out without baking. Its heat resistance and adaptability make it suitable for creating temporary prototype closures. In addition, one can add fine and intricate detailing on the models due to its flexibility.
How to soften leftover polymer clay?
Here are four easy steps to soften polymer clay easily.
- Smashing: Place the polymer clay in a plastic bag and smash it on a surface using a rolling pin till it becomes pliable.
- Warming: Use your body temperature to warm up the polymer clay. Avoid placing it in an oven to avoid any hard structures.
- Mixing clay with clay softeners: One can mix any commercially available clay softener by following the instructions on the packaging.
- Clay softening in machines: One can use household machines such as a food processor, a pasta machine, or a professional clay conditioning machine to condition it properly; however, make sure never to use those machines for food processing again to avoid any health consequences.
How to seal and store polymer clay?
The most conventional method for storing polymer clay is placing it in an air-tight bag and a container to avoid direct contact with air, moisture, or dirt particles. Select a cool, dry spot away from direct sunlight to prevent damage to the unused clay after working.

How to glaze polymer clay?
How to protect, glaze or varnish polymer clay?
Application of a glaze and varnish are the easiest ways to protect the structure and color of the projects from dust, humidity, and moisture. Sand the cured polymer clay project with a fine-grit sandpaper or nail buffer for an even surface and apply a thin layer of clear acrylic varnish or a dedicated polymer clay sealant using a brush. However, it is important to select a polymer clay compatible varnish for durability. Most importantly, always make sure that the polymer clay project is properly cured before applying varnish for best results.
Here are some glaze and varnish recommendations for polymer clay:
Varanthane Polyurethane: This varnish is durable, non-yellowing and resistant to scratches.
Sculpey Glaze: Quick-drying and formulated for polymer clay specifically. Less durable than Varanthane.
How to clean pasta machine after conditioning polymer clay?
After conditioning polymer clay, clean your pasta machine:
1. Quick Clean (After Each Use):
- Roll a piece of scrap or neutral-colored clay through the machine to pick up most of the residue.
- Wipe the rollers with a soft, lint-free cloth or baby wipe. Avoid using water.
2. Deep Clean (Regular Maintenance):
- If possible, disassemble the machine to access the rollers and scrapers.
- Use a wooden skewer, toothpick, or cotton swab to scrape off any stuck clay.
- Wipe rollers with rubbing alcohol to remove oily residue.
- Optionally, apply a small amount of lubricant (sewing machine oil) to the side gears.
3. General Tips:
- Avoid using water to clean, as it can cause rust.
- Regularly clean after each session to prevent clay buildup.
- Use scrap clay between colors to reduce color transfer.
This routine ensures your pasta machine stays clean and works efficiently for conditioning polymer clay.
Related: How to Clean Polymer Clay Pasta Machine?
Written by: Nageen Sohail
Reviewed by: Hani Shabbir
You will also like: