This post may contain affiliate links. Please see our full Disclosure Policy for details.
Cleaning your pasta machine after conditioning polymer clay is essential to avoid color transfer and residue buildup. If you have been wondering how to clean clay pasta machine, usually it is a very simple process. Let me guide you through the proper instructions to help you extend the life of your clay pasta machines.

How to clean polymer clay pasta machine?
Here’s a step-by-step guide to keep your pasta machine in top condition:
Quick Clean (After Each Use)
1. Roll Scrap Clay:
Run a piece of scrap or neutral-colored clay through the rollers several times. It will pick up most of the residue.
2. Wipe with a Cloth:
Use a soft, lint-free cloth or baby wipe to clean the rollers. Avoid using water, as it can cause rust.
Deep Clean (Regular Maintenance)
1. Disassemble (if possible):
If your pasta machine allows, carefully remove the screws or side panels to access the rollers and scrapers. Refer to the manufacturer’s manual.
2. Clean Rollers and Scrapers:
Use a wooden skewer, toothpick, or cotton swab to gently scrape away stuck clay from the rollers and the scrapers underneath. Wipe the rollers with a cloth dampened with rubbing alcohol to remove oily residue.
3. Lubricate (Optional):
If your machine squeaks, apply a tiny amount of food-safe or polymer clay-safe lubricant (like sewing machine oil) to the side gears, not the rollers.
4. Reassemble and Test:
Once cleaned, reassemble the machine and run a scrap piece of clay through to ensure it’s clean and functioning properly.
Tips to Keep It Cleaner Longer
- Avoid using very soft or sticky clay, which leaves more residue.
- Condition light-colored clay before dark clay to prevent color transfer.
- Never wash the machine with water, as it can lead to rust.
Related: The Ultimate Guide to Clay Crafts: Air-Dry Clay vs. Polymer Clay
How to choose a pasta machine specifically for Polymer Clay?
Choosing the right pasta machine for polymer clay can make conditioning easier and more consistent. Here’s what to look for when selecting one:
Key Features to Consider
1. Smooth, Non-Stick Rollers:
Look for stainless steel rollers, which are smooth and less likely to stick or rust. Avoid machines with coated rollers, as the coating can wear off.
2. Adjustable Thickness Settings:
A machine with multiple thickness settings (typically 7 to 9) gives more control when conditioning clay or creating sheets for projects.
3. Sturdy Construction:
A solid, metal frame ensures stability during use. Lightweight machines can move around, making conditioning difficult.
4. Strong Clamp and Handle:
Ensure the machine includes a table clamp to keep it secure and a handle that fits snugly without slipping out.
5. Easy to Clean Design:
Machines with removable scrapers or easy-access rollers simplify cleaning. Avoid models with tightly enclosed parts that trap clay.
Recommended Pasta Machines for Polymer Clay
1. Budget-Friendly: Atlas Marcato 150 or Makin Clay Machine
Known for smooth rollers, precise thickness settings, and durability. Popular among polymer clay artists.
2. Mid-Range: Sculpey Clay Conditioning Machine
Specifically designed for polymer clay, but it may not be as sturdy as a traditional pasta machine.
3. Premium: Dream Machine or Lucy Clay Machine
Professional-grade machines with wider rollers, stronger construction, and finer thickness adjustments. Ideal for heavy use.
Tips for Using a Pasta Machine with Polymer Clay
- Avoid mixing food and clay: If you use the machine for polymer clay, don’t use it for food afterward.
- Condition softer clay first: This reduces residue when switching colors.
- Clean regularly: Wipe rollers after each session and deep-clean occasionally to prevent buildup.
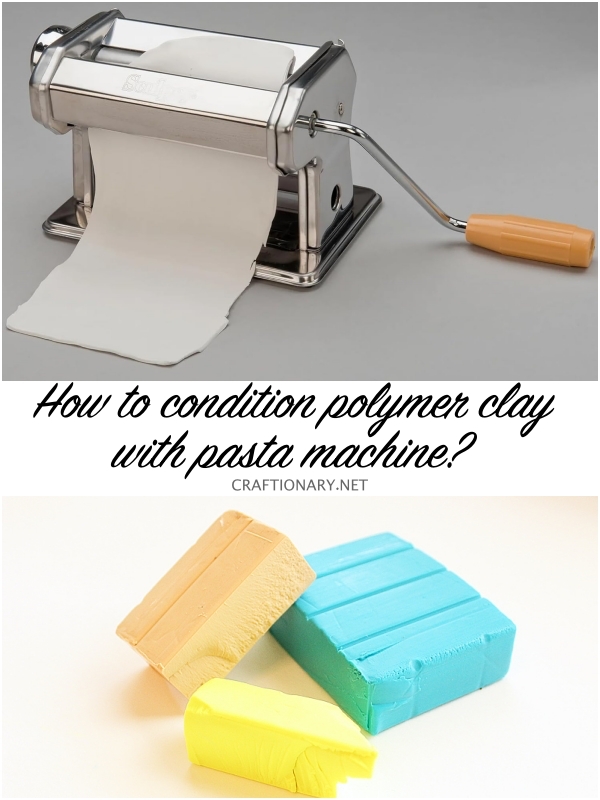
How to Condition Polymer Clay with a Pasta Machine?
Conditioning polymer clay is essential to make it soft, pliable, and free of air bubbles. A pasta machine makes this process easier and more consistent. Here’s a step-by-step guide for effective conditioning:
1. Prepare the Clay:
- Cut the clay into small, manageable pieces. If it’s hard, warm it in your hands to soften slightly.
- If the clay is crumbly, don’t worry—conditioning will fix it.
2. Start with the Thickest Setting:
Set your pasta machine to the thickest setting. Flatten the clay slightly with your hands and feed it through the rollers.
3. Fold and Roll Repeatedly:
- After each pass, fold the clay in half and feed it through the machine again, fold side first. This helps eliminate air bubbles.
- Rotate the clay occasionally to ensure even conditioning.
4. Adjust Thickness as You Go:
- Once the clay becomes more pliable and smooth, gradually reduce the thickness setting.
- Stop when the clay feels soft, warm, and uniform in texture.
5. Check for Readiness:
- Properly conditioned clay should be smooth, crack-free, and easy to bend without breaking.
- If it tears or feels dry, continue conditioning.
Tips for Easier Conditioning
1. Use Clay Softener (Optional):
If the clay is very stiff, add a drop of clay softener (like Sculpey Clay Softener) or a tiny bit of baby oil. Alternatively, mix the stiff clay with a softer brand.
2. Avoid Overworking:
While conditioning is essential, excessive rolling can weaken the clay’s structure. Stop once it’s smooth and pliable.
3. Prevent Color Transfer:
- Condition light colors before dark ones to avoid staining.
- Clean the pasta machine with scrap clay between colors.
4. Rest the Clay:
After conditioning, let the clay rest for 10–15 minutes. This reduces air bubbles before sculpting or cutting.
Related: How Long To Leave Polymer Clay Before Baking?
Tips for conditioning popular polymer clay
Different polymer clay brands vary in texture and firmness, so conditioning techniques can differ. Here’s how to handle popular ones:
1. Sculpey (Premo, Souffle, and Original)
Sculpey has soft texture and is easy to condition.
Conditioning Tips:
For Premo: It usually conditions quickly. Just a few passes through the pasta machine on the thickest setting should do.
For Souffle: Softer and almost suede-like, so be gentle. Over-conditioning can make it sticky.
For Original Sculpey: It’s very soft but less durable when baked. Kneading by hand might be enough.
Watch out for: Overworking can make Sculpey sticky. If that happens, cool it in the fridge for 10 minutes before continuing.
2. Fimo (Soft and Professional)
The texture of Fimo Soft is pliable, while Fimo Professional is firmer and preferred for detailed work.
Conditioning Tips:
For Fimo Soft: Condition lightly, as it’s already quite workable. Excessive rolling can weaken the structure.
For Fimo Professional: This clay is firmer and benefits from hand-warming before pasta machine conditioning.
Watch out for: Fimo can become crumbly if cold. Warm it in your hands first.
3. Kato Polyclay
Kato is very firm and dense, even at room temperature.
Conditioning Tips:
Warm the clay thoroughly with your hands before attempting the pasta machine.
Pass it through the machine several times on the thickest setting, folding each time.
A clay softener can help if the clay is too stiff.
Watch out for: Kato is heat-sensitive. It can become brittle if not conditioned properly but sticky if overheated.
4. Other Brands (Cernit, Pardo)
Cernit: Softens quickly but becomes sticky if overworked. Condition gently.
Pardo: Softer than most clay but prone to crumbling when cold. Warm by hand first.
General Conditioning Tips for All Brands
- Cold Clay Crumbles: Warm it by hand before conditioning.
- Sticky Clay: Cool in the fridge for 10 minutes.
- Very Firm Clay: Add a few drops of clay softener or mix with a softer brand.
- Color Blending: Condition each color separately before mixing to avoid uneven textures.
Written by: Hani Shabbir
You will also like:
How Long to Bake Polymer Clay?