This post may contain affiliate links. Please see our full Disclosure Policy for details.
Hey Craftionary readers!! I’m so excited that Hani invited me today! To tell you a bit about myself, I’m a SAHM of 3 {2 girls and a boy}, married to my husband for almost 5 years {together almost 12}, and the author of I Know the Plans I Have for You where I share the projects that I have refinished, crafts, things repurposed, DIY tutorials, family and anything else that goes on in the crazy world of Jill.
I’m basically a silly, carefree, kinda gal that needs a creative outlet, and my “redo’s” and blog brings that outlet to my life! I began this blog last year because I was so inspired from the blogs I read. I wanted to share the things that I do to keep a “journal” of them and hope to inspire others the way that I have been inspired. In January, I decided I wanted to take my blogging journey to the next level. It has been a great learning venture and I have met so many great people along the way!
I’m basically a silly, carefree, kinda gal that needs a creative outlet, and my “redo’s” and blog brings that outlet to my life! I began this blog last year because I was so inspired from the blogs I read. I wanted to share the things that I do to keep a “journal” of them and hope to inspire others the way that I have been inspired. In January, I decided I wanted to take my blogging journey to the next level. It has been a great learning venture and I have met so many great people along the way!
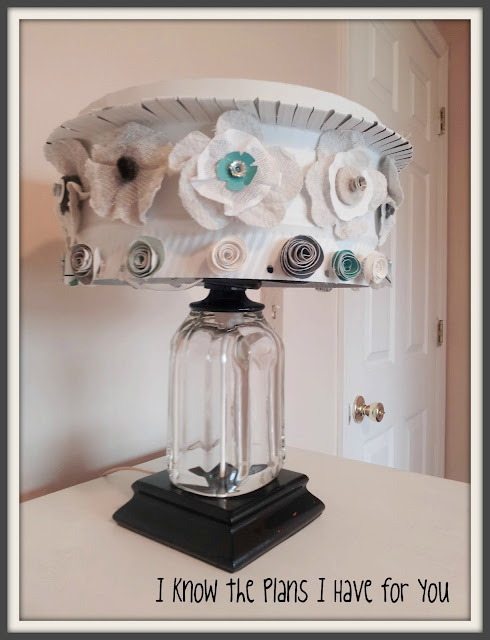
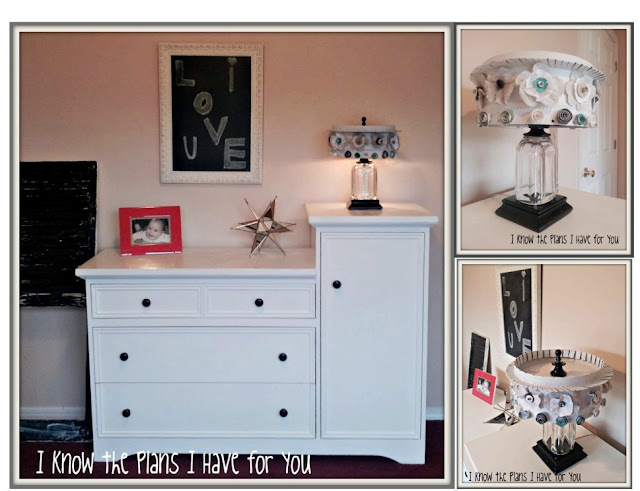
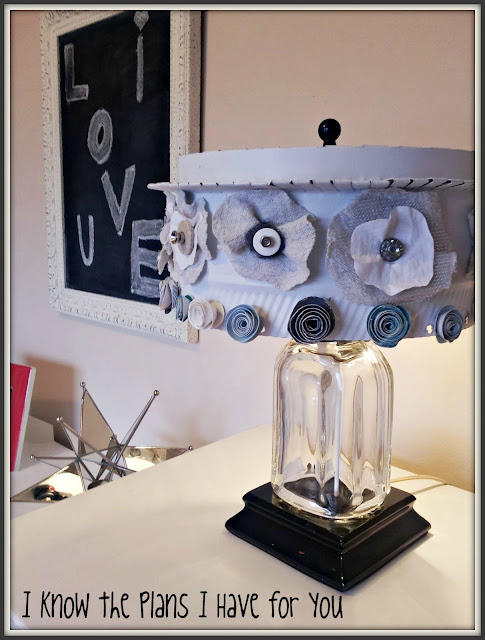
Today I would love to share with you a project that I recently took on for the American Crafter contest. This was for the “Hardware Store Gem” week. I decided to make a lampshade using an AC duct, flowers using drop cloth, screen, nuts and bolts, steel wool, floor saver felt circles and basically anything else that I could find in the garage!
Here are some of the supplies that I used….

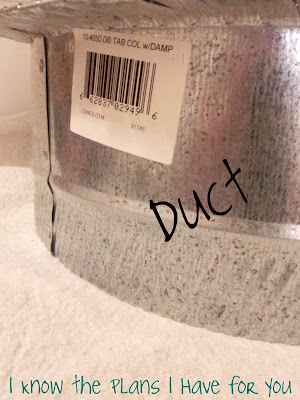
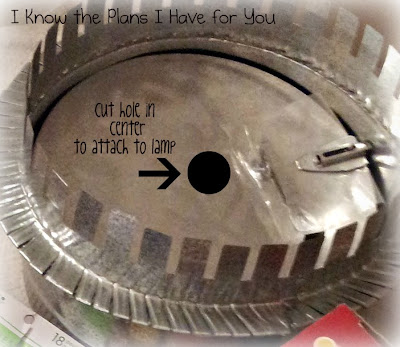
The first thing I did, was took the tabs sticking up on top, and bent all of them down. Then using a drill, I cut a hole directly in the middle {with a bit used to cut through metal} Be very careful, the metal is really sharp!
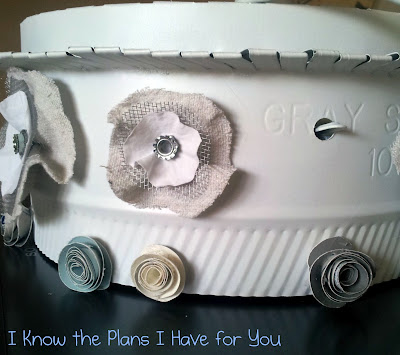
I then spray painted it with a satin white. Now it was time to cutesify {yes that’s a word!}it!! I knew I wanted to make flowers with all of the things that I had from the hardware store and the garage. I had planned from the beginning to use the drop cloth as the main part of the flowers and embellish them with the screen, nuts, bolts, and really the list can go on and on. You can use anything you want! My flowers turned out like this…
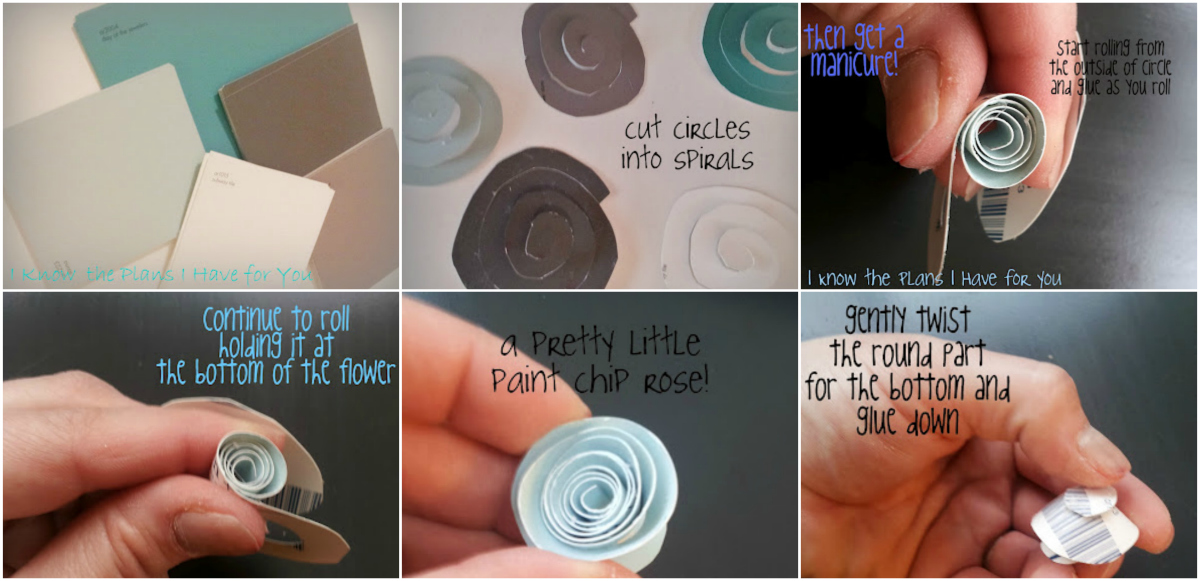
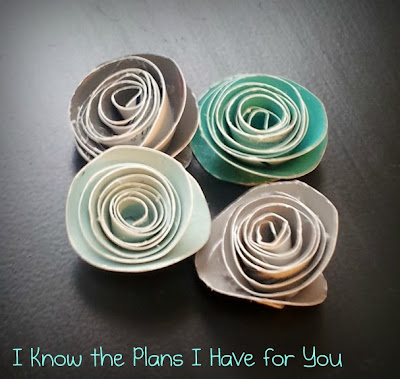
I made the rolled paper roses with the paint chips! It’s SO simple!! This is what ya do….
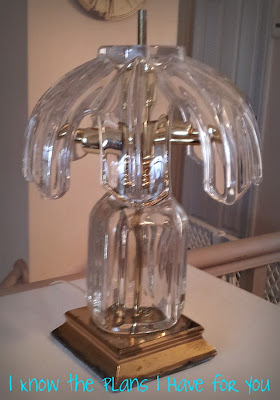
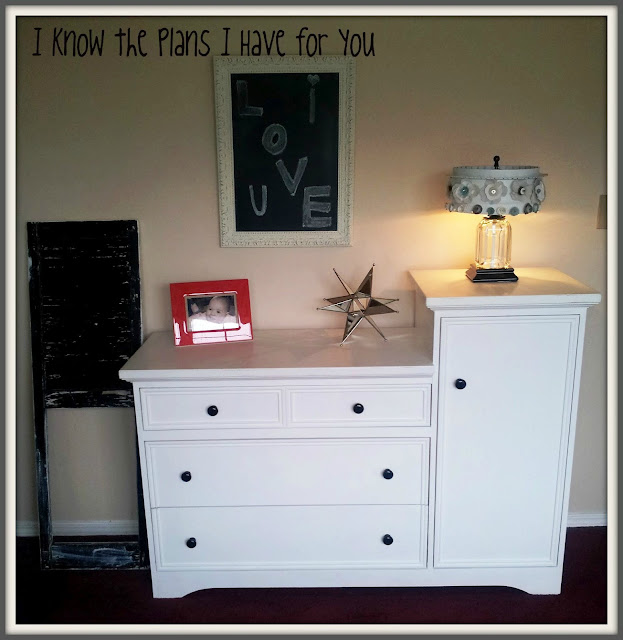
After I had the lampshade finished, it was time to tackle the lamp itself. I took it apart, spray painted all of the brass with a glossy black, and the pole on the inside I painted with ASCP in Pure White. If you are taking apart a lamp, make sure to pay attention to how you took it apart. It can be tricky to put back together!! And when you do get it back together…you have a cute vintage industrial lamp and lampshade, that will keep people guessing!!
Thanks Hani for having me today and I hope that this tutorial inspires you guys to think out side of the box!! I’d love for you to come by I Know the Plans I Have for You and take a look around!!
Thanks for the guest post Jill. This is such a fun idea!
Don’t forget to check out my favorite three and more ideas at Jill’s blog
Antique Pedestal

The post has been truncated for copyright safety. Thank you so much for understanding! “This post first appeared on Craftionary.net”


Thanks for having me today Hani!!