This post may contain affiliate links. Please see our full Disclosure Policy for details.
Can You Embroider on Canvas? Yes. You can embroider on a stretched artist’s canvas, and it looks incredible. The trick is that painted or primed canvas is stiff and tightly woven, so a needle won’t glide through it like it does through fabric. The fix is simple: poke your holes first, evenly spaced along your design lines, then stitch through those holes with a backstitch. That one change makes the stitches uniform, protects your thread from fraying, and saves your fingers.
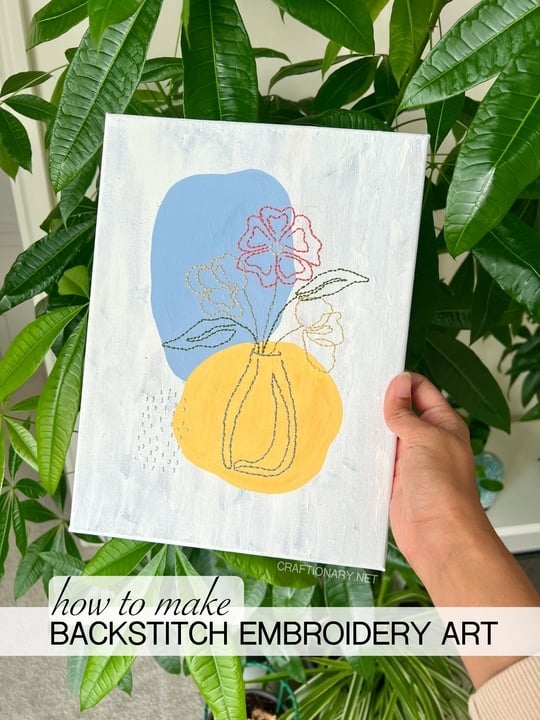
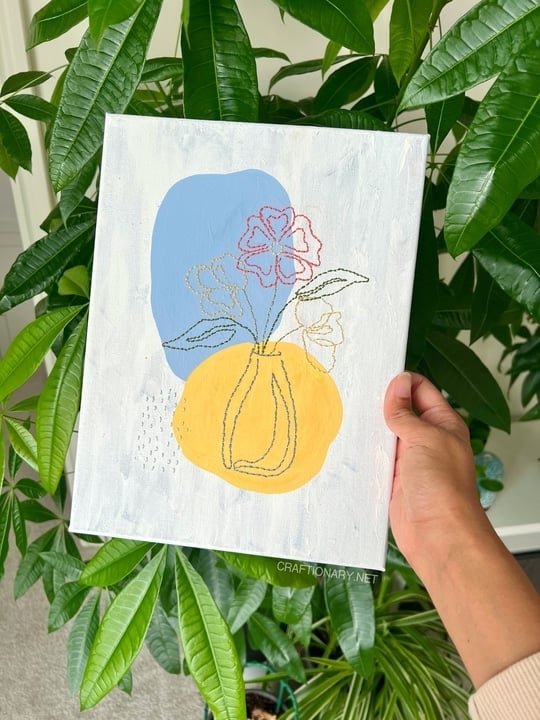
This tutorial walks you through the exact process I used to make the piece in the photo above: a minimalist line-art vase of flowers, stitched over two big, soft abstract shapes in dusty blue and mustard yellow, on a textured white canvas. It’s modern, it’s a little boho, and it looks like something you’d pay real money for in a boutique. It’s also very doable if you’ve never touched embroidery before.
Quick facts:
- Skill level: Beginner-friendly (you only need one stitch)
- Time: Roughly 3 to 5 hours of hands-on work for a 9 x 12 inch canvas, plus paint drying time. Dense designs take longer.
- Cost: Usually under $25 if you already own acrylic paint
- Stitch used: Backstitch (plus optional small straight stitches for dots)
- Best canvas: Stretched cotton canvas with a hollow back
What Is Backstitch, and Why Is It the Best Stitch for Line Art?
Backstitch is one of the most basic embroidery stitches, and it creates a solid, continuous line made of small, even stitches that sit end to end. It’s the stitch most embroiderers use for outlines, lettering, and fine details, which is exactly why it suits line-art designs so well.
The name comes from how it’s built. Each stitch travels backward against the direction you’re moving along the line. On the front of the work you see a neat row of short stitches. On the back you see overlapping stitches that are roughly twice as long, because each one spans the gap you just left behind.
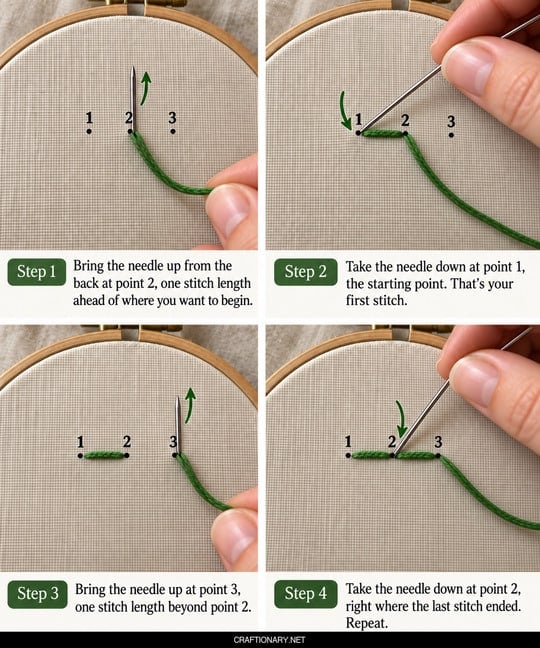
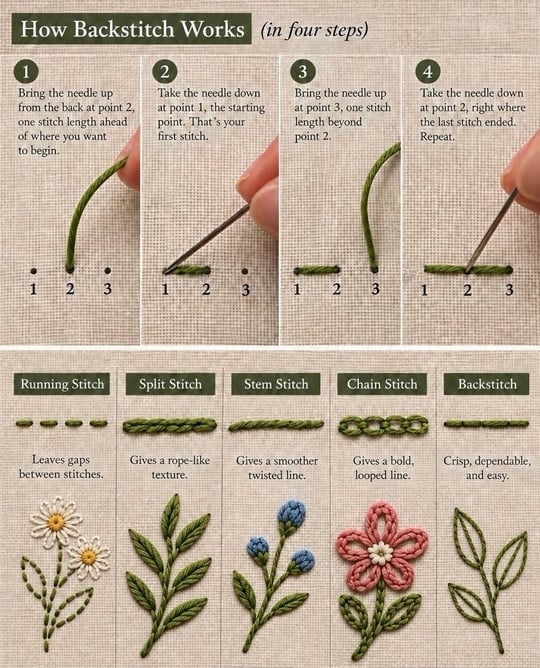
How backstitch works:
- Bring the needle up from the back at point 2, one stitch length ahead of where you want to begin.
- Take the needle down at point 1, the starting point. That’s your first stitch.
- Bring the needle up at point 3, one stitch length beyond point 2.
- Take the needle down at point 2, right where the last stitch ended. Repeat.
Every new stitch begins by moving forward (empty space) and finishes by going backward into the hole the previous stitch already used. That is what makes the line look continuous with no gaps.
Why I choose backstitch over other stitches for this project:
- It follows curves well when you shorten the stitch length.
- It gives a clean, graphic line that looks like pen on paper.
- It’s strong. Each stitch is anchored by the next, so a snag won’t unravel the whole line the way a long running stitch can.
- Beginners can learn it in minutes.
If you want to compare it with similar stitches: a running stitch leaves gaps between stitches, a split stitch gives a rope-like texture, a stem stitch gives a smoother twisted line, and a chain stitch gives a bold, looped line. Backstitch sits right in the middle: crisp, dependable, and easy.
Why Embroider on Canvas Instead of Fabric?
People usually think of a hoop, linen, and a flat piece of fabric when they hear embroidery. Canvas changes the whole feel of the finished piece.
- It’s already a finished frame. A gallery-wrapped stretched canvas hangs straight on the wall. No hoop, no framing costs.
- You can paint first. Acrylic paint lets you build color blocks and texture that fabric can’t hold as crisply. This is what makes the mixed media embroidery look so contemporary.
- The contrast is the magic. Matte paint next to the slight sheen of thread is what makes a piece look dimensional.
- It’s forgiving. If you don’t love a section, you can paint over a pencil mark, and you can pick out stitches.
- The one thing to know: use a stretched canvas, not a canvas panel or canvas board. Canvas boards have a solid cardboard or hardboard backing, so you can’t pull the needle through to the back. A stretched canvas is hollow behind the fabric, which lets you work the needle from both sides.
Materials You’ll Need:
1. For the canvas and background
- One pre-primed stretched cotton canvas (I like 9 x 12 inches, 23 x 30 cm, for a first piece; it’s large enough to feel substantial and small enough to finish in a weekend)
- Acrylic paints: titanium white, a dusty blue, a mustard yellow, and a little grey for streaks. If you mix your own: blue plus white plus a tiny touch of brown or grey gives that muted, dusty blue. Yellow ochre plus a little cadmium yellow and white gives mustard.
- A flat brush (1 inch) and a medium round brush
- A palette knife or an old card for texture (optional but worth it)
2. For tracing and marking
- A printed or hand-drawn line-art vase-and-flowers design, sized to your canvas
- Graphite transfer paper, or a soft pencil (2B) and a pen for tracing
- Masking tape or washi tape
- A ruler
3. For stitching
- A sharp embroidery needle, size 3 to 5. Choose one with an eye big enough for your thread, but sharp enough to pierce the canvas.
- Six-strand cotton embroidery floss. You’ll separate the strands. Use 2 strands for a delicate line, 3 strands for a bolder, graphic look like the one pictured.
- Colors in the photographed piece: dark green (leaves and stems), coral red (the large flower), pale butter yellow (the smaller flowers and the flower center), charcoal-navy (the vase), and a pale powder blue for the dotted texture. Close matches in DMC floss are 3345 (dark hunter green), 351 (coral), 3078 (very light golden yellow), 3799 (very dark pewter grey), and 3753 (ultra very light antique blue). Colors vary by screen and dye lot, so check against your own swatches.
- A thimble or a pair of flat-nose pliers (helpful for pulling the needle through painted canvas)
- Small scissors
- Clear tape for securing thread tails on the back
Step-by-Step Tutorial: Backstitch a Modern Flower Vase on Canvas
1. Plan and Trace Your Design
- Start with a simple, one-line style drawing: a vase with a narrow neck, three or four blooms on slender stems, and a couple of pointed leaves. Modern line art works best when the lines flow and the shapes are slightly imperfect. Open, organic petals look better stitched than tight, geometric ones.
- Print or draw the design at the size you want on the canvas. Tape it to the canvas with the vase positioned slightly below center so the flowers have room to rise. Slide graphite transfer paper underneath and trace over every line with a pen, pressing firmly. Lift a corner to check that the lines are visible before you remove the paper.
- Before you take the template off, make two or three small registration marks at the edges: a tiny pencil tick on the canvas at the template’s corner or edge. You’ll need these in Step 3 to line the design up again after painting.
- P.S: I started by using a pencil to draw it free-hand.
2. Paint the Two Abstract Rounds and the Background
- This is the fun, loose part. The two large shapes behind the vase are what give the piece its contemporary art look.
- Paint the background first. Cover the canvas with a mix of white and a bit of grey-blue, using uneven, dry-brush strokes so the background looks like soft marble. The texture in the photo came from layering thicker paint and dragging a palette knife through it.
- Paint the first large shape. In my piece, it’s a dusty blue organic blob in the upper left, behind where the flowers will sit. Don’t aim for a perfect circle. Slightly wobbly, egg-like or pebble-like shapes feel more modern.
- Paint the second shape. A mustard yellow round sits lower and to the right, behind where the vase will be. Let the shapes sit close together, even touching, so the stems and vase neck stitch across the meeting point.
- Apply two coats if the color looks streaky. Acrylic dries darker, so judge the color after it dries.
- Let it dry fully. Acrylic can feel dry to the touch in about 20 to 30 minutes, but thick or textured layers take much longer to cure. I’d wait at least several hours, ideally overnight. Poking a needle through tacky paint gums up the needle and drags paint into the hole.
3. Re-Mark the Tracing Lines
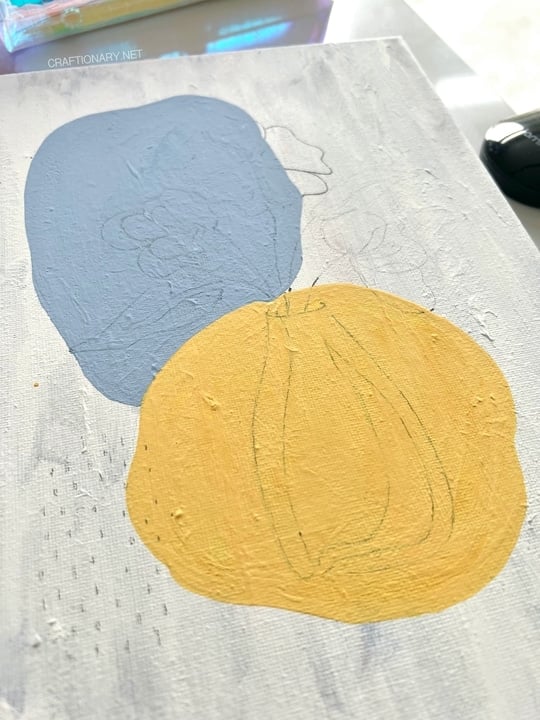
- Acrylic paint is opaque, so your original pencil lines will be buried under the shapes. This is why you made registration marks.
- Tape the template back onto the canvas, lining up your edge marks. Slide the transfer paper back underneath and re-trace every line. Check that the shape sits where it did before. You can also lightly redraw missing sections freehand with a 2B pencil or a water-soluble pencil, using the printout as your guide.
- Pro tip: Draw your lines slightly lighter than you think you need to. Graphite is hard to erase from painted texture, and you want the stitches to cover it completely.
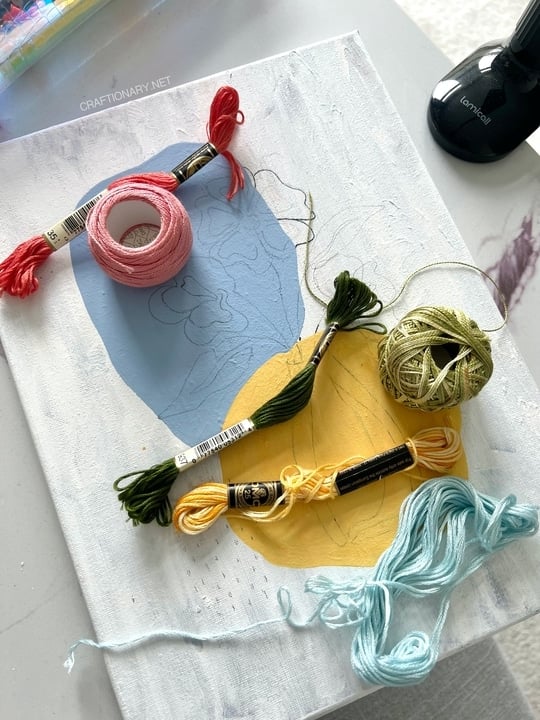
4. Poke Evenly Spaced Holes Along Every Line
This is the step that makes the whole project look professional. Instead of trying to eyeball stitch lengths while forcing a needle through stiff canvas, you create a path of holes first.
- Decide your stitch length. For long, gentle lines like the vase body and stems, aim for about 4 to 5 mm (roughly 3/16 inch). For tight curves like petal edges, use 2 to 3 mm so the curve stays smooth.
- Make a spacing guide. Cut a thin strip of cardstock, mark it every 4 mm, and use it like a ruler as you work along the line. After a few minutes your eye will start to match the spacing without it.
- Use the same needle you’ll stitch with. Push it straight down through the canvas at each mark with a thimble or the flat of your finger. Pull it back out straight, not at an angle, so the hole stays clean. Keep your other hand behind the canvas to feel for the needle tip.
- Place holes at every corner and at the peak of every curve. The holes mark where your stitches will begin and end, so sharp turns need a hole exactly at the turn.
- Work one section at a time. Poke the holes for the vase first, stitch it, then move on. If you poke the whole design at once, it’s easy to lose track of which holes belong to which line.
- The holes will look tiny and almost invisible. That’s fine. They’re only a guide, and the stitches will cover them.
5. Thread the Needle and Start the First Line
Cut a piece of floss about 18 inches (45 cm) long. Longer thread frays as it passes through the same canvas holes again and again. Separate the six strands, then recombine the number you want (2 or 3) so they lie flat together.
Thread the needle and knot the end. Starting from the back of the canvas, push the needle up through the second hole of your first line. Then go back down into the first hole. That’s your first stitch. Pull gently until the knot sits snugly against the canvas back. Do not yank. Painted canvas dents if you pull too hard.
6. Backstitch Through the Holes
Now you’re ready to stitch the way the technique is meant to work:
- Bring the needle up from the back through the next hole ahead (hole 3).
- Take it down into the hole where your last stitch ended (hole 2).
- Bring it up through hole 4. Take it down into hole 3.
- Keep repeating. Every hole gets used twice: once for the needle going down and once for the needle coming up.
- Because the holes are already evenly spaced, your stitches will be consistent without any measuring while you stitch.
- Keep your tension even. Pull each stitch until the thread lies flat on the surface with no loops and no puckering. If the canvas ripples, you’re pulling too hard.
7. Change Colors and Finish Off
When you reach the end of a line or run out of thread, flip the canvas over. Pass the needle under a few of the long backstitches on the back, snip the thread leaving a small tail, and secure it with a bit of clear tape against the canvas. Don’t tie lots of knots on the back. They create bumps that show through on the front.
A good stitching order, based on how my piece came together:
- The vase first. It’s the largest, darkest outline, and it anchors the whole composition.
- Stems and leaves next, in dark green.
- The large coral flower and its petal outlines.
- The smaller pale yellow flowers. Light thread goes in last so the darker colors don’t smudge it with oils from your hand.
- Flower centers with a tiny circle of backstitches.
- The scattered dot texture in the bottom left corner. These are single short stitches in light blue, in loose clusters, that add movement and balance the heavy shapes on the opposite side.
8. Check, Clean, and Display
Turn the canvas over and check the back for loose tails. Tape any that are lifting. If you see graphite marks showing between stitches, tap them gently with a clean eraser. Avoid rubbing, which can smear paint. Hang it as it is. A stretched canvas needs no frame, though a slim floating frame looks lovely.
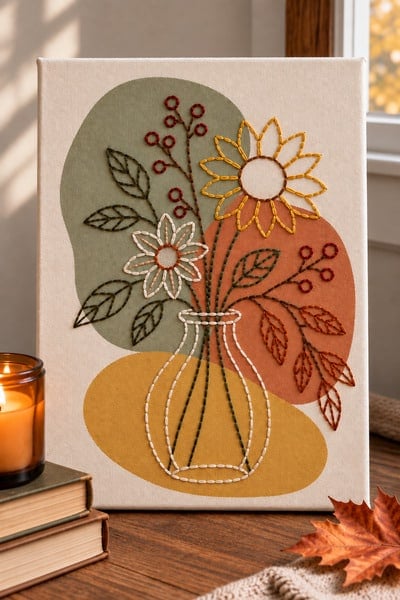
Here’s another design for you to try:
Troubleshooting: Common Problems and Easy Fixes
- My needle won’t go through the canvas: The paint is probably too thick or not fully cured. Wait longer, use a thimble, or switch to a sharper, slightly finer needle. A pair of pliers helps pull the needle out on the other side.
- My stitches are uneven: That’s almost always from skipping the pre-poked holes or from irregular hole spacing. Use a cardstock spacing guide and keep your holes straight.
- The thread keeps fraying: Use shorter lengths, around 18 inches. Painted canvas is rough on the thread. If a hole is rough or clogged, re-poke it.
- The canvas is puckering: You’re pulling too tight. Loosen your tension and let the thread rest on the surface.
- Gaps show between stitches: Your stitches are too short in relation to the hole spacing, or you went down in the wrong hole. Each stitch must end in the hole where the last one finished.
- The curve looks jagged: Use shorter stitches and more holes. Tight curves need 2 to 3 mm spacing.
- I made a mistake: Cut the thread on the back of the canvas, then pull the stitches out from the front with tweezers. The holes stay open, so you can re-stitch through them.
Fun Embroidered Canvas Art Ideas
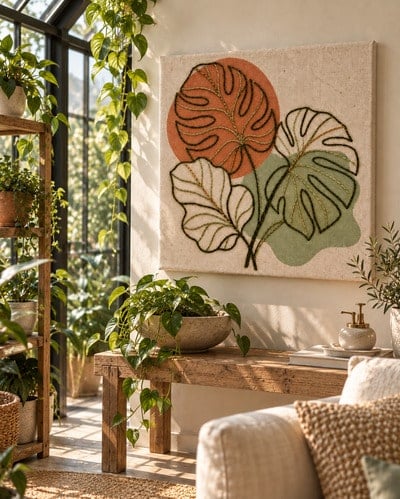
Once you know this method (trace, paint, mark, poke, stitch), you can apply it to almost any line drawing. Here are seven specific ideas to get you started. Please note the images are created for illustration purposes:
1. Terracotta and Sage Botanical Leaf
Paint two overlapping rounds in terracotta and soft sage on a warm cream background. Trace a single monstera or fiddle-leaf fig branch with simple, flowing lines. Backstitch the leaf outline in deep olive and the veins in a lighter green. A tiny line of gold metallic floss along one edge catches the light.
2. Continuous-Line Face Profile
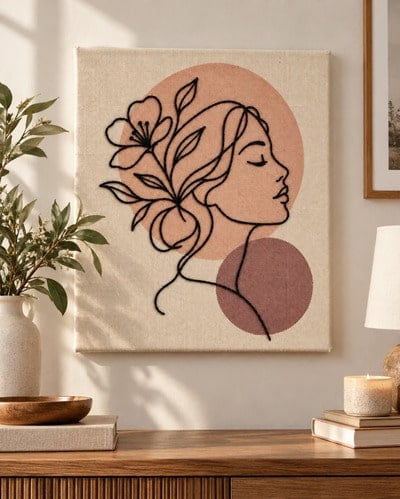
This is a very popular look right now. Paint one large blush-pink round and one small dusty-plum round. Trace a single unbroken line that forms a face in profile with a flower or a leaf growing from the hair. Stitch it in black or charcoal for a graphic result. The flow of one continuous line makes the backstitch look especially smooth.
3. Moon Phases on Midnight Blue
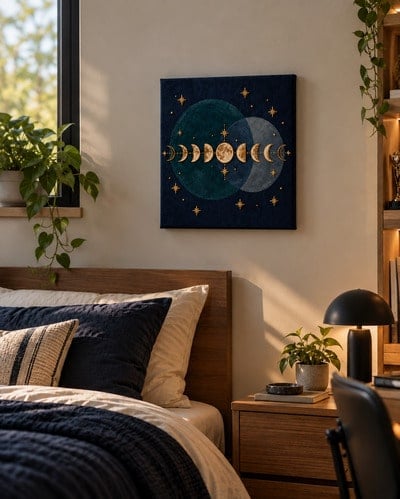
Paint the whole canvas navy. Add two big circles in a deep teal and a soft grey-blue, like a moon and its shadow. Backstitch a row of moon phases in cream and gold thread across the middle, with a scatter of tiny star stitches around them. Light thread on a dark canvas reads beautifully, but you’ll want to use 3 strands so the thread stands out.
4. Citrus Bowl in Sunny Colors
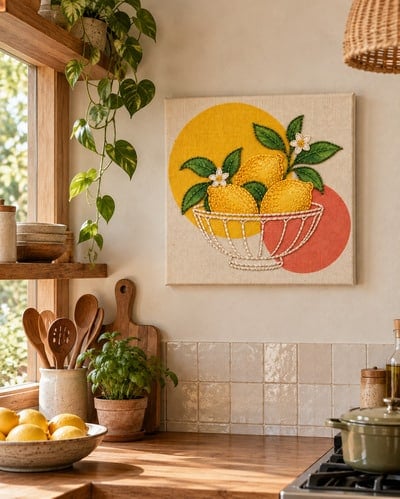
Paint a large lemon-yellow round and a smaller coral round. Trace a simple bowl with three lemons and a few leaves. Stitch the bowl in white or cream, the fruit in a darker yellow, and the leaves in bright green. It’s a cheerful kitchen piece and a good gift for a friend who loves to cook.
5. Hands Holding Flowers (Boho Line Art)
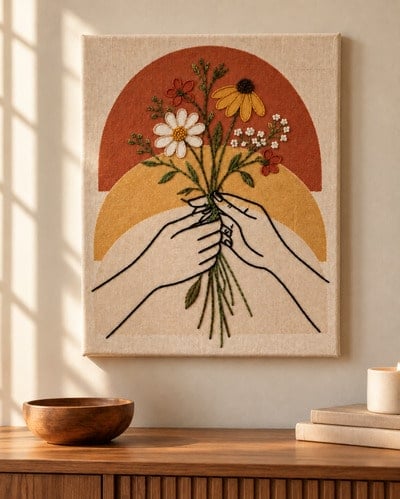
Paint a trio of arches or half-circles in rust, mustard, and cream, stacked like a sunrise. Trace two hands holding a few wildflower stems. Stitch the hands in black, the stems in green, and the blossoms in the accent colors. It’s a more detailed design, so reduce your stitch length to 3 mm around the fingers.
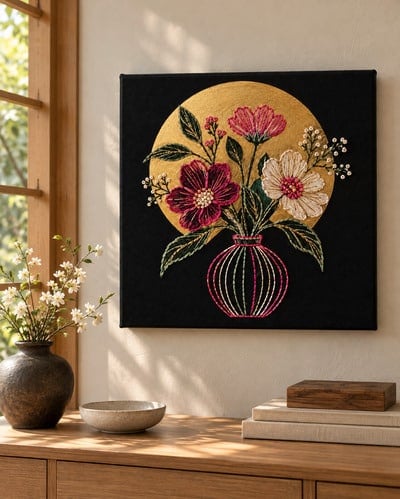
6. Black Canvas with Neon or Metallic Thread
Paint the background black with a single large matte gold round for a bold statement or gilding with gold leaf sheets. Backstitch the vase and flowers in neon pink, mint, and white. Metallic thread is slippery, so use shorter lengths, around 12 inches, and tape the tail down carefully. Pre-poked holes help a lot here, since metallic thread frays easily.
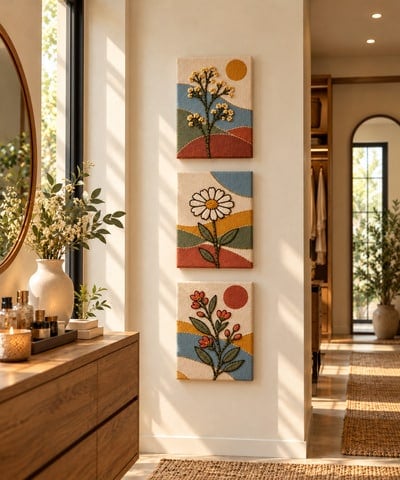
7. Mini Triptych Set
Buy three small canvases, about 5 x 7 inches each. Paint matching abstract shapes across all three, so the shapes flow from one canvas to the next. Stitch a different stem or flower on each canvas, all in the same thread colors. A small set like this works well as a gift, and each canvas takes only an hour or two of stitching.
More quick ideas: a wave and sun for a coastal look, a line-art cat curled up inside a painted circle, a mountain range with a big setting sun, a pair of lemons with a hand-stitched quote, or a family birth-flower bouquet, with each flower stitched in a different color.
Tips That Make It Easy and Effective:
- Match thread to paint, then break the rule. Choose thread colors that echo your background, then add one unexpected accent. In my piece, the coral flower pops against the blue.
- Contrast beats subtlety on painted shapes. A pale thread on a pale background disappears. Test your thread by laying it on the painted surface before you commit.
- Vary your thread weight. Use 3 strands for the main outlines and 2 strands for fine details, like flower centers.
- Keep the stitches on the front slightly angled. A little slant, like in the dotted texture at the bottom left, adds a hand-made charm.
- Leave some of the design open. Don’t stitch every petal edge. Negative space is what makes line art feel modern.
- Use good light. Painted canvas hides the holes, and you’ll squint less with a daylight lamp.
- Seal if you like. A very light coat of matte acrylic varnish on the painted areas only, before stitching, protects the paint. Keep it off your holes and thread.
Frequently Asked Questions About Embroidery on Canvas
1. Design and Paint:
- How do you transfer a design to canvas? Graphite transfer paper is the easiest method. You can also draw freehand with a soft pencil, or poke holes directly through a paper template.
- Do you need to paint the canvas first? No, but painting adds color and texture, and the abstract shapes are what give this style its contemporary look. You can stitch on plain primed canvas, too.
- Should you paint before or after embroidering? Paint first. It’s much harder to paint cleanly around thread, and wet paint can stain it. If you want a few paint details after stitching, add them very carefully.
2. Embroidery:
- Can you embroider on a canvas? Yes. A stretched cotton canvas can be embroidered with floss, yarn, or thin cord. Pre-poking holes makes it far easier, especially on primed or painted canvas.
- What type of canvas is best for embroidery? A stretched canvas with a hollow back, because you need access to the back side to pull the needle through. Avoid canvas boards and panels with solid backing. Thinner, lighter canvas is easier to stitch than heavily primed or very thick canvas.
- What needle do you use for embroidery on canvas? A sharp embroidery needle in size 3 to 5 works for 2 to 3 strands of floss. Blunt tapestry needles are for open-weave fabric and don’t pierce a painted canvas well.
- What thread should you use? Six-strand cotton embroidery floss is the easiest to control and comes in hundreds of colors. Perle cotton, wool yarn, and metallic floss are also good, but they behave differently, so test first.
- How many strands of floss should you use for backstitch? Two strands for fine lines, three strands for a bolder graphic line. Use four or more only if you’re deliberately going for a chunky look.
- Do you have to poke holes first? On a primed or painted canvas, it’s strongly recommended. The holes keep your stitch length even and prevent you from forcing a needle through a tight weave.
- How far apart should the holes and stitches be? About 4 to 5 mm for straight or gently curved lines, and 2 to 3 mm for tight curves and small details.
- Will the holes damage the canvas? No. The holes are very small, and the thread fills and covers them. A canvas is a woven fabric, so the fibers shift around the needle rather than tearing.
3. Others
- Can beginners do this? Absolutely. You only need to learn one stitch, and the pre-poked holes do most of the measuring for you. Start with a simple design with fewer curves.
- How do you hide the knots and thread tails? Secure thread ends on the back by weaving under a few stitches and taping the tail down. Avoid big knots, as they can create raised spots on the front.
- Can you wash or clean an embroidered canvas? Not in the washing machine. Dust it gently with a soft brush or a dry cloth, and keep it out of direct sun and damp rooms to protect the thread and paint.
- How long does an embroidered canvas take? A 9 x 12 inch piece like this one is about 3 to 5 hours of hands-on work, not counting paint drying. Smaller or simpler designs can be done in an evening.
- What other stitches can you use? Split stitch, stem stitch, chain stitch, running stitch, French knots, and satin stitch all work. Backstitch is the easiest to control for crisp lines. French knots work well for flower centers.
Embroidery on canvas is one of those crafts that looks far more complicated than it is. Trace a simple design, paint a couple of soft shapes, poke your holes, and let a humble backstitch do the rest. The result is a piece of wall art that feels handmade in the best way, with texture you can see and a color palette that is entirely yours.
If you try this vase-and-flowers piece or one of the variations above, I’d love to see it. Share your version and tag the us.
Written by: Hani Shabbir
You will also like:
How to frame a canvas with gift bag to make art