This post may contain affiliate links. Please see our full Disclosure Policy for details.
Add a personal touch to your paper crafts, fabric projects, or even gift wrapping with DIY custom stamps made from simple foam sheets. Get ready to unleash your inner artist and create unique designs that you can print again and again! Learn to make handmade stamps with this tutorial that uses foam sheets and cutting knife.
Normally you buy a stamp for a certain project, and then its a waste or you may not find the right stamps for your projects that when you create your own handmade stamps. All you need is a little bit of patience, while you work with cutting knife.
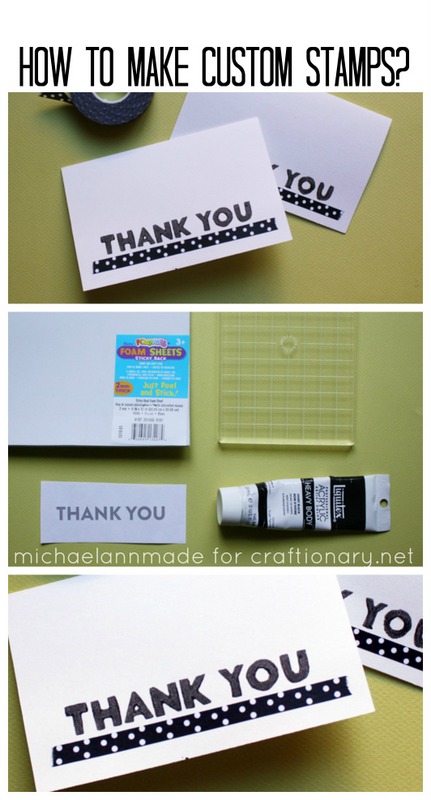
Materials to Make Handmade Stamps
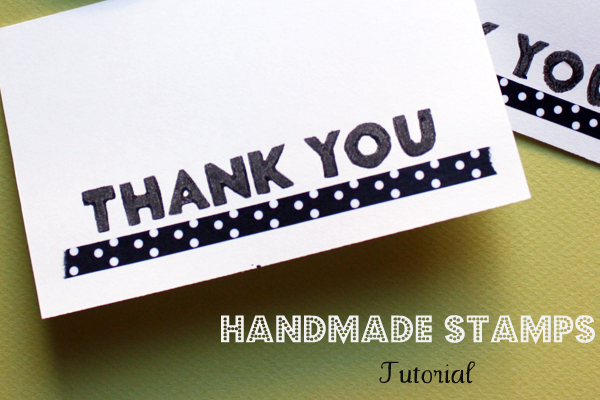
Create your own Personalized “Thank You” Cards.
- Colorful Craft Foam Sheets: The star of the show! Choose your favorite colors and thicknesses. Thicker foam (around 2mm+) is generally easier to carve.
- A Sturdy Work Surface: A reliable cutting mat or a thick piece of cardboard will protect your table.
- Your Cutting Tool of Choice: For intricate details: A sharp craft knife (X-acto knife). Handle with care! For simpler shapes: Trusty scissors.
- The Design Master: A pencil or pen to bring your ideas to life.
- Optional Design Transfer Helpers: A permanent marker for direct drawing or tracing paper if you want to perfect your design separately.
- Something to Mount On (Optional, but Makes Printing Easier!): Smooth wooden blocks or see-through clear acrylic blocks. Even sturdy cardboard scraps in a pinch.
- A Strong Bond: Double-sided tape (strong hold), craft glue, or hot glue (use sparingly on thin foam).
- The Ink That Makes It Happen: Your favorite ink pad (for paper) or fabric ink (for textiles).
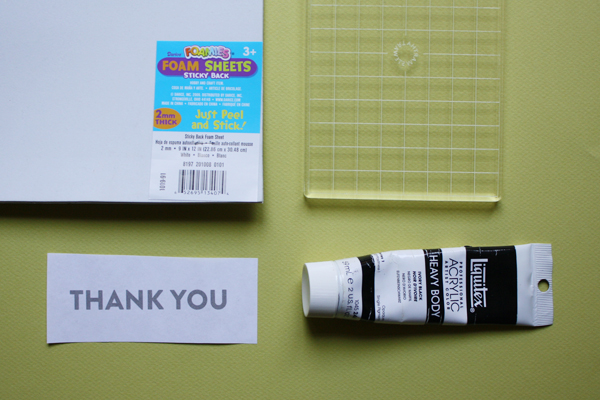
Materials to make stamps
How to Make Personalized Stamps
Print Your Design:
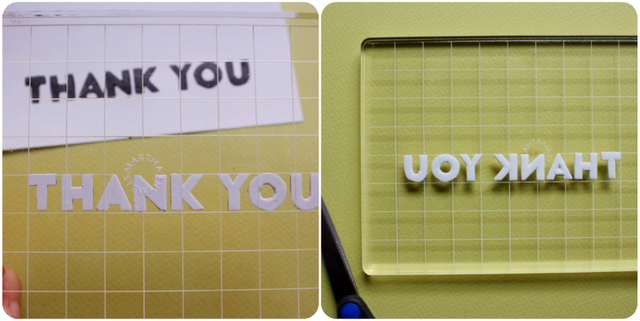
- Start by sketching or printing your design on paper. Remember this crucial tip: your stamp will print a reversed image! Keep this in mind for text or directional elements.
- Begin with simpler designs, especially if this is your first time. Intricate, closely spaced lines can be tricky to carve and might not print as cleanly.
Trace On Foam Sheet:
- Now transfer your design onto the paper backing of the foam.
- An easy way to transfer is to color the backside of the image with a lead pencil, and then carefully trace over the top of the image. The lines you drew on the front will then be transferred by the lead on the back of the foam’s paper backing.
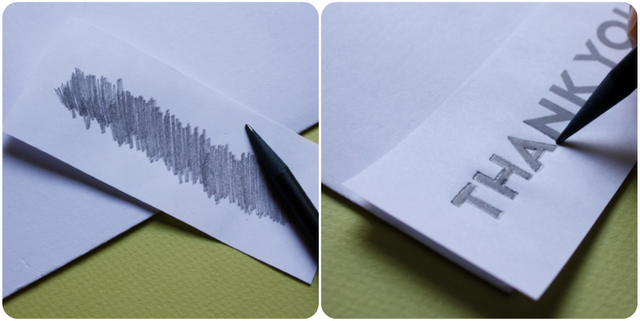
Print and Trace Design on Foam Sheets
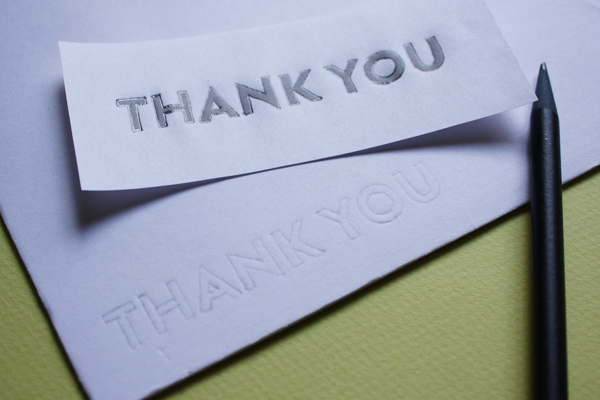
Designed Stamp ready to Cut
Cut on cutting mat:
- Carefully cut away the foam around your design with a craft knife. The raised parts are what will leave their mark! Use a firm but gentle grip, making multiple light passes instead of forcing a deep cut. Angling your blade slightly outwards can create a nice bevel, helping your design stand out.
- For simpler shapes, carefully follow your drawn lines with your scissors.
- Once you’ve cut around your design, gently peel away the excess foam. Take your time to avoid accidentally tearing the parts you want to keep.
Mount the Stamp:
- Mounting your stamp onto a block makes it so much easier to handle and ensures even pressure for a crisp print!
- Peel off the paper backing and stick your image onto the acrylic block.
- If it doesn’t have a sticky back, apply strong double-sided tape, craft glue, or a dab of hot glue to the back of your carved foam. Carefully stick it onto your chosen mounting block. If using liquid glue, let it dry completely.
Test your Custom Stamps:
- Press your new stamp onto your ink pad, making sure it’s evenly coated.
- Stamp it onto a piece of scrap paper. This is your moment of truth! See how it looks and identify any areas that might need a little more trimming.
- When you are done, the foam can easily be removed to reuse the acrylic block, or you can keep your stamp forever!
Pro Tips for Perfectly Printed Stamps:
- Sharpness Matters: Clean, sharp cuts in the foam equal crisp, clean prints. A dull blade is your enemy!
- Create Some Depth: Make sure you remove enough of the background foam so it doesn’t get inked. You want a clear difference in height.
- Even Steven Pressure: When you’re printing, apply even pressure across the whole stamp for a consistent result. Mounting really helps with this!
- Ink Wisely: Choose the right ink for your project – dye ink for paper, pigment for more coverage, fabric ink for textiles.
- Keep it Clean: Gently wipe your foam stamps with a damp cloth or paper towel after use to remove ink. This keeps them in good shape for future projects. Be gentle!
Practice Makes Perfect! Don’t worry if your first stamp isn’t flawless. Keep practicing, and you’ll be a stamp-making pro in no time!
So, what are you waiting for? Grab some foam sheets and start creating your own unique stamps! We’d love to see what you come up with. Share your DIY stamp creations in the comments below!
You will also need:
What color to paint furniture?
You will also enjoy the DIY Techniques and DIY projects Boards. These are updated regularly whenever I find unique ideas.


thanks again hani for having me! it was so much fun :]
fantastic Tip!!!!
Thanks for linking up to Serenity Saturday
Hope to see you next time
Natasha xx