This post may contain affiliate links. Please see our full Disclosure Policy for details.
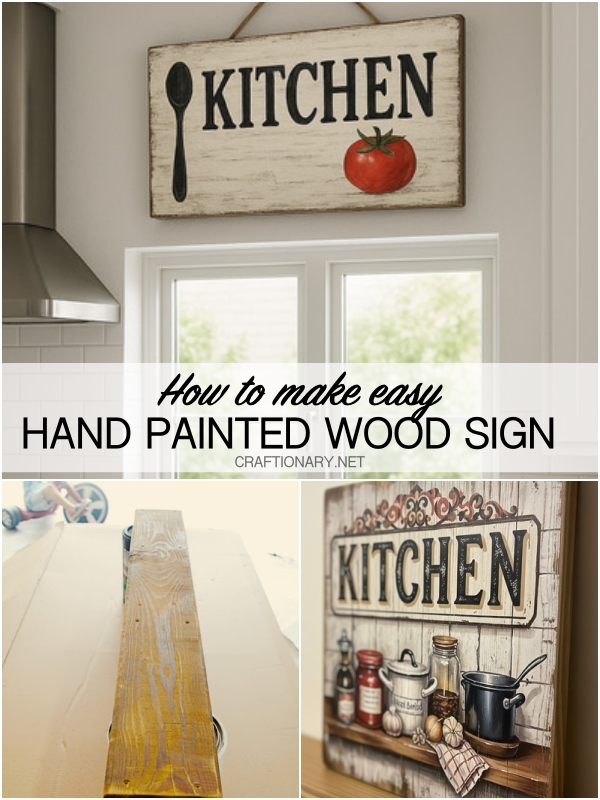
Learn how to make a hand painted distressed kitchen wood sign decor using an old piece of wood, acrylic paints, and a stencil sign using printer paper for image transfer. Find ways to make kitchen sign sayings that look like vintage kitchen sign that is ideal for farmhouse kitchen sign or country kitchen signs for lasting impact.
Apart from kitchen signs with messages you can also have kitchen signs with shapes, images and illustrations. Make eat kitchen sign or moms kitchen sign with family rules or funny sayings. Kitchen sign wall decor can be large or vertical depending on your location’s dimensions. Today’s tutorial focuses on wooden kitchen sign, however, metal kitchen sign can also be painted using this technique.

Easy Method: DIY Hand Painted Wood Sign
Why Make a Hand-Painted Kitchen Sign?
A hand-painted kitchen sign is more than just a decorative item—it adds warmth, personality, and creativity to your cooking space. It’s also a great DIY project for crafters of all skill levels.
Materials:
- Wooden board (pine, cedar, or reclaimed wood)
- Sandpaper (medium and fine grit)
- Acrylic paints
- Paintbrushes (fine-tip for details and medium for backgrounds)
- Clear acrylic sealer (optional for protection)
- Jute cord or sawtooth hanger
- Scissors and tape
- Pencil or stylus for tracing
- Regular printer and paper (not transfer paper)
- Chalk or graphite
- Design/word art printed from your computer (mirror-flipped if needed)
Tip: You could also use vinyl cutouts for this project, but probably couldn’t rough it up with sand paper as much!
Related: 150 Wood Burning Ideas – Objects and Designs

DIY Hand Painted Sign Instructions
Step-by-Step Instructions
1. Prepare Your Wood Surface
- Lightly sand the wood using medium-grit sandpaper to remove splinters or residue.
- Wipe clean with a damp cloth and let dry.
- Optional: Apply a base coat of white or off-white acrylic paint for a clean background.
Wood Selection and Preparation
Choosing the right wood ensures a smooth painting experience and a long-lasting sign. Ideal choices include:
- Pine: Lightweight and soft, making it easy to sand and paint.
- Cedar: Naturally resistant to moisture and insects—perfect for kitchens.
- Poplar: Smooth and fine-grained; great for detailed painting.
- Reclaimed Wood: Eco-friendly and full of rustic charm (think old fence boards or pallet wood).
Sustainability Tips:
- Source reclaimed or scrap wood from old furniture, construction offcuts, or secondhand stores.
- Avoid MDF or particle board—they often contain formaldehyde and aren’t eco-friendly.
- Use non-toxic, water-based primers and low-VOC paints when possible.

Reclaimed wood piece for crafting
I started with an old piece of wood…thinking it was from a shorter fence by the nail-markings.

I painted it with a lovely shade of “Bimini Blue” in an acrylic paint.

Prepare the wood for painting
2. Create and Print Your Design
- Use a program like Canva, Word, or Adobe Illustrator to type or design your sign (e.g., KITCHEN, Let’s Eat, Bake and Bless).
- Enlarge to match the dimensions of the wood and print parts of design on standard printer paper.
To create my stencil, I measured the sign and created a document in that size in Photoshop Elements. I tile printed it to keep my dimensions in tact. You could easily do this in any word-processing document…just keep in mind the dimensions of your sign and print as many sheets as you’ll need to cover it!

Creating design to paint on wood
3. Wood Design Transfer Technique Without Any Fancy Tools:
Transferring your design to wood doesn’t require vinyl cutters or transfer paper. Here’s a simple and budget-friendly method using printer paper and chalk or graphite.
- Print Your Design on regular paper (mirror the image/text if needed).
- Rub Chalk or Graphite on the back of the paper.
- Position and Tape the paper (chalk side down) on your wood.
- Trace Over the Design with a pencil or pen. This will leave a visible outline on the wood.
- Remove the Paper and you’re ready to paint!
Tip: Use white chalk for dark backgrounds and graphite for light ones.
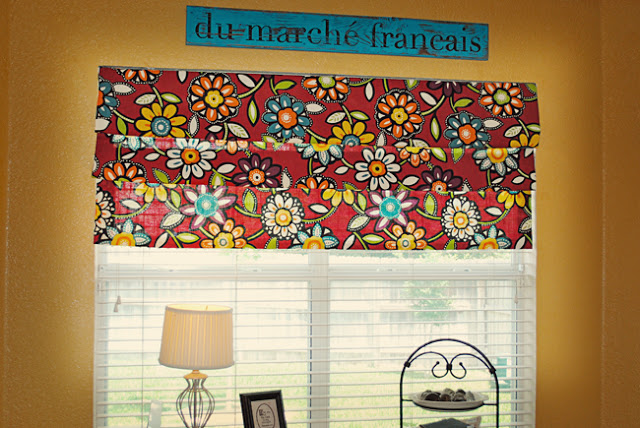
This sign says “The French Market”, I used Google’s Translator to make sure I had it right.
After printing and trimming the edges, I used painter’s tape to adhere it to my sign.

Tape design on wood to trace
And then trace your words with a fine tipped pen. Press fairly hard so you can make an indention into the wood through the paper.

Tracing method on wood
After you’ve pulled off your paper, you’ll see the grooves your pen left.

Indent from trace on wood
For an extra-measure, I outline the letters with a pencil directly on the wood.

Tracing design on wood
4. Paint Your Sign
- Use fine brushes and acrylic paint to carefully fill in the outlines.
- Let each color dry before layering or adding shadows for a dimensional effect.
- Optional: Add kitchen-related motifs like spoons, tomatoes, or herbs for charm.
Acrylic Painting Tips on Wood:
- Choose Quality Acrylic Paints: Craft-grade works, but artist-grade offers better coverage and less fading.
- Use the Right Brushes:? Flat brushes for backgrounds and block letters. Detail brushes for small text or accents
- Apply in Thin Layers: Allow each coat to dry fully before adding another to avoid smudging or clumping.
- Let Paint Cure: Don’t rush—wait at least 24 hours before distressing or sealing.
Sustainability Tips:
- Select non-toxic, water-based acrylics (look for AP-certified labels).
- Reuse water cups, paint trays, and brushes.
- Store leftover paint in airtight containers for future touch-ups or small projects.
Then I fill in my letters with plain black acrylic paint. The grooves from the pen help the paint stay within the letter’s perimeters.

Hand painting on wood
5. Distress the Sign for a Rustic Look
Once dry, use fine-grit sandpaper to lightly sand the surface and edges.
Focus on corners and letter edges for a naturally aged appearance.
Easy Distressing Techniques for the Best Rustic Finish
Distressing your sign gives it a charming vintage look—and it’s easier than you think. Here are some methods:
1. Sandpaper Distress:
- Lightly sand corners, edges, and letters with 220-grit sandpaper after paint dries.
- Sand unevenly for a more authentic weathered look.
2. Dry Brush Technique:
- Dip a dry brush into a small amount of paint.
- Wipe excess off on paper towel, then brush lightly across the sign for streaky, aged color.
3. Vaseline Resist Technique:
- Rub petroleum jelly on areas you want the base layer to show through.
- Paint over the board, then wipe off the paint from jelly-covered areas after it dries slightly.
4. Stain Over Paint:
- Apply a light wood stain after painting to tone down brightness and give a vintage patina.
5. Layer Colors:
- Paint a base color, then a second color. Sand to reveal the base for a layered effect.
After the letters were completely dry, I distressed the piece with the palm sander.

Distressing wood
6. Seal the Sign (Optional)
If the sign will be in a humid or high-traffic area, use a clear acrylic sealer to protect your artwork.
Sealing for Protection and Polish
Sealing your wood sign protects the paint from grease, humidity, scratches, and fading—especially in kitchens. Here are some sealant Options:
- Matte Finish: Subtle and rustic
- Satin Finish: Slight sheen, great for modern spaces
- Gloss Finish: Shiny and bold, but may highlight imperfections
Sustainable Choices:
- Use non-toxic, water-based sealers like Polycrylic.
- Avoid aerosol sprays—opt for brush-on formulas for better coverage and less waste.
How to Apply:
- Wait 24–48 hours after painting.
- Use a foam brush or soft-bristle brush to apply a thin coat or simply spray on the wood piece.
- Let dry completely; apply 2–3 coats if needed.
Related: Best Sealer: How to Waterproof Acrylic Paint on Wood Crafts
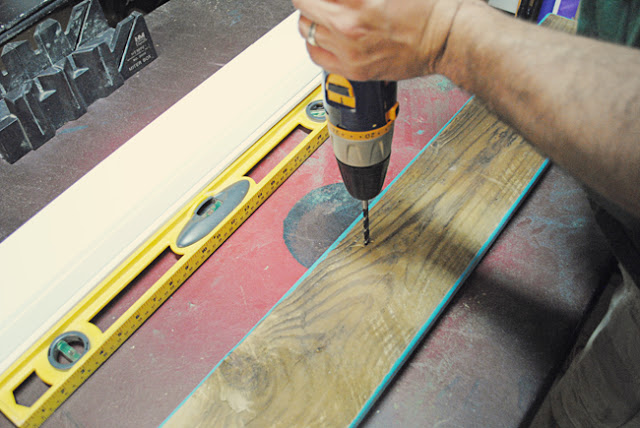
7. Attach the Hanger
Attach a sawtooth hanger, D-rings, or staple jute cord to the back for easy hanging.
My husband drilled three holes in the back for hanging it.
Although a wee-bit crooked in this photo, this is where she went in my breakfast area.

The French Market – Hand Painted Kitchen Sign
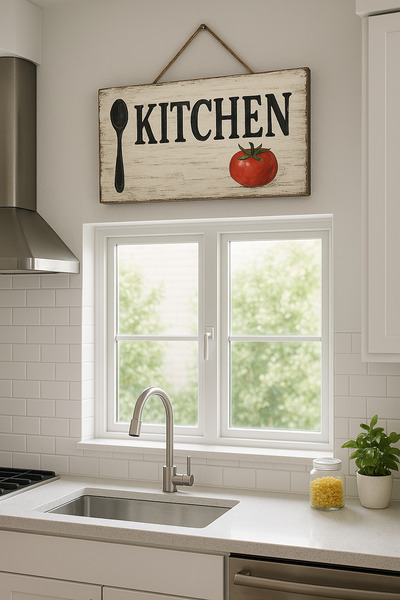
Displaying Your Sign in the Kitchen
Hang your finished sign above the stove, on a gallery wall, or near your pantry. Its handcrafted charm enhances farmhouse, cottagecore, and rustic-themed kitchens beautifully.
Common Kitchen Phrases for Signs
These are widely loved and rank well in DIY and home decor circles:
1. Classic and Functional
- KITCHEN
- The Heart of the Home
- Gather Here
- Let’s Eat
- Home Cooked Meals Served Daily
- Eat Well, Laugh Often, Love Much
- This Kitchen is Seasoned with Love
Kitchen sign with simple elements

A sign board with vintage objects
2. Humorous and Fun
- Whip It Good
- Chop It Like It’s Hot
- Just Beat It
- Kitchen Closed (This Chick’s Had It!)
- Life Happens, Coffee Helps
3. Farmhouse and Rustic
- Farm Fresh
- Bake and Bless
- Pantry Provisions
- Rise and Shine
- Welcome to Our Farmhouse Kitchen
4. Coffee Corner Ideas
- But First, Coffee
- Espresso Yourself
- Coffee Bar Open Daily
- Coffee is My Love Language
Practical Usage Tips for DIY Wood Signs
- Choose the Right Wood: Pine, cedar, or reclaimed wood with minimal warping.
- Check for Warping: Ensure your board lays flat before painting.
- Seal It: Use matte or satin acrylic sealer if your sign is near moisture (kitchen sinks, stovetops).
- Add Hanging Hardware: Sawtooth hangers, D-rings, or jute rope for farmhouse style.
- Use in Multiple Ways:? Hang above windows, doors, or coffee bars, prop on countertops or open shelves or use smaller versions for pantry or cabinet labels.
- Customize Seasonally: Use chalkboard paint for interchangeable phrases.
Related: How to Make a Chalkboard using Foam Boards
Troubleshooting Common Problems:
| PROBLEM | POSSIBLE CAUSE | FIX |
| Paint won’t stick | Oily or dusty surface | Re-sand and clean thoroughly |
| Transfer is too light | Not enough chalk/graphite | Retrace with more pressure or reapply chalk |
| Letters are jagged | Using rough brushes or shaky hand | Use painter’s tape for clean lines; use detail brushes |
| Paint bleeds outside lines | Paint too watery or unprimed surface | Use thicker paint, or seal surface before painting |
| Sign looks too “new” | No distressing or layering | Add sanding, dry brushing, or second color layers |
| Sealer streaks | Overworked application | Apply in thin, even coats and avoid going back over wet areas |
Creating your own hand-painted kitchen sign is an affordable and rewarding way to personalize your space. With just a wooden board, printer paper, and acrylic paint, you can craft a one-of-a-kind piece that brings joy to your kitchen daily. Whether you’re gifting, decorating, or selling—this DIY project is a perfect blend of creativity and charm.
You will also like:
Inkjet Printing on Fabric using Freezer Paper (Easy Instructions)
30 Craft tips you will love to know
18 Easy and creative decorative letters


I love it!! Such a cool technique.
Very beautiful sign! I love the French wording, especially since we just got back from Paris! I already subscribe to Kristi's blog (love her ideas) as well as Craftionary. So much inspiration! I've pinnned this sign. I create altered art.
Very cool sign and such an awesome tutorial! Thanks for sharing 🙂
Kristi you did a great job. It is so nice to read your guest post. Blessings,Shelia
What a great tutorial! Thank you Hani and Kristi!
Found this tutorial via twitter, very cool. It is fascinating how techniques have changed. As a painting craft apprentice back in the day we used to use an epidiascope which was like a projector to beam designs onto surfaces. Then we would pencil the lines straight onto the wall etc, dodging the light. Now print it out and trace. That's progress.
Another approach where you can use literally any piece of timber (new, varnished or waxed) and know the basic paint layers wont ever deteriorate or lift disastrously, is to use chalk paint and then distress and wax the finished job, or varnish it for exteriors. cheers.
Love this….you are such a creative lady! 😀
LOVE this!
Once I’m in Photoshop elements where to I go to do a document…can’t seem to find the right spot.? It keeps wanting a pic to work with.
Hi there, you can create a document on word doc or canva as an easy substitute to photoshop. I hope this helps!