This post may contain affiliate links. Please see our full Disclosure Policy for details.
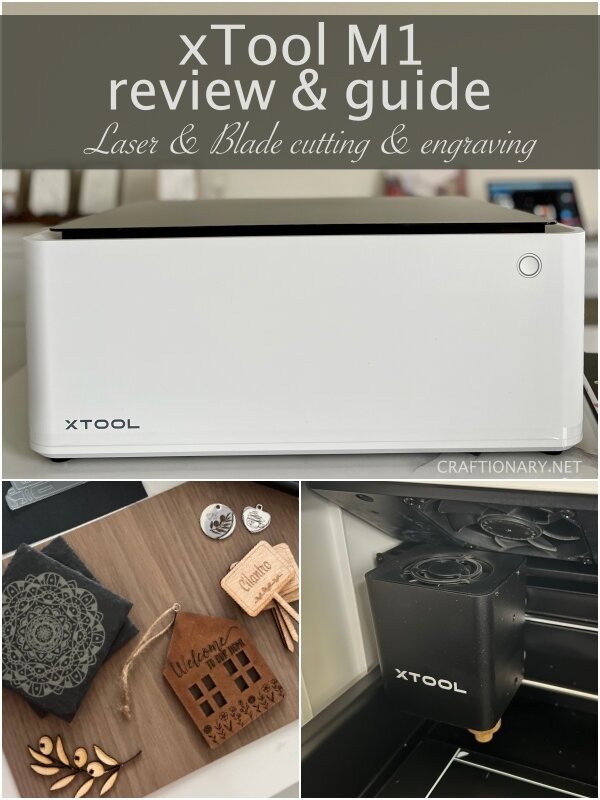
XTool M1 is a hybrid 3-in-1 laser cutting and engraving and blade cutting tool that allows you to diversify a variety of handmade projects. This hybrid laser and blade cutting machine is reasonably priced and fits perfectly on a desktop. It is ideally sized for craft hobby as well as small businesses. It works smoothly and provides precise and neat outputs. In the xTool M1 review today, I am going to share my personal experience overview, unboxing M1, connecting the hardware and downloading the software and finally testing out a variety of materials to conclude whether it’s worth buying.
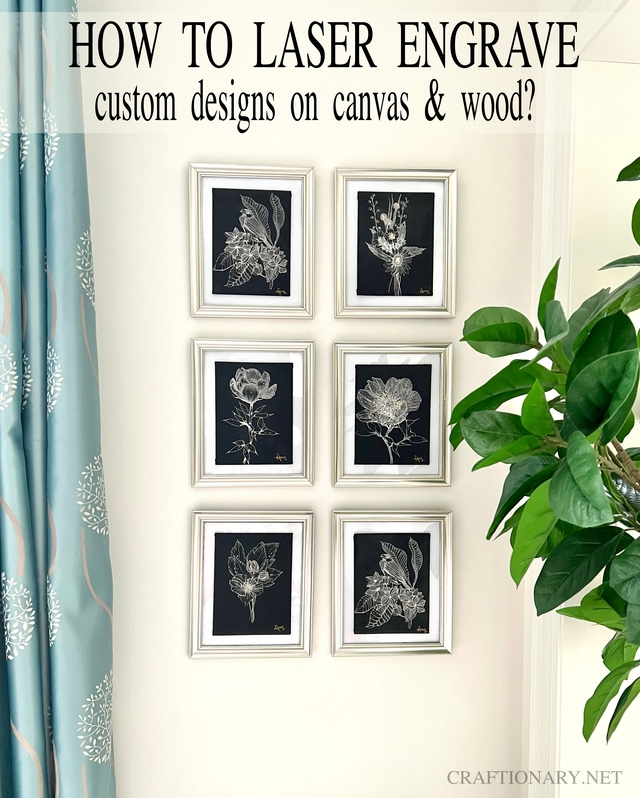
You will also like: Laser engrave canvas with custom drawings using xTool M1
We will cover:
- Beginner’s guide xTool M1 Video Review
- xTool M1 laser and blade cutting machine features
- Machine Cost
- Diode laser vs CO2 laser vs Fiber laser
- Materials to use
- Safety features of M1
- Unboxing xTool M1
- Connecting the machine
- xTool air purifier for venting machine
- How the machine works?
- xTool Creative Space
- How to use xTool for cutting and engraving?
- Laser cutting
- Laser engraving and scoring
- Blade cutting
- Pros
- Cons
- Conclusion
Beginner’s Guide to xTool M1 Video Review
You might be interested in the video review of M1 and can find it below. However, there is valuable information that I have included in this article you may not want to miss out.
XTool M1 Laser and Blade Cutting Machine Features:
Before we start unboxing let’s look at some characteristics:
- Diode Laser and Blade Cutting Machine
- Product size of 22″ x 18″ x 9″ (L X W X H)
- Working area 15″ wide x 12″ tall
- Carving precision 0.01 mm
- Weight 21.6 lb (9.8 kg)
- Features: Blade cutting, Flat cutting, Flat engraving and Rotary engraving
- Laser output: 5W-10W
- AI Auto focus feature with zero manual adjustments
- Built-in software
- 16 MP high resolution smart camera with real-time workspace preview on xTool software.
- Offline operation
- Pre-assembled with no complex screws or settings
- Batch processing on multiple materials in one time
- Setup and make your first project in less than 30 minutes
- You can use rotary accessories and engraving attachments to engrave on cylindrical objects like tumblers, flasks, rolling pins and more.
- You can remove the bottom of the machine and use risers to work with thicker materials.
Machine Cost
The xTool M1 comes in two models with laser wattage being the only difference. I would recommend to go with the higher wattage as it allows you to work on projects faster and more efficiently for a small price difference.
- xTool M1 5W – $1299 (currently on sale for $899)
- xTool M1 10W – $1499 (currently on sale for $999)
Diode Laser vs CO2 laser vs Fiber Laser:
M1 is a diode laser cutting and engraving machine. Let’s compare it with fiber and CO2 laser to help you make your decision. xTool also sells the fiber and CO2 laser machines.
Diode Laser:
Material: Diode laser is suitable for small business and hobbyist with the ability to cut and engrave. It can cut plywood, solid wood, acrylic, paper, cardboard and leather and engrave metal, ceramic, glass, along with the ones it can cut and some more.
Power: 5W-15W
Lifespan: 25,000-50,000 hours
Speed: Fast (higher the power, higher the speed)
Price: typically $700-$1500
CO2 Laser:
Material: CO2 laser have a broad spectrum of materials in addition it can cut including MDF, corian, rubber, plastic, glass and fabric and engrave fabric, steel, plastic and brick to name a few.
Power: 40W-300W
Lifespan: 3,000-8,000 hours
Speed: Faster
Price: $3000-$4000
Fiber Laser:
Material: Fiber laser can cut and engrave most metals as their standing difference in addition.
Power: 2000W-4000W (These are industrial fiber laser machines)
Lifespan: about 100,000 hours
Speed: Fastest
Price: $15,000-$20,000
Hence, if you want to start cutting and engraving with laser as a hobby or small business at a low cost diode laser machine is your best bet.
Materials to use
With preset recommendations for a variety of materials this machine provides ease of use with just selecting the material with a click. However, you can manual select speed, pressure, and process to your desired settings as well. It is compatible for use with the following materials:
- Cork
- Wood, basswood plywood, pine plywood and others
- Metal and stainless steel
- Stone
- Laser marking colored paper to work on ceramics, mirrors and glass
- Leather
- Acrylic
- Heat transfer and self-adhesive vinyl
- Laser engraving marking paper
- Kraft Paper
- PVC sheets
- Sticker sheets
The material packages include metal business cards, wooden poster stands, wooden tags, metal business card holders, stainless steel necklaces, bamboo plant labels, pine coasters, rock coasters, unfinished wood piece and a variety of different colored vinyl, paper and acrylics to name a few.
Safety Features of M1:
XTool M1 is designed to use indoors as well as outdoors, making it safe to use at home without any worries.
- It has an efficient ventilation system with a built-in fan that blows out any dust and smoke from the exhaust pipe.
- It’s a high quality FDA certified Class 1 product.
- The lid cover is tinted with blue light filtering to protect your eyes from laser processes.
- Machine stops when lid is open.
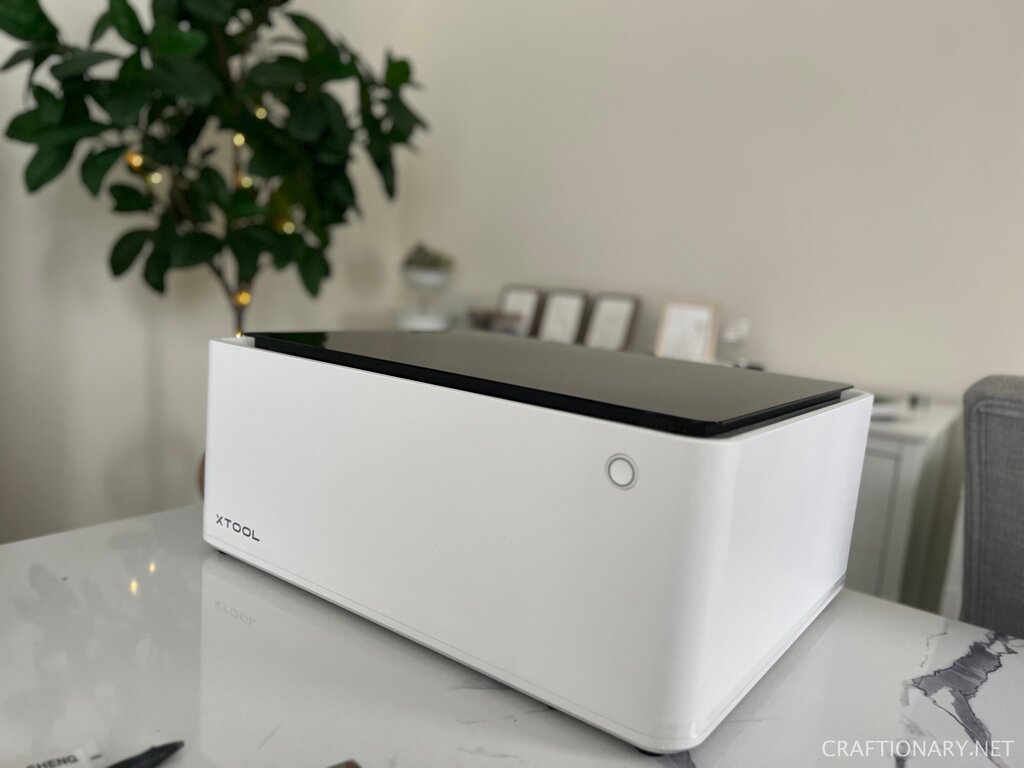
Unboxing XTool M1:
I like the fact that it is light-weight allowing me to unpack without any assistance. It is large enough to work on good size projects and convenient to place on your working table. This one box provides you complete material package along with accessories to start working on your projects. You will find:
- XTool M1 Machine
- Power plug
- USB cord
- Basic material package
- Light grip and strong grip cutting mats for paper and fabric respectively
- 45° replacement blades set of 5
- Exhaust pipe with clamps, connector, and screws to assemble
- Triangular prisms
- Rotary attachments for engraving on circular objects like tumblers
- Risers
- Premium material package
Connecting the machine:
The following are the quick 3 steps to get started making your projects:
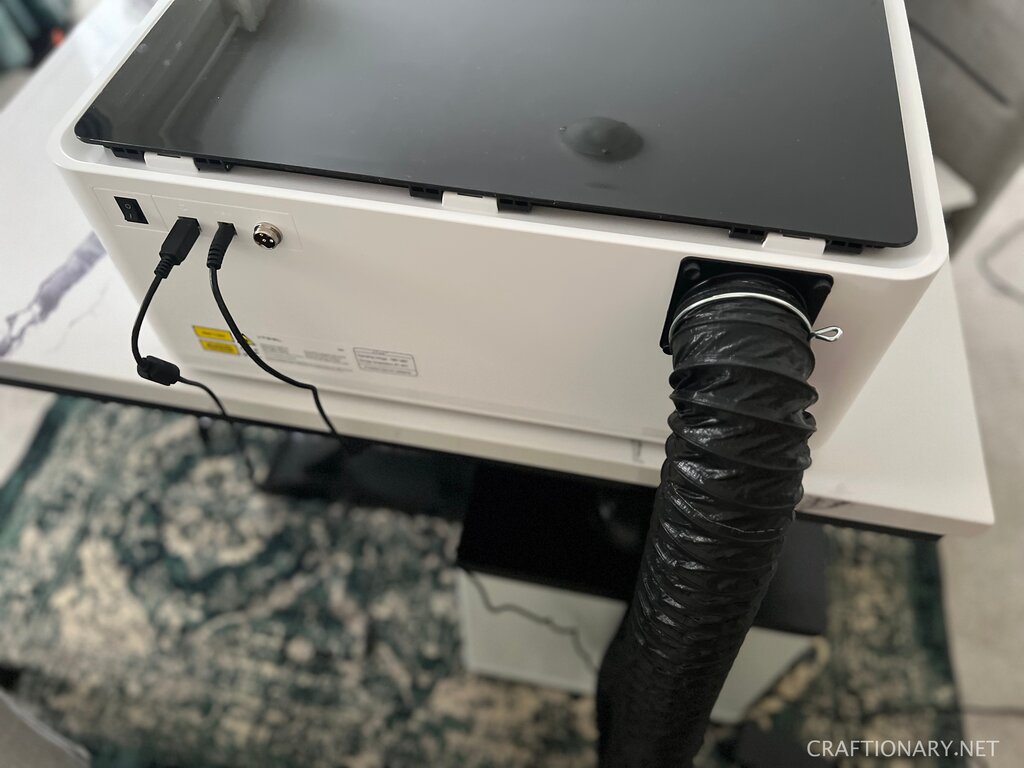
1. Place the machine on the table and connect the power plug and USB respectively on the back. You also have the option to connect with WiFi but I just want to make sure I am not interrupted while working due to weak internet signals for any reason.
2. Secure the connector with screws at the back of the machine on the vent. Now connect the exhausting pipe to the back of the machine with the clamp. You can pass it out of the window or connect it with an air purifier.
3. Next step is to download the software. XTool Creative Space (XCS) is compatible with windows, apple and all other operating systems. Once downloaded open the software and click connect device and it will automatically connect to the machine and the in-built camera will allow you to see the inside workspace in real time.
4. Get ready to make your projects. Place your material, choose your design and process.
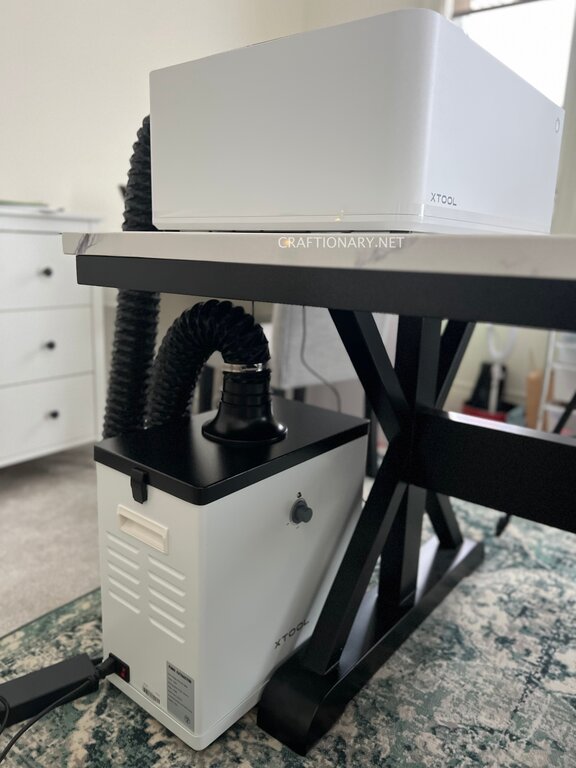
XTool Air Purifier for venting machine
Laser cutting produces smoke and impurities while it cuts and it is recommended that you use a air purifier when working indoors. If you choose to work outdoors in a garage or near an output window you may not need an air purifier and can simply move the exhausting pipe out of the window for that purpose. You can use any air purifier, however, you can bundle on xTool air purifier with your purchase as well.
It is a 3 layer filtration with activated carbon and HEPA filters to achieve a 99.7% purification rate. With a low noise rate of below 55dB, it provides a quiet working space with high quality and durable filter. The only downside is that it is heavy due to carbon at the bottom.
Connect Air Filter to M1: It is very simple to connect the exhausting pipe with the air purifier using a clamp and turn it on before working on your project. You can see how it exhausts the air out of the working space in the video review I shared above.
How the machine works?
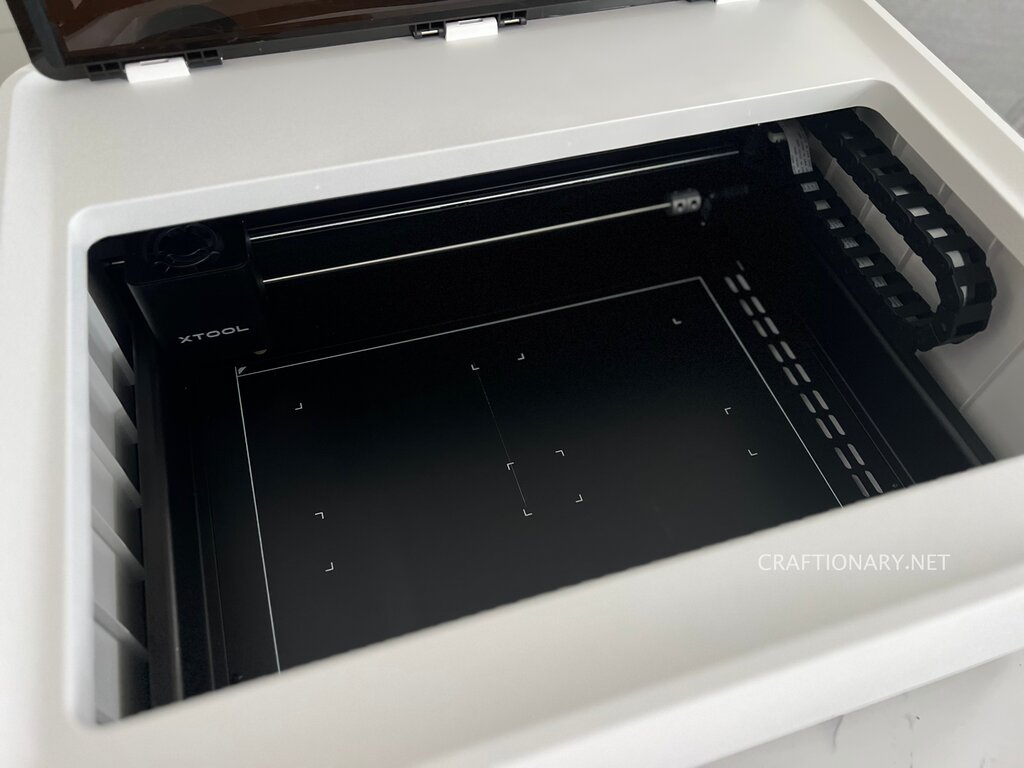
- The machine is pre-assembled and contains a laser module with both the laser and gold blade module in one tool.

- There are rollers on the right side that allow the module to move around the working space while cutting and engraving.
- There is an in-built camera that helps you see the material inside the machine and align your design in real-time using the xTool Creative Space. The laser cutting and engraving works with SVG and PNG files, however, for blade cutting you will need a vector file such as SVG.
- It’s as easy as insert your design, select your settings and hit process. We will talk about it in detail below.
- There is a single button on the front right side which you press to start the process for any project.
- You will need to place the triangular prisms on the bed of the machine and place your material such as plywood board on top for laser cutting. The prisms allow for better air passage as the machine cuts.
- Laser engraving and scoring can be done by placing the object on the bed in the working space without the triangular prisms.
- The sticky cutting mats come handy when using blade cutting to keep the paper, acrylics, vinyl and more such materials in place as the blade cuts.
- The rotary attachments are used for cylindrical and round objects engraving.
- Use risers to lift the machine and remove the bottom to work with objects that don’t fit inside the machine’s working space.
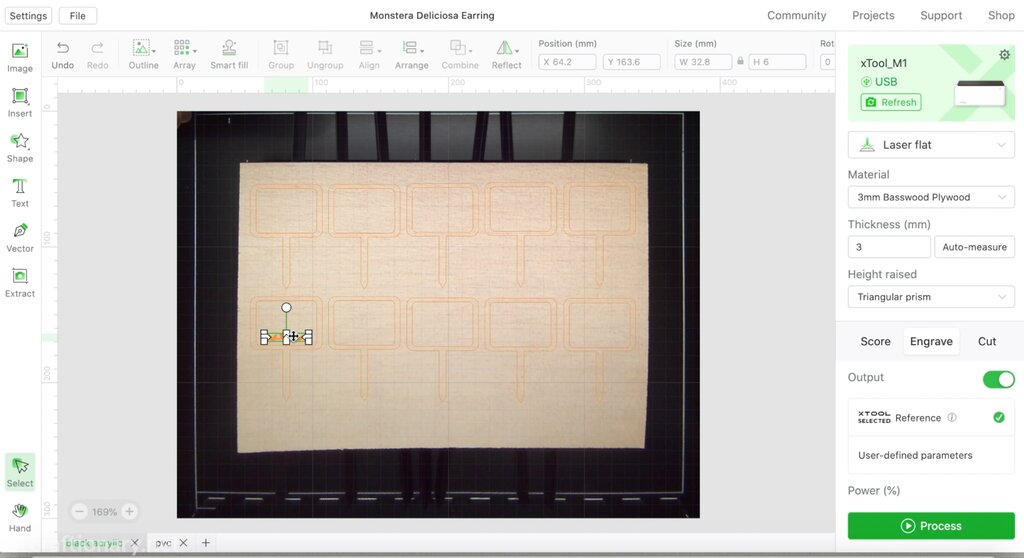
xTool Creative Space
The software is self explanatory and easy to use.
Menu:
It has a vertical and horizontal menu for inserting and designing your design file.
1) The vertical menu allows you to insert a downloaded PNG or SVG file, add shapes, text and use vector to make your own designs. There are a variety of in-built shapes and text fonts to choose from, however, you can always download and add more similar to cricut and silhouette software.
2) The horizontal menu allows you to make changes to your design. You can resign, position and rotate your image. There is a small lock on the size which when unlocked allows you to change the ratio of your design to suit your needs. You can group, ungroup, arrange, combine, reflect, undo and redo as you work.
3) On the top right you will find community tab with tutorials, weekly updates, community and discussions as the most prominent options in my opinion. Some projects that you can use directly from the software. You can filter them based on difficulty level, processing type and material type. You can easily get support and shop with just a click as well.
Settings:
The settings allows you to choose your surface and material.
1) There are a variety of surface options:
Laser Flat: Used for cutting and engraving with laser on wood, acrylic and more.
Laser Cylindrical: This works with rotary attachments to work on circular surfaces like tumblers.
Open Plane: When working on larger projects, remove the bottom and use risers to work in open plane.
Blade cut: This option works with blade and cutting mats to cut vinyl, paper and more.
Print and blade cut: Print and cut using the blade.
2) For the material also they have preset settings that work swiftly with all my testing except vinyl where I had to manual change the settings. You can choose these settings and adjust the thickness for your own materials if different.
Some materials you can choose with a click for laser include:
- 3mm Basswood plywood
- 3mm acrylic
- Rock coaster
- Silver bone dog tag
- Cork desk pad
- Metal business cards
- Cardboard
and for blade:
- Heat transfer vinyl (HTV)
- Removable self-adhesive craft vinyl
- Brown craft paper
- PVC sheet
- PU Leather
- White sticker paper
Output:
In the output you can select to score, engrave or cut with laser or cut with blade.
You can then go with xTool selected reference and if you require to change the settings you can select user-defined parameters.
This allows you to adjust the pressure, speed and pass settings.
How to use xTool M1 for cutting and engraving?
Now we will look at each of the functions of the machine individually in detail.
Laser Cutting
You can get a clean thick cut in one go with two laser beams infused to give a powerful spark for cutting up to 3mm acrylic and 10mm wood in one pass.
1) Lay down the triangular prisms and place your material on top.
2) See the real-time image on the xTool Creative Space. Now insert your design and select your surface as flat laser, material as basswood plywood and height raised as triangular prisms. The software recommends settings and they work swiftly. Select the design, pick laser cutting and click process.
3) The machine prompts you to push the single button on the M1. Click it and it starts processing.
The edges of the wood may look burnt depending on the material you are cutting. You can increase the speed of air purifier to maximum to avoid this phenomena. You can also use rubbing alcohol to remove some of the marks. Personally, I like the slightly browned edges it looks natural and vintage in my opinion.
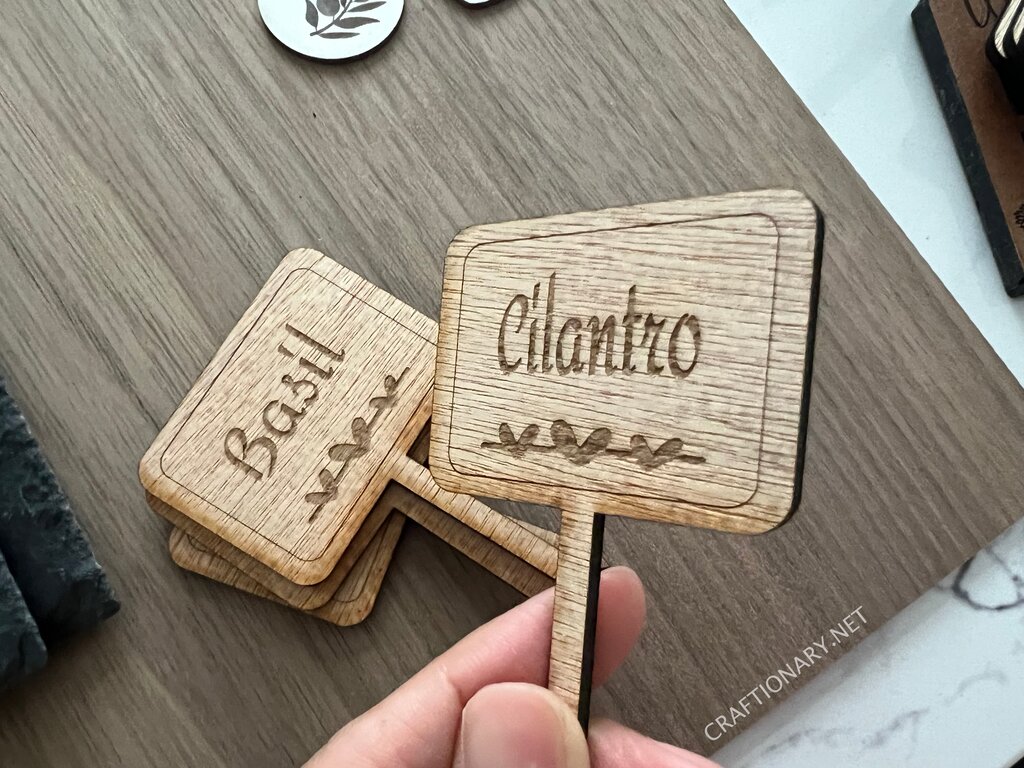
Laser engraving and laser cutting garden markers in one pass.
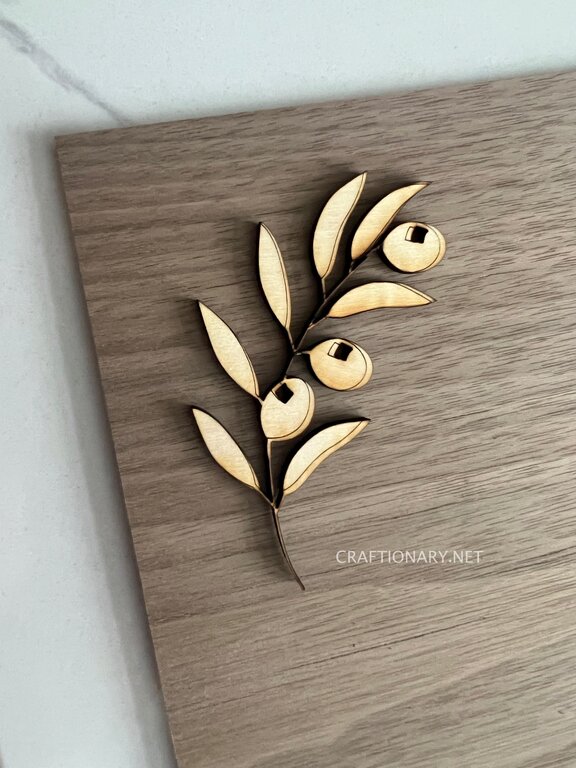
Laser Cut Materials:
The following materials I tested out with their settings and the results were great unless stated otherwise. I will keep testing and updating here.
- Acrylic sheet
- 3mm Basswood plywood
- 6mm wood ornament
- Cherry plywood
- Pine plywood
- Walnut plywood
- Leather (cut with blade only, laser will burn and produce foul smell)
3mm basswood plywood cutting in one pass.
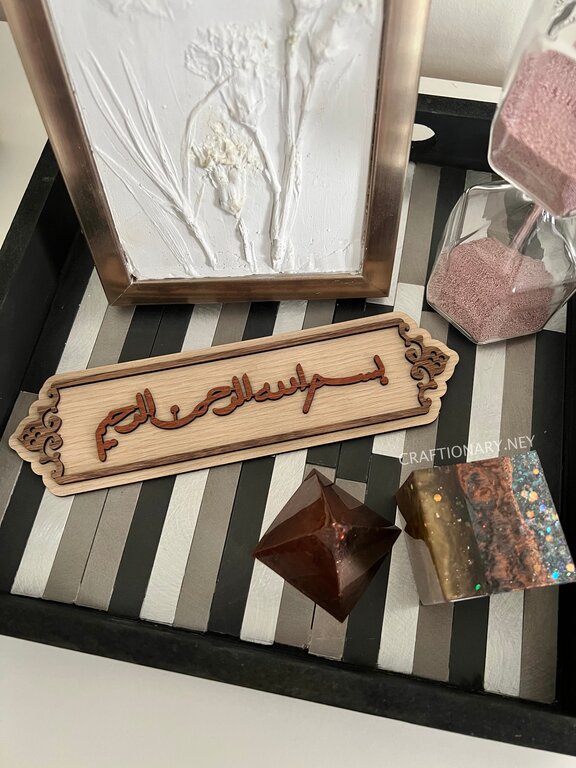
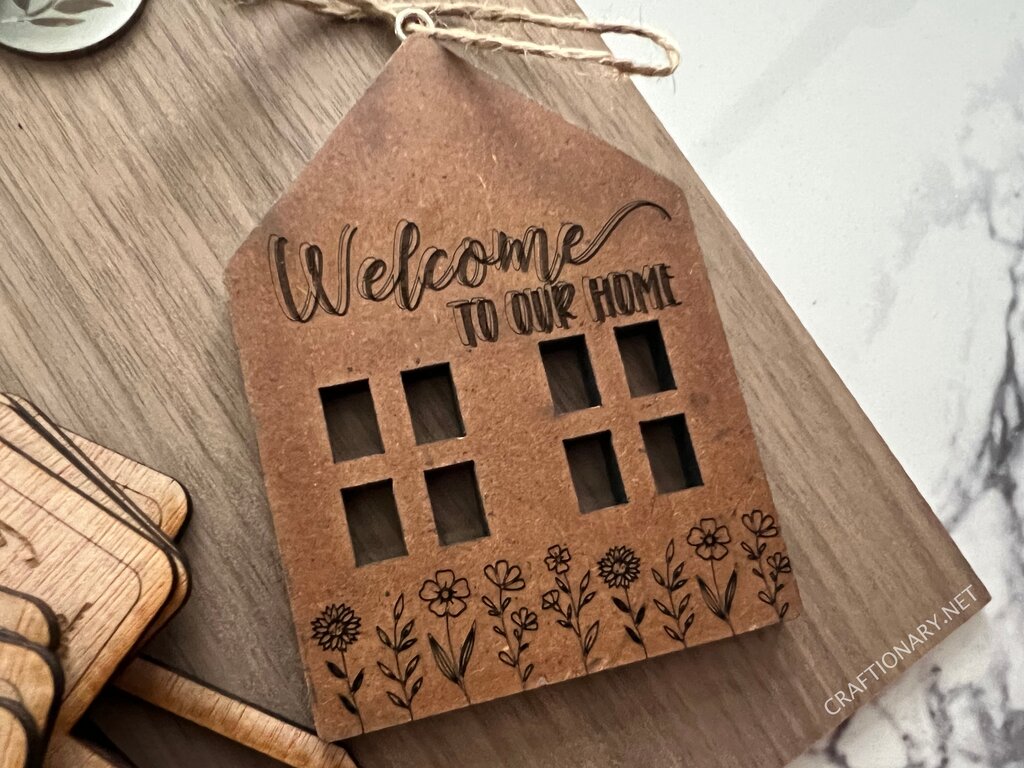
A wooden bookmark with three layers of plywood designed with frame and calligraphy.
Laser Engraving and Scoring
Engraving: Engrave the inside of a design completely.
Scoring: An outline using the engraver tool for painting, assembling or decorative outlines.
Engraving has taken this essential tool to another level. It can accurately engrave the finest prints to the smallest size using FAC (Fast Axis Collimator) lens to focus on ultrafine lines upto 0.01mm movement accuracy and compressed laser spot.
1) Place your material on the bed of the machine with or without triangular prism.
2) See the real-time image on the xTool Creative Space. Now insert your design and select your surface as flat laser, material as silver stainless steel tag and height raised as “no”. The software recommends settings and they work swiftly. Select the design, pick laser engraving or scoring and click process.
3) The machine prompts you to push the single button on the M1. Click it and it starts processing.
Laser Engrave and Score Materials:
The following materials I tested out with their settings and the results were great unless stated otherwise. I will keep testing and updating here.
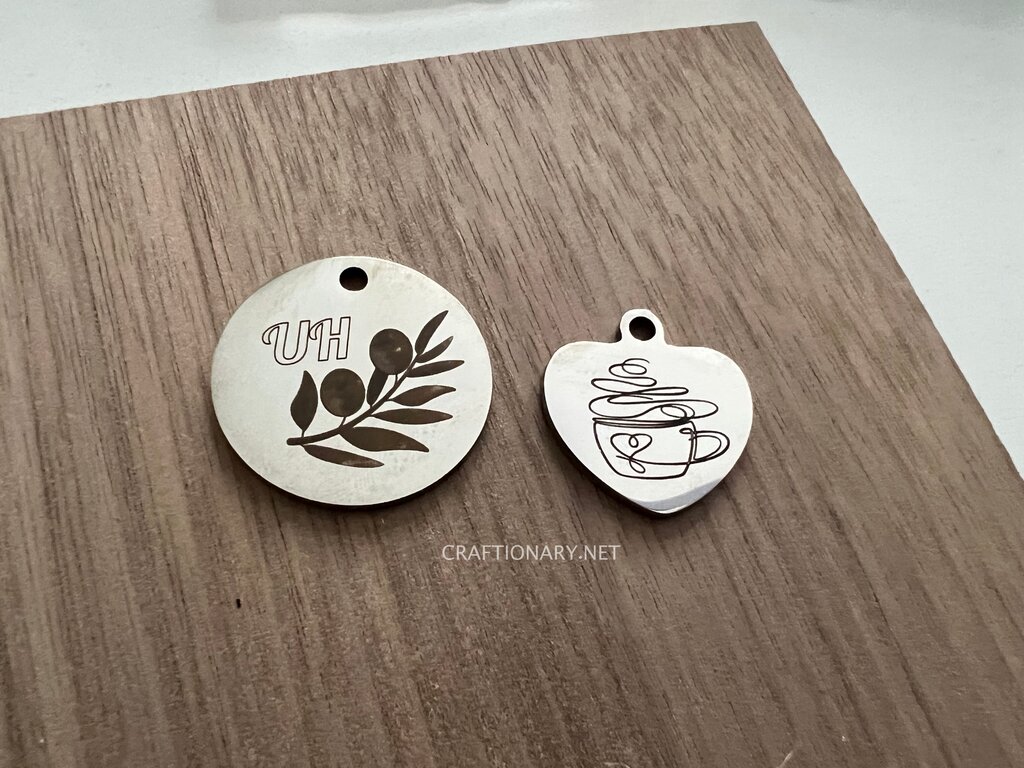
- Stainless steel necklace
- Pine coasters
- Beech phone stand
- Bamboo plant stand
- Metal business card holder
- Rectangular wood piece
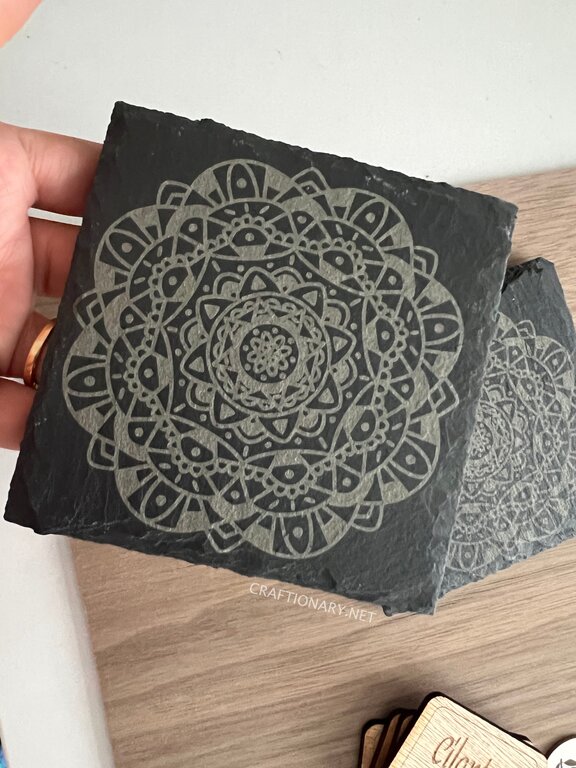
- Rock coaster
- Metal business cards
- Silver bone dog tag
- Acrylic sheet
- 3mm Basswood Plywood
- 6mm Pine plywood
Laser engraving on stone and rock coasters in one pass.
Engraving and scoring with laser on 6mm walnut plywood in one pass.
Laser engraved on silver tag and stainless steel necklace in one pass.
Blade Cutting
It can blade cut on a variety of materials where laser cutting is not the best option.
1) Pull the magnetic gold blade housing from the machine. Push the smaller dial and slide the blade from the pack into place. Now rotate the large dial while holding the smaller dial till you only see the tip of the blade. Secure it back in place. The blade is ready for use. The video review helps better understand the securing of blade if you are new to it.
2) Now remove the top transparent film from the cutting mat and secure the vinyl, paper or any cutting material in place following the grid lines.
3) Remove the transparent film from the bottom and carefully align the grip mat in place with the working space boundaries. Keep both the transparent films to replace for storing sticky mats.
4) Insert your design and select your surface as blade cut and material as vinyl. Select the design and click process.
You may require to change pressure according to your vinyl to cut it effectively. Make sure to write down your settings.
Blade Cutting Materials:
I tested the following materials and required adjustment of pressure to cut completely.
- Vinyl
- Iron on HTV
- PVC sheet (it did not cut but gave an embossed cut at maximum pressure)
- Faux Leather (a very thin sheet of leather it can cut)
- White sticker paper
- Craft paper
- Cardstock
- Glitter sheet
Blade cutting self-adhesive vinyl with increased pressure from auto settings.
There is no one setting that works for all materials. Like all the machine out there xTool M1 also requires testing of materials and noting down the settings that work best.
Pros and Cons
There is a lot of information so I think it would be beneficial for you to decide whether it is worth it for you to buy xTool M1 with the advantages and disadvantages.
Pros
- Hybrid laser and blade cutting
- Idea for hobby and small business
- Affordable
- Low noise
- Batch processing
- Laser processing in one pass
- Works on flat and cylindrical surfaces
- Removable base with risers for largers projects
- Auto precision in-built camera
- Preset material settings
Cons
- Long processing time
- Requires testing of materials
- Blade may not cut in one pass
- Only one style of blade
- Laser cutting may leave burnt marks on edges
Conclusion
Overall it is a great machine capable of doing what it says. It is suitable for hobby and small business. The preset settings for each material makes it very easy to navigate through the software and process designs on different mediums.
The price can not be beaten. For the other options available in the market xTool is the most cost efficient option with tons of possibilities. If you act now you can get it at a discounted price.
However, if you are looking for a faster more efficient processing then this machine might not be your best option. You can instead invest in a CO2 laser. With that said this machine is ideal for a fewer projects per day and works perfect if you are on a budget.
If you need help, you can always checkout their blog or FAQs too. XTool forums and Google also has lots of information from other makers.
Disclaimer: This is a sponsored post by xTool. I received the machine, however, the opinions and projects shared are 100% mine.