This post may contain affiliate links. Please see our full Disclosure Policy for details.
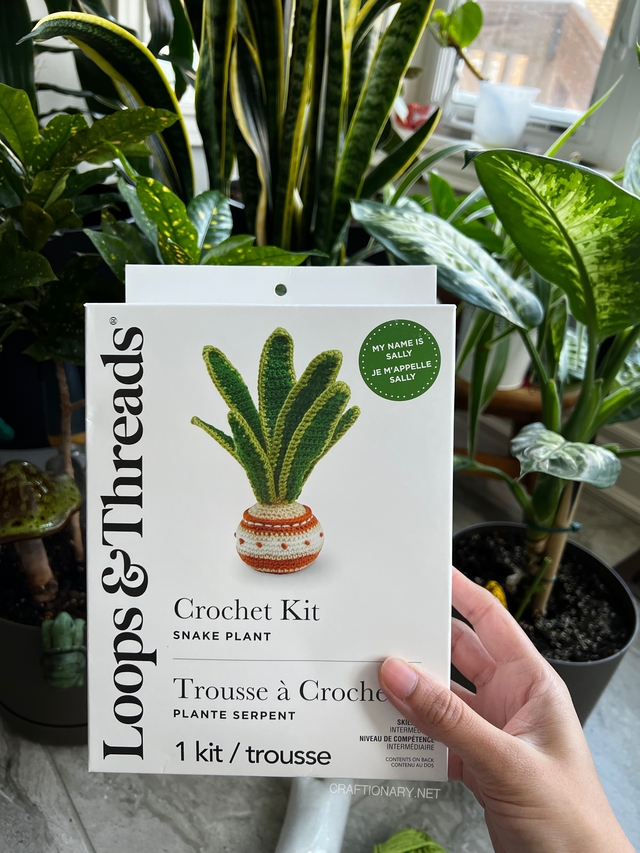
Creating a handmade indoor garden is one of the most rewarding ways to bring life into your home without the stress of watering schedules. If you’ve always wanted to try crochet but felt intimidated by complex patterns or lacked the patience for long-term projects, a Amigurumi Crochet Snake Plant Kit is the perfect entry point.
Related: 50 Free Amigurumi Crochet Patterns that are love
This guide is designed for the absolute beginner—someone who has never held a hook but wants to create a professional-looking piece of Modern Heritage decor.
My Honest Beginner Experience (Why This Project Works?)
When I first wanted to try crochet, I wasn’t sure if I’d enjoy it. Instead of starting with something basic, I chose a crochet snake plant kit—because I wanted to create something I’d actually display and feel proud of.
Even though the kit was labeled intermediate, I went for it anyway. And here’s the truth:
- It took me 3 days just to understand how to hold the hook and make chains, it was frustrating but trust me it gets better.
- Written patterns initially made zero sense. So, I search for a video to learn the technique.
- Luckily I found a video for this exact project. I relied heavily on a slow-motion video tutorial.
- I made mistakes—and unraveled my work multiple times because it’s about learning and not finishing a project.
But once it clicked, everything became easier. The biggest realization?
Crochet is forgiving. You can always undo mistakes and start again. If I could learn this as a complete beginner, you absolutely can too.
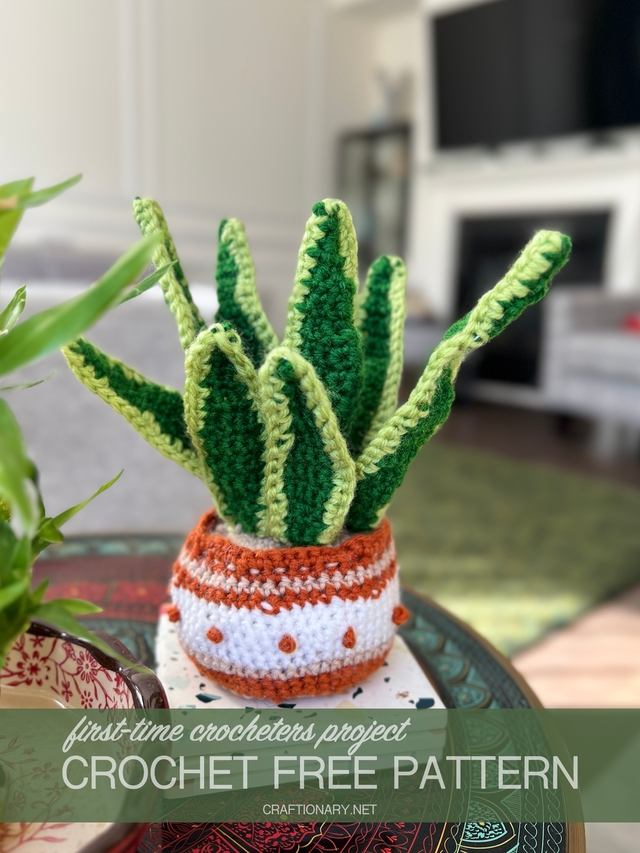
Why Start with a Snake Plant Kit?
For a first-timer, the sheer volume of hook sizes, yarn weights, and terminology can be overwhelming. A kit—specifically the Loops and Threads Snake Plant Kit—removes the guesswork.
The Beginner Advantage:
- Curated Materials: No need to calculate yardage; the kit includes exactly what you need.
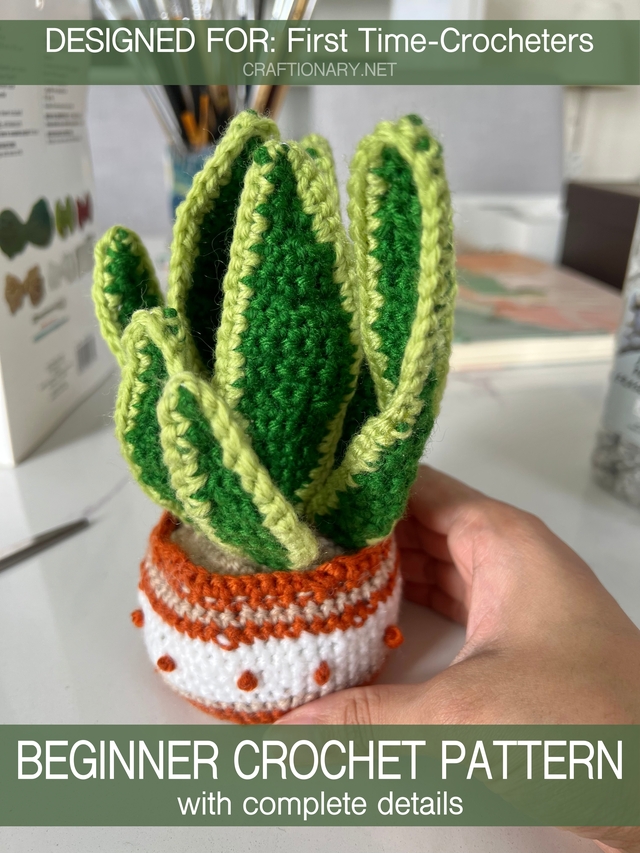
- Display Value: Unlike a basic practice square, a snake plant is something you’ll be proud to display alongside your real greenery or essential oil diffuser.
- Skill Building: Even though it’s often labeled Intermediate, it teaches foundational stitches (chains, single crochet, and borders) that apply to every future project.
Essential Beginner Techniques and Persistence Tips
Crochet is a physical skill that requires muscle memory. Even if it takes you three days just to get a hang of the hook, you are on the right track.
1. Basic Crochet Techniques You Will Learn
- Chain Stitch (ch): The foundation of most crochet projects.
- Single Crochet (sc): The most common stitch for beginners.
- Slip Stitch (sl st): Used to join and finish rows.
2. The Slow-Motion Secret
Written instructions can look like a foreign language (e.g., Rnd 1: 6 sc in MR). For your first project, always pair the pattern with a video tutorial.
Pro Insight: Use YouTube’s playback settings to slow the video down to 0.5x or 0.25x. Watch the specific arc of the hook as it pulls the yarn through the loops.
3. The Frogging Mindset
In crochet, frogging means unraveling your work (rip it, rip it).
Expert Tip: Mistakes in crochet are never permanent. If your stitch count is off or the shape looks wonky, pull the string and restart. It’s better to have a clean foundation than a frustrated finish.
4. Critical Crochet Lesson: Where Does the Hook Go?
The most common beginner mistake is missing the V.
- Standard Stitch: Always insert your hook through both the loops, not just one, at the top of your previous row, unless instructed otherwise.
- Through the Chain: Only crochet directly into the chain spaces if the pattern specifically asks for a “Chain Space” (ch-sp) stitch.
- Losing Count: Count stitches at end of each row
- Tight Tension: Relax your hands—crochet should feel smooth, otherwise your chains will be too squished.
- Take Breaks: Crochet improves when your mind is relaxed.
Basic Beginner Crochet Plant Instructions:
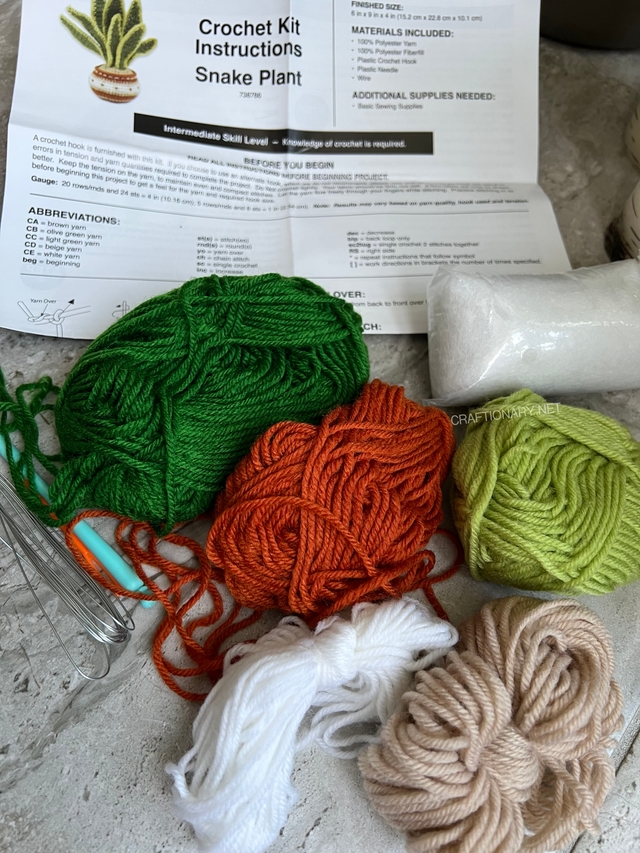
Material:
In this kit you will find all the necessary material to start.
- Yarn in all assorted colors enough for the project.
- Crochet tool
- Wire
- Needle
- Polyester stuffing
- Instructions manual with abbreviations learning for all future projects.
- Not in this kit but needed: rocks and cardboard base for pot.
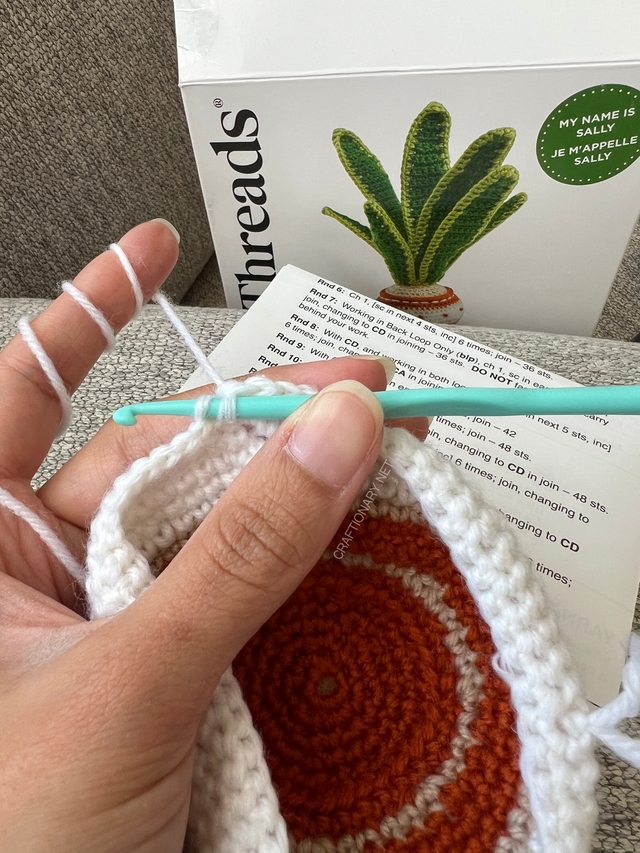
The written instruction:
Follow the written instructions and checkout the video above for assistance when you get stuck.
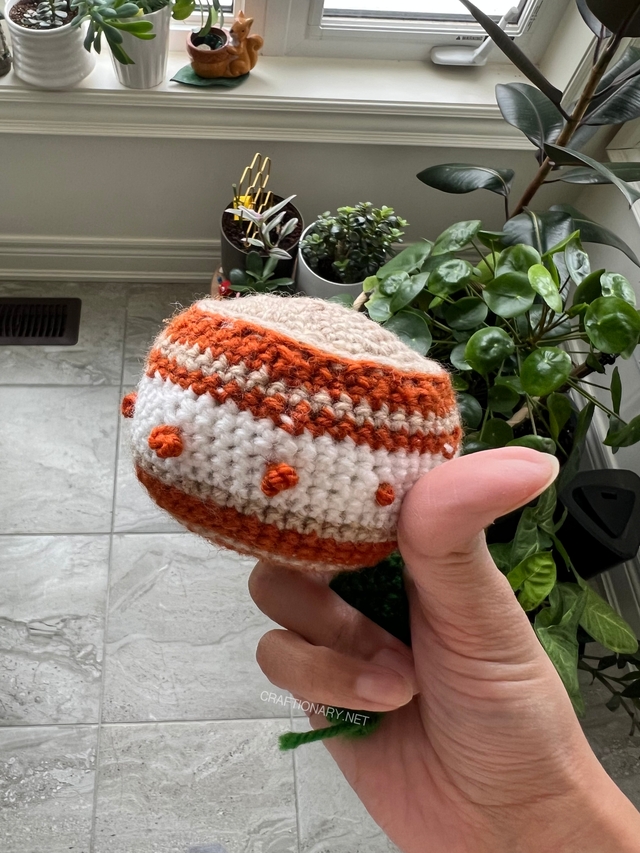
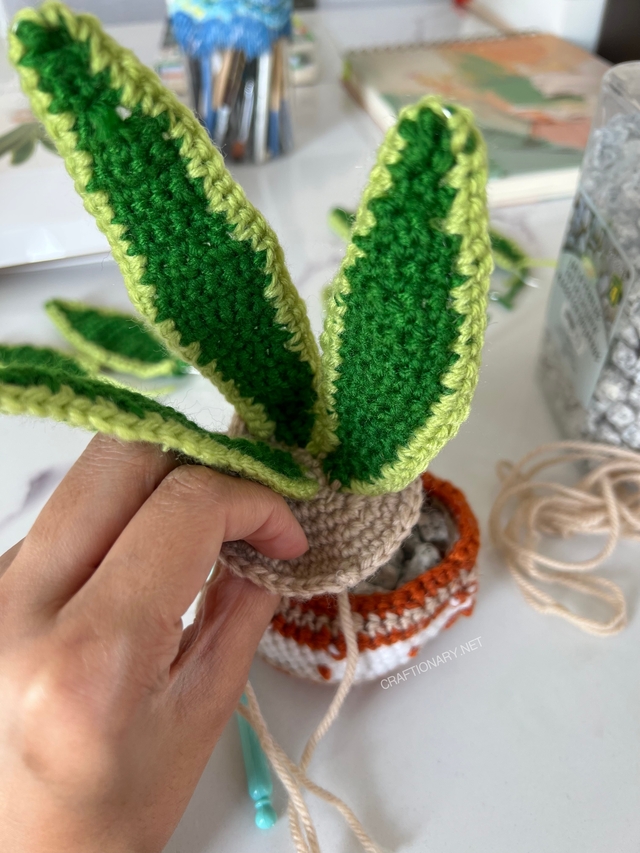
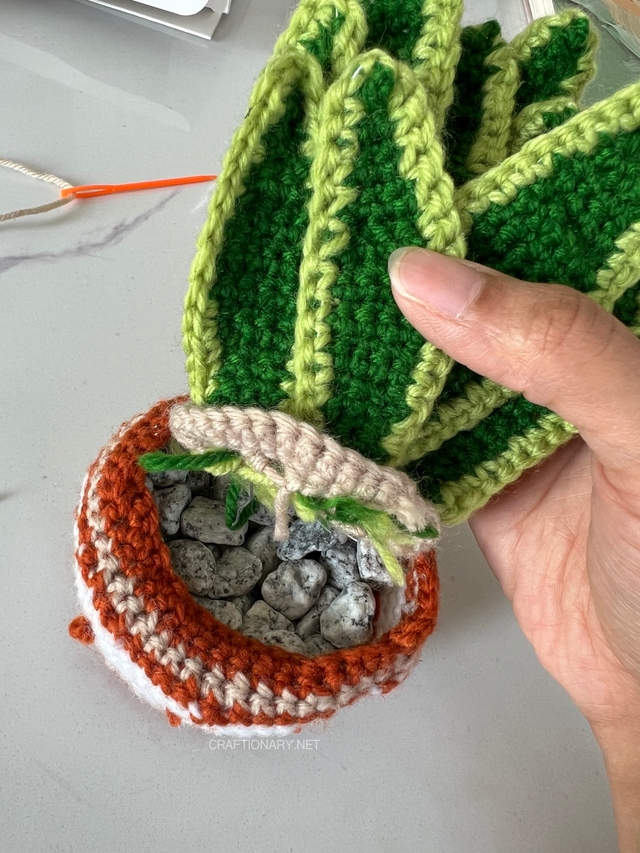
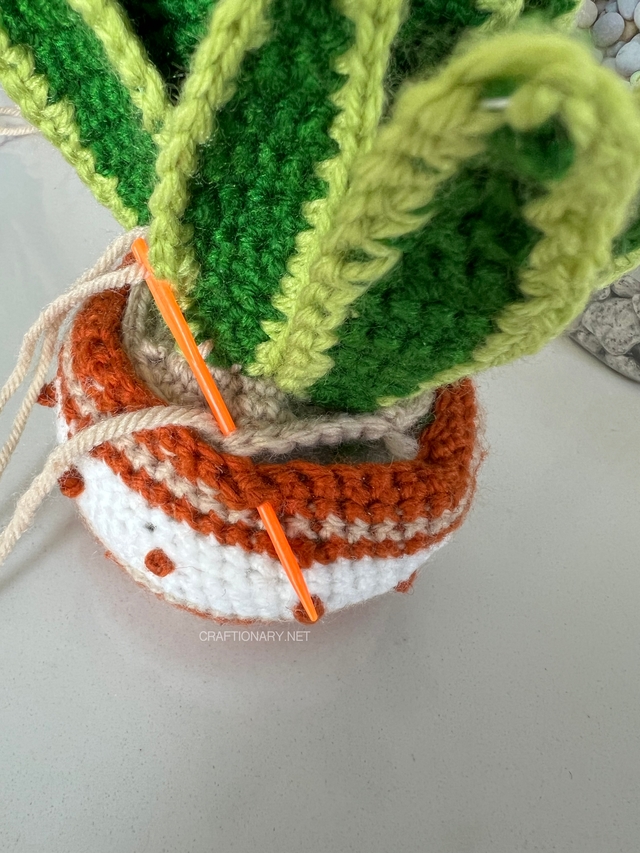
- You will first crochet the pot and soil patch following the instructions provided.
Then add wire to the leaves for shaping and support and complete the leaf crochet with contrasting border.
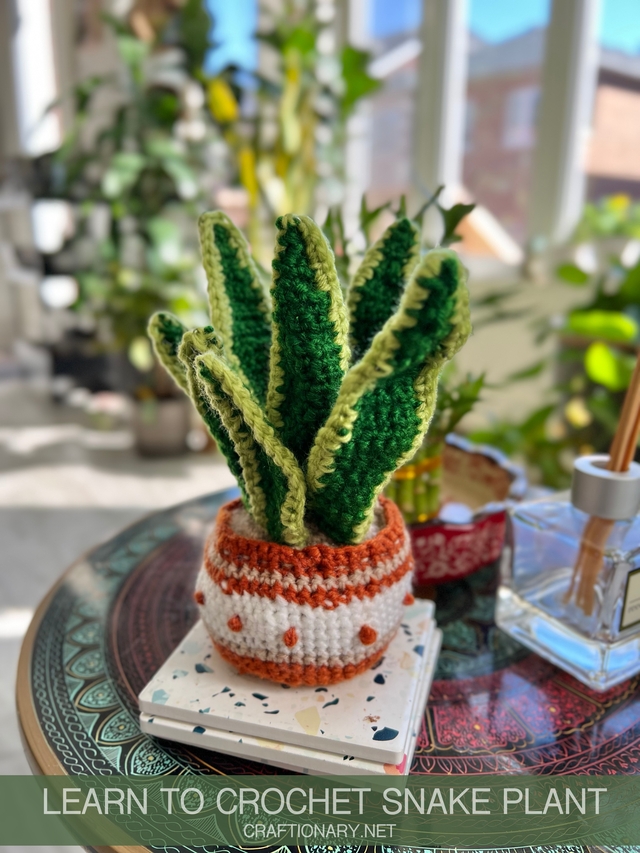
Finally, assemble the snake plant pot by sewing leaves on the soil patch first and then stitching the soil to the top of the pot filled with pebbles for support.
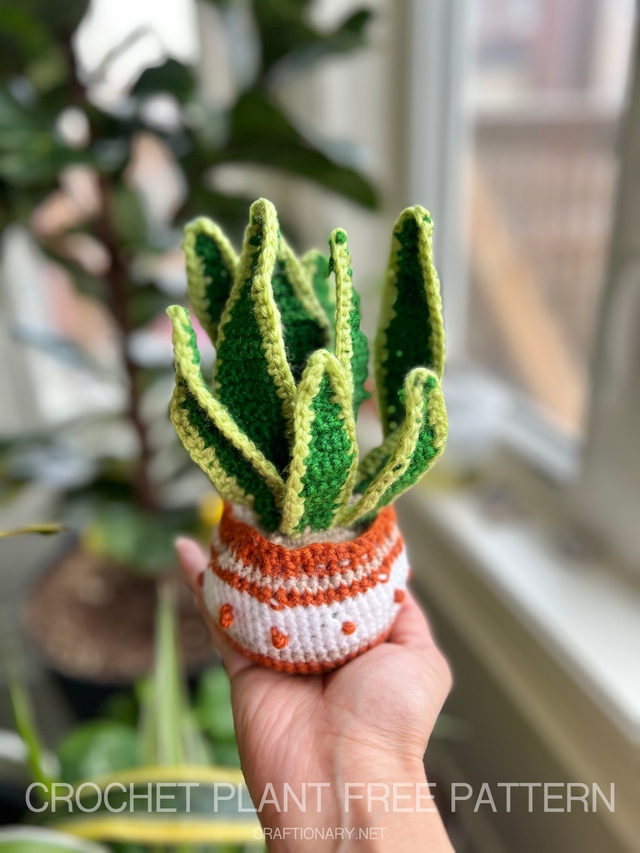
Shape the leaves naturally and display as a conversation starter.
Tips: There are some additional tips shared below which are from my personal experience to help you successfully complete your first crochet project.
The Snake Plant Modification Guide (Pro-Level Assembly)
While the kit provides the basics, these custom modifications will elevate your project from crafty to botanical masterpiece.
1. Structural Support for the Pot: The Cardboard and Pebble Trick
Standard polyester stuffing is light. Because snake plant leaves are tall and top-heavy, the pot can become wobbly.
- The Fix: Cut a circle of stiff cardboard to fit the bottom of the crocheted pot. Before closing the soil, add a layer of small pebbles or decorative stones. This lowers the center of gravity and ensures your plant stands straight on a desk or table.
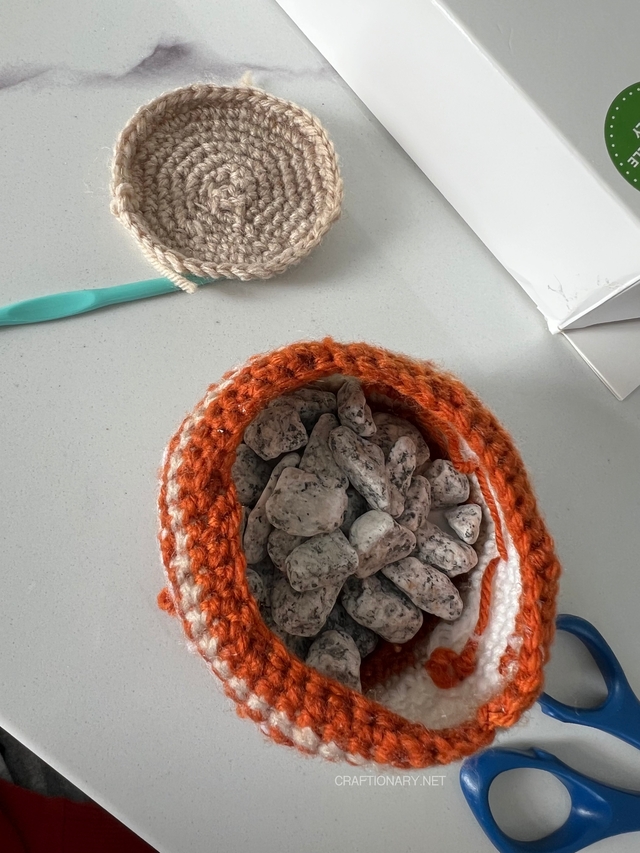
- Tip: Add polyester stuffing around to shape the pot when you sew the soil on top.
2. Perfecting the Leaves
To give the leaves their signature structure:
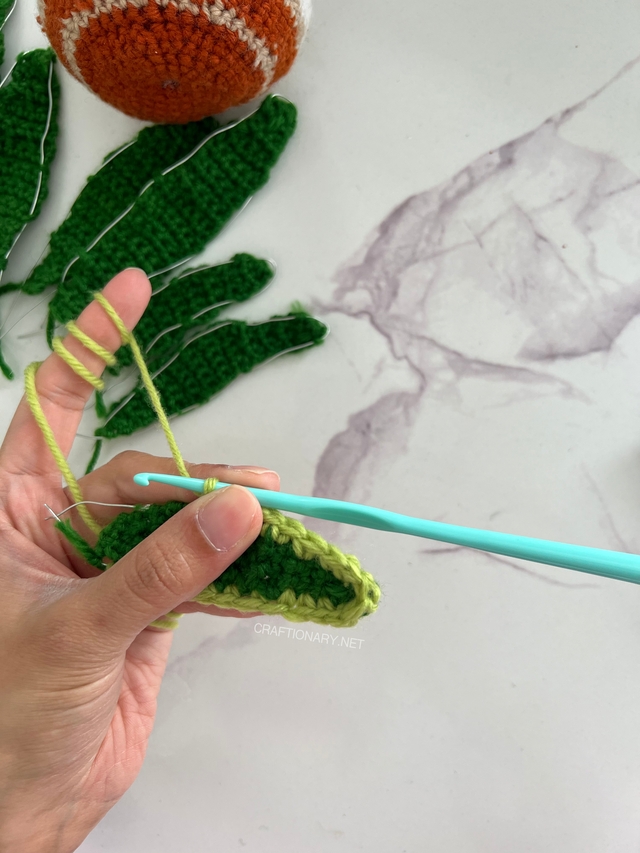
- Wire Placement: Pass your floral wire through 3-4 points on the outer edge of the leaf before finishing the border chain. This holds the wire in place and makes the final edging much easier to manage.
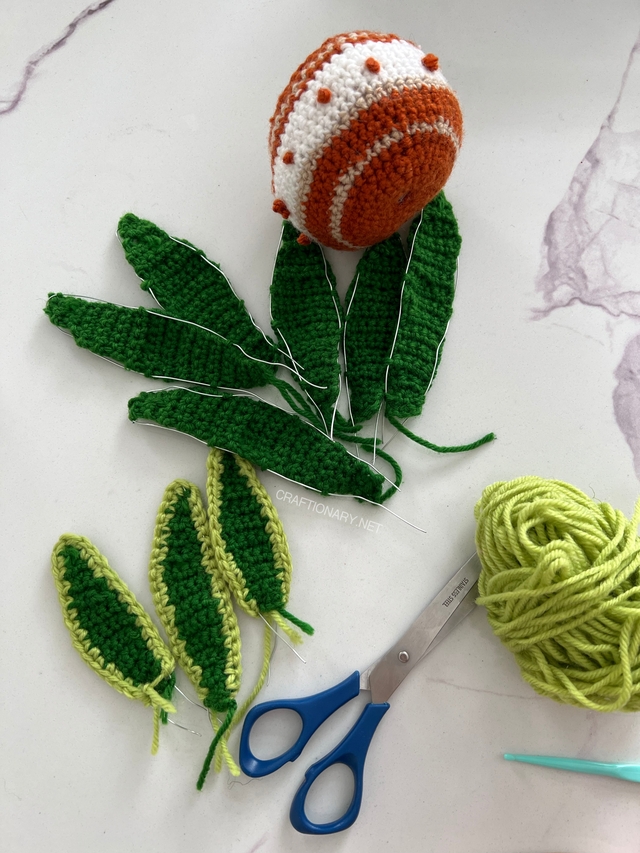
- Natural Variation: Don’t place your leaves in a straight line.
- Sew the tall and medium leaves randomly in the center, and place the smaller ones on the outer edges.
- Use the extra hanging wire to secure the leaf at the wrong side of the soil by inserting and flattening the two ends of the wire inside to position it upright.
- Then sew the sides and center of each leaf individually.
- Twist, angel, and spread them naturally once you have stitched all the leaves.
3. Seamless Soil Stitching
To keep the soil looking like it’s inside the pot rather than sitting on top stitch the soil part just below the top row of the pot rather than onto the very top edge. This creates a small lip on the planter that looks more realistic.
Frequently Asked Questions
How long does it take a beginner to crochet a plant?
Expect to spend 3–5 days on your first project. The first 48 hours are usually dedicated to learning the basic chain and single crochet movements.
What if you can’t read the written pattern?
Don’t worry—most beginners can’t! Follow a video tutorial first. As you watch the creator work, look at the written pattern simultaneously. Eventually, the abbreviations (sc, inc, dec) will start to click.
What materials do you need if you’re not using a kit?
- Hook: 4.0mm or 4.5mm (G or H).
- Yarn: Medium weight (4) cotton or acrylic in dark green, light green, and brown.
- Extras: Floral wire, polyester fiberfill, pebbles, and a tapestry needle.
- Pattern: A design to follow to make your project.
Once assembled, don’t be afraid to twist and bend the leaves. Real snake plants have organic curves and leaning edges. Place your finished piece near a diffuser or a bamboo plant to add a pop of immortal life to your indoor garden.
Written by: Hani Shabbir
Why This Project Builds Real Crochet Skills
This single project teaches:
- how to hold a crochet hook
- how to read patterns
- how to shape pieces
- how to assemble projects
You will also like:
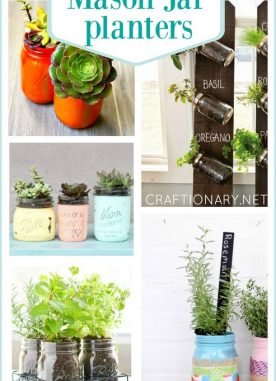
DIY Glass Tile and Stone Indoor Garden Art