This post may contain affiliate links. Please see our full Disclosure Policy for details.
There’s something almost magical about watching a thin wire loop fill with color — that moment when the nail polish catches and spreads across the frame like a soap bubble frozen in time. It’s one of those crafts that looks impossibly delicate, costs almost nothing, and produces results that genuinely stop people in their tracks.
Wire and nail polish flowers have been quietly trending for years, but in the last couple of years creators are using them for jewelry, hair clips, bouquet accents, cake decorations, gift toppers, terrariums, wall art — the list keeps growing. Every week, more people are discovering this craft for the first time and immediately asking the same set of questions.
This guide is the honest, practical answer to all of them. I’ve spent serious time with wire, a collection of nail polishes ranging from fresh to ancient, and a lot of patience (and impatience). What follows is what actually works, what doesn’t, and what nobody else seems to mention.
What Are Wire and Nail Polish Flowers?
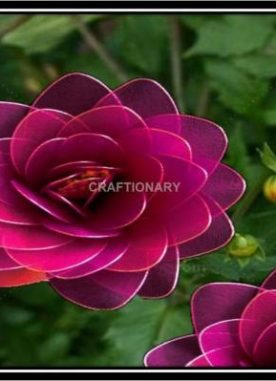
The basic idea is simple. You bend and loop thin wire into petal shapes, then use nail polish — either brushed on or dipped — to fill in those loops with a thin, translucent film of color. When the film dries, each petal looks like stained glass. You join petals together (or make them as a single continuous wire piece) to form a complete flower.
The result is a lightweight, semi-transparent bloom that catches light beautifully and genuinely looks like it belongs in a jewelry store window.
The Size: Why Nail Polish Flowers Are Mostly Miniature
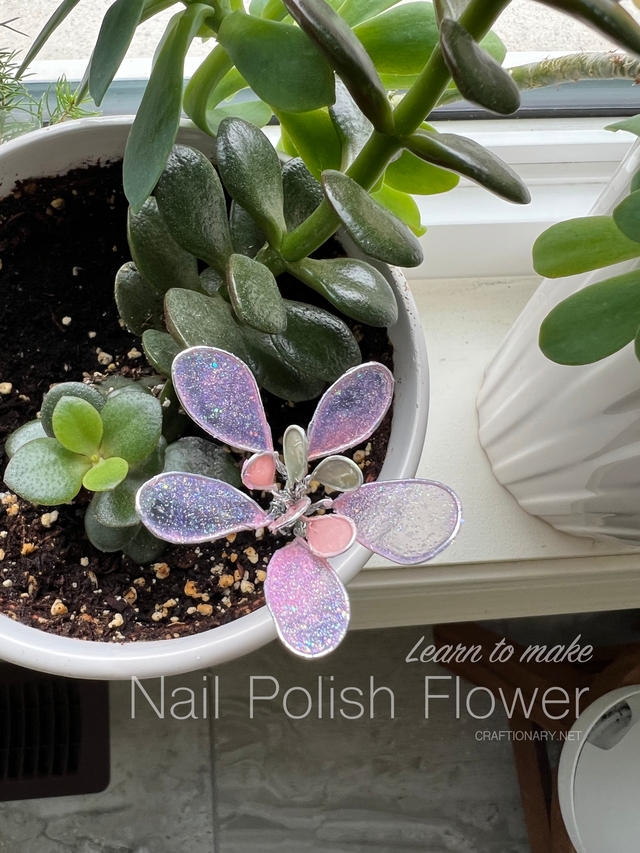
This is the first thing most people bump into, and it’s worth addressing directly: nail polish flowers are small flowers here’s why:
The nail polish brush is small. It’s designed to paint nails, not fill in large surface areas. When you load that brush and drag it across a wire petal loop, it creates a film — but the film can only stretch so far before surface tension can’t hold it. The bigger the wire loop, the harder it is to get the polish to bridge the gap and stay put.
Think of it like blowing a bubble. A small bubble is stable. Push it too big and it pops. Same principle applies here. The nail polish film is essentially a thin membrane held in place by surface tension and the wire frame acting as its boundary. Wider loops give that membrane more opportunity to fail — and it will, often right when you thought you were nearly done.
From personal experience: Petals that comfortably fill with nail polish using just a brush tend to be roughly the size of a small coin — about 1–2 cm across. That’s the sweet spot. Go smaller and you’re making genuinely miniature, jewel-like flowers. Go larger and you start running into problems.
Miniature is actually perfect for what most people use these flowers for. Earrings, rings, brooches, hair pins, necklace pendants, boutonnieres, gift decorations — they all look better with a delicate, small flower than a chunky one. The miniature scale is part of the charm.
Making Larger Petals: It Can Be Done, But Here’s How
So you want bigger flowers. Maybe you’re making a centerpiece, or you want wall art, or you just like working large. It’s possible — but it requires a different approach.
1. Dipping the Wire Frame
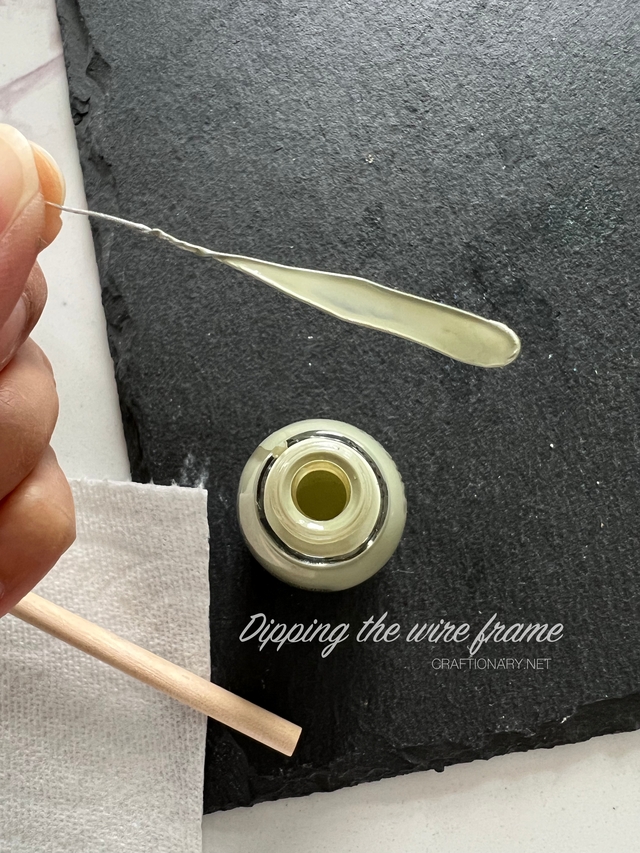
For long, narrow petals — think elongated rose petals, lily petals, or thin leaf shapes — dipping the entire wire petal directly into the nail polish bottle is your best strategy. This works because:
The wire frame goes into the polish at an angle. As you lift it out slowly, the polish coats the wire and the surface tension pulls a film across the interior
A narrow, elongated shape has less area to bridge than a wide, round one, so the film holds more reliably
The key here is slowly. Pull the petal out of the bottle too fast and you either get no film at all or a messy, dripping coat that’ll take forever to dry properly. Slow and steady — almost painfully slow — gives the polish time to settle and form that clean, even membrane you’re after.
This is also one reason why the size of the nail polish bottle mouth matters. A wider bottle mouth is easier to dip into; a narrow one makes it tricky to maneuver a wire frame without touching the sides. Some crafters pour a small amount of polish into a bottle cap or a tiny container — like an old deodorant cap — specifically to make dipping easier and to avoid contaminating the whole bottle.
2. Pre-Coating with Wood Glue
This is a tip that’s genuinely game-changing for anyone who wants larger petals:
Dip the wire frame in diluted wood glue first. Let it dry completely. The glue creates a thin initial membrane — a scaffold, essentially — that the nail polish can then sit on top of more reliably.
The glue film is forgiving of wider loops. Once it’s dry, the surface tension problems of the nail polish largely disappear because now it’s just coating a surface rather than bridging a gap. Two or three coats of nail polish on top of dried glue gives you a petal that’s more opaque, more robust, and possible at a larger size.
3. Building with Separate Miniature Petals
This is the approach that comes most naturally once you’ve spent any time with this craft:
Make your flower from individually crafted miniature petals and wire them together.
Each petal is made at the small, brush-friendly size. You let each one dry fully, then use fine gauge wire or even a bit of floral wire to join them at the base into a complete bloom. This way the finished flower can be as large as you like, because the individual components are still within the manageable size range.
This method also gives you a lot more flexibility in petal shape. You can mix different sizes — larger outer petals, smaller inner ones — to mimic how real flowers are structured. A dahlia or a rose built this way looks genuinely impressive.
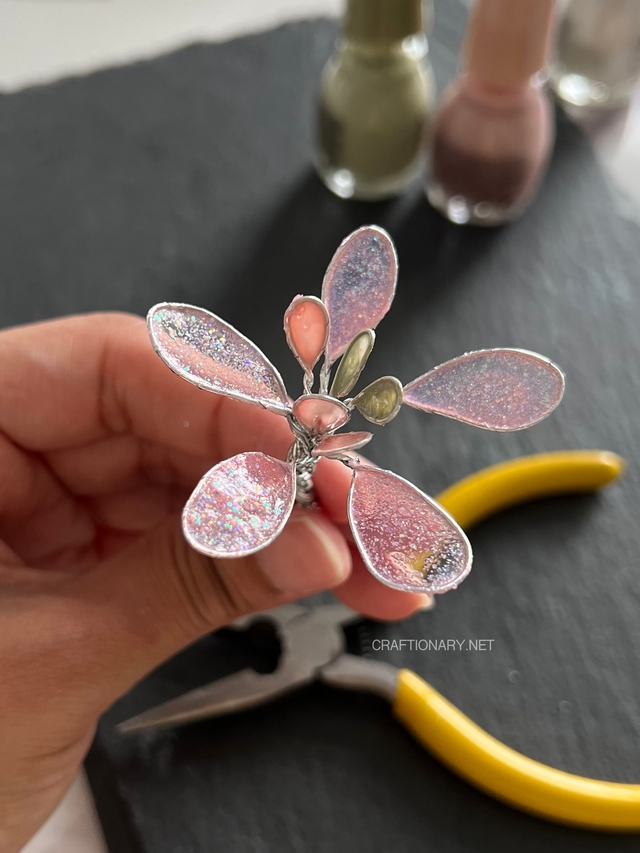
Why the Film Bursts (And How to Stop It)
The bursting film is probably the single most frustrating thing beginners encounter. You’ve shaped your wire perfectly, loaded the brush, started filling the petal, and — pop. Gone. Sometimes it bursts as you’re brushing. Sometimes it waits until you think it’s dry and then just collapses.
Here’s what’s actually happening and how to fix each cause:
- The petal is too wide. Surface tension can’t bridge a large gap.
- Solution: Make narrower petals, pre-coat with glue, or use the dipping method.
The nail polish is too thin/watery. Fresh, very liquid polish doesn’t have enough body to hold a membrane. This is counterintuitive — you’d think fresh polish would be better — but older, slightly thickened polish actually works significantly better for this craft. The slightly increased viscosity helps the film hold. If all your polish is new and runny, let it sit open for a short while to thicken a little (though don’t overdo it or it’ll be gummy and brush poorly).
You’re brushing too fast or too hard. Gentle is the word here. You’re not painting a wall; you’re coaxing a membrane into existence. Touch the brush to the wire and let the polish flow and stretch by gravity and surface tension, rather than dragging it aggressively across. Light, slow strokes.
You touched the forming film. Once the polish starts to bridge the wire gap, don’t go back over it. If there’s a thin spot, resist the urge to immediately fix it. Let it dry, then add a second coat on top. Going back over wet, partially-formed film is almost always fatal to it.
The petal wasn’t completely flat/still. Movement while the film is wet will burst it. Hold the flower steady, set it down carefully, and don’t touch it until dry.
The wire has oil or residue on it. Clean hands and clean wire make a difference. Oils from your fingers can interfere with the polish adhesion to the wire. Handle the wire as little as possible with bare hands, or wipe it with a tiny bit of rubbing alcohol first.
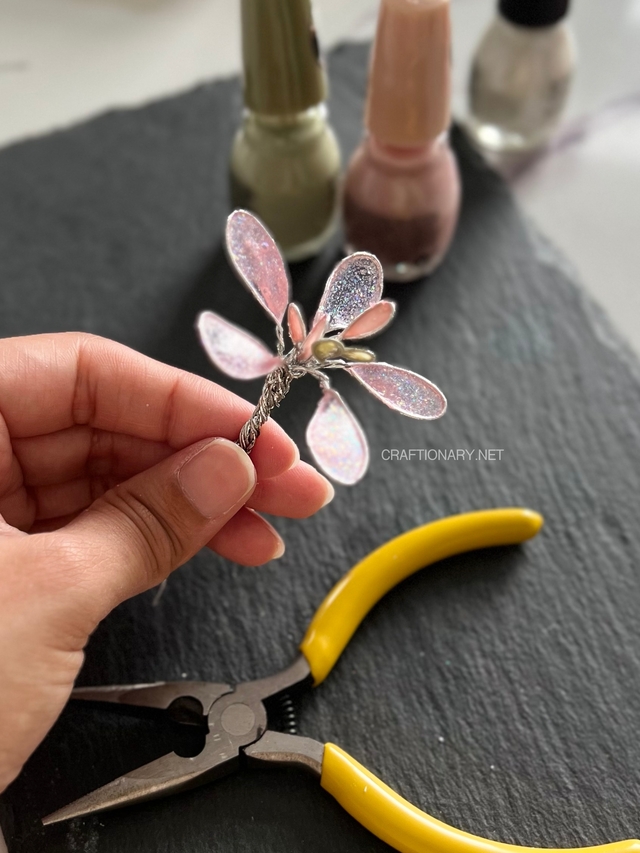
Does the Type of Nail Polish Matter?
Yes, it genuinely does — though not necessarily in the way you might expect.
- Regular Nail Polish (Standard Formula): This is your workhorse for this craft. Standard cream or sheer nail polishes in a medium-to-thick consistency are the most reliable. The translucent ones give you that beautiful stained-glass look; the creamier opaques give you something more solid and vivid.
- Old or Thickened Nail Polish: As mentioned above, slightly thickened old nail polish often performs better than fresh. The extra body helps the film hold. Many crafters deliberately use up old polishes in their collection for wire flowers — it’s also a wonderful way to use up colors you’ve had sitting around for years.
- Glitter Nail Polish: This works, but with caveats. Fine glitter integrates well into the film and produces gorgeous, sparkly petals that catch light beautifully. Chunky glitter is harder — the large particles can interrupt the film formation and create holes or weak spots. If you want glitter, go for fine-particle glitter polish or add loose fine glitter on top of a wet clear coat.
- Chrome and Metallic Polish: Chrome polishes can work and produce stunning results — mirror-like petals that look like they’ve been cut from foil. They’re sometimes trickier to form into a clean film because the metallic particles can interfere with surface tension. Work slowly and be prepared for more second coats.
- Gel Nail Polish: Standard gel polish (the kind that requires UV or LED curing) doesn’t work for this in the traditional way — it stays sticky and won’t form a self-supporting film without curing, and you can’t easily cure a wire frame under a lamp. UV-cure methods are being explored by some crafters, but for most people, regular polish is simpler and more effective.
- Quick-Dry Polish: Mixed results. Some quick-dry formulas work well because they stabilize fast and you can build up coats more quickly. Others are too thin. Worth trying if that’s what you have, but don’t assume it’ll be better just because it’s quick-dry.
- Top Coat (Clear Polish): Clear top coat is genuinely useful here, not just for protection. Applying a coat of clear polish over a dried colored film strengthens the petal and makes it less likely to crack or chip. It also adds a beautiful glass-like gloss. You can also use it to mix colors by applying colored polish and then quickly brushing a different color over the still-wet film to create blended, gradient petals.
- Nail Polish Remover Warning: If you make a mistake, don’t try to wipe the petal with nail polish remover. The acetone will dissolve the film you’ve already built on other petals and can leave a residue on the wire that makes future coats fail. Accept imperfect petals or re-make the frame.
Wire Choice Matters More Than You Might Think
The nail polish conversation dominates, but wire choice has a huge impact too.
- 26-gauge wire is the most commonly recommended for beginners. It’s thin, flexible, easy to bend into petal shapes by hand, and the tighter loops it naturally forms mean the petals tend to be smaller and more manageable for the nail polish film.
- 20-gauge wire gives you slightly more structure and is better for flowers that need to hold a three-dimensional shape — like roses or flowers that will be handled and worn as jewelry. It’s a little harder to bend with just fingers; small round-nose pliers help.
- Copper wire has a warm tone that looks lovely alongside warm-colored polishes — oranges, pinks, reds. Silver-tone aluminum or steel wire is more neutral.
- Colored craft wire adds another layer of visual interest. The wire becomes part of the design rather than just the skeleton. Green wire used for leaves looks particularly natural.
What to Make With Nail Polish Wire Flowers
This craft lends itself to so many applications that it can be genuinely hard to choose where to start.
- Jewelry is the most popular. Wire nail polish flower earrings — especially the small, stud-style or short drop versions — look beautiful and get consistent compliments. Brooches, rings, and delicate bracelets with flower accents all work wonderfully. The flowers are light as air, which makes them comfortable to wear all day.
- Hair accessories are another favorite. Glue a few miniature blooms onto a hair clip, bobby pin, or headband. They’re especially lovely for bridesmaids, children’s occasions, or anyone who wants to add something a little unusual to their look.
- Cake and food decoration (with appropriate care about food contact — the flowers shouldn’t touch the cake surface directly, but nestled on waxed paper or around a tier they’re gorgeous). The transparency and color of the petals photographs beautifully.
- Gift wrapping accents: Instead of a ribbon bow, a small nail polish flower attached to twine or a ribbon becomes the decoration and the gift in one.
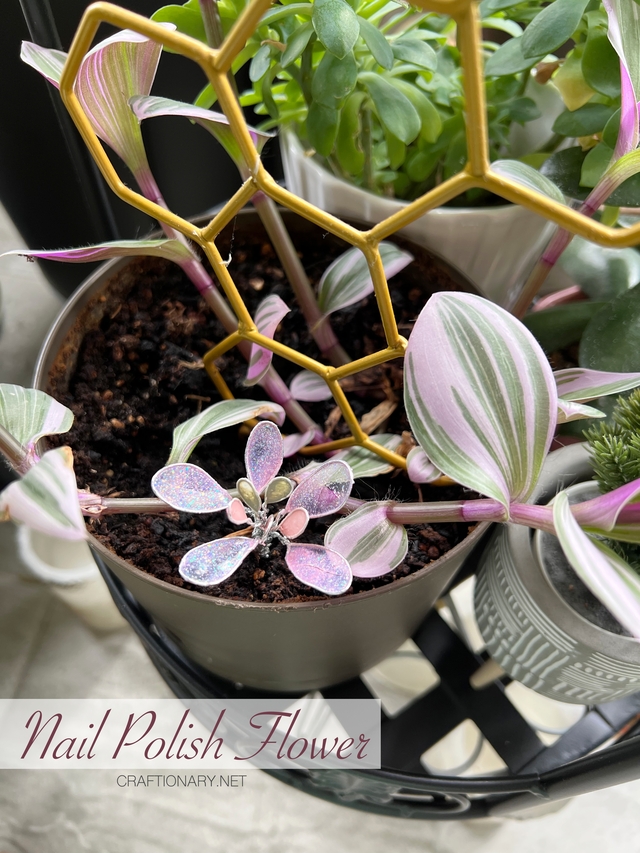
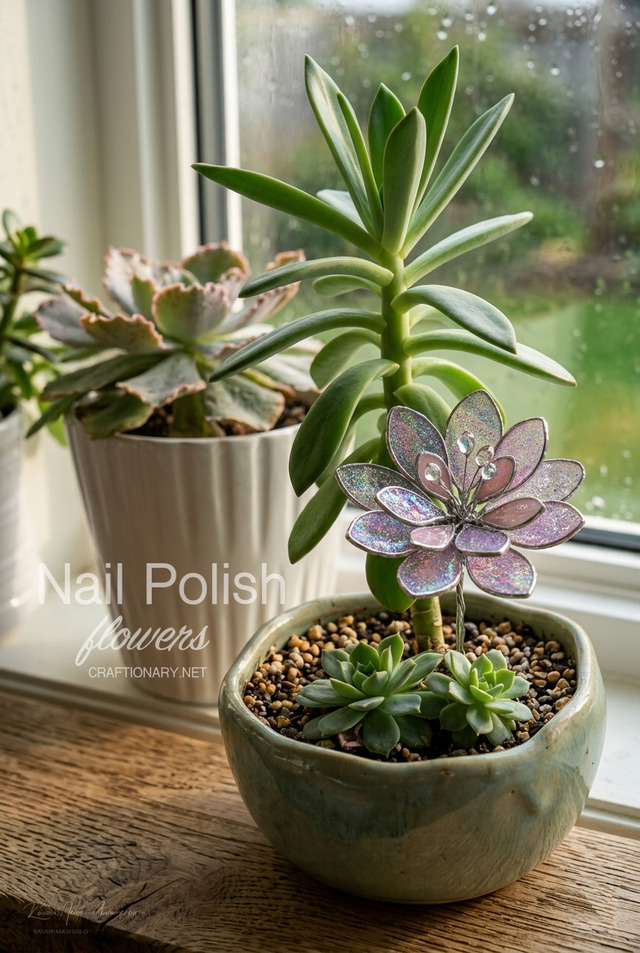
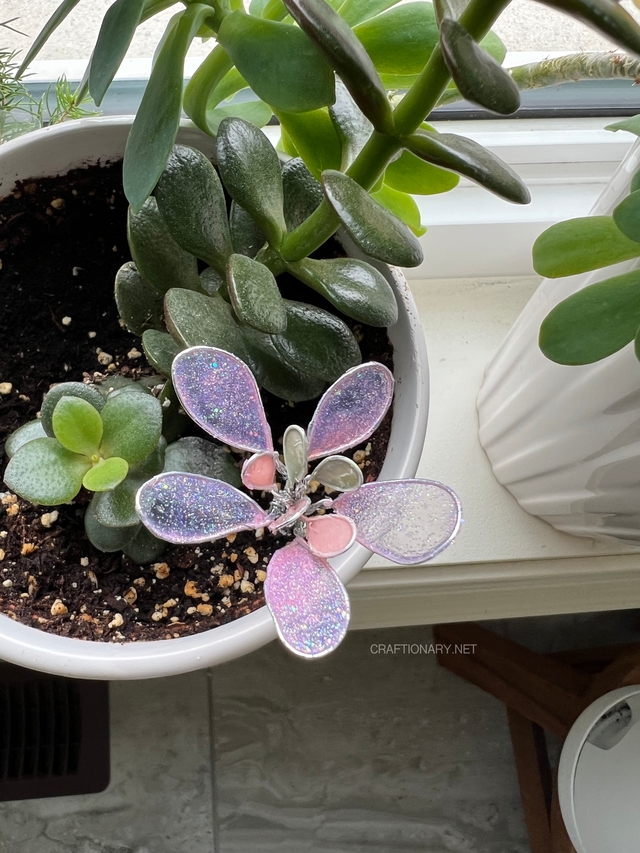
- Terrariums and fairy gardens: Tiny nail polish flowers look completely at home among miniature plants and moss. Because they’re wire-based, they can be pushed directly into soil.
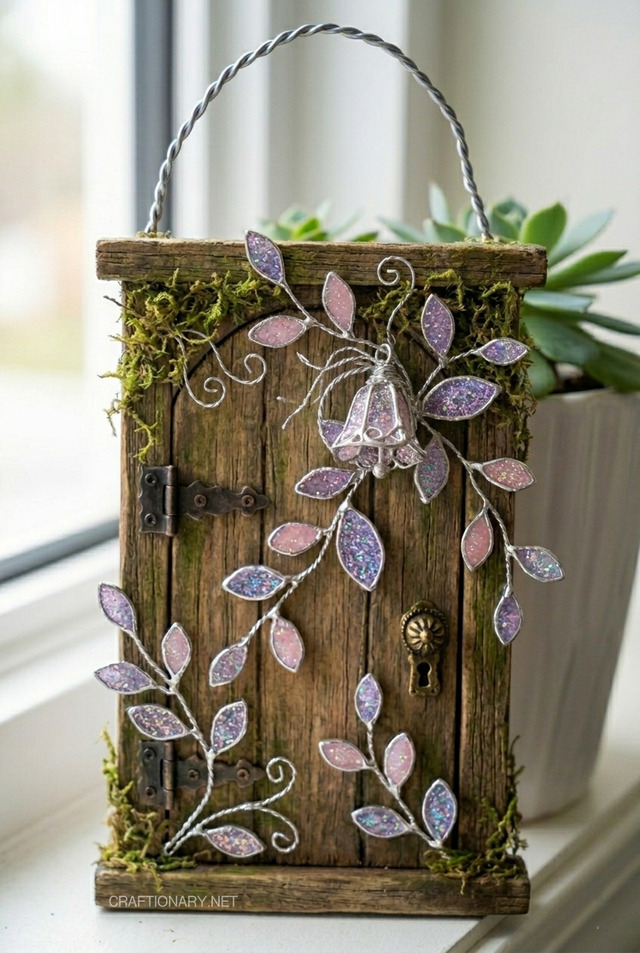
Fairy door
- Framed botanical art: Arrange a collection of nail polish flowers on a white background in a simple frame for wall art that genuinely looks like it belongs in a boutique.
- Bookmarks and stationery accents: A single flower wired to the top of a ribbon bookmark is a lovely touch.
- Seasonal and holiday decorations: Spring centerpieces with clusters of flowers in a small vase, Christmas ornaments, Valentine’s Day table arrangements — the translucency of the petals makes them look like they’re glowing when light hits them.
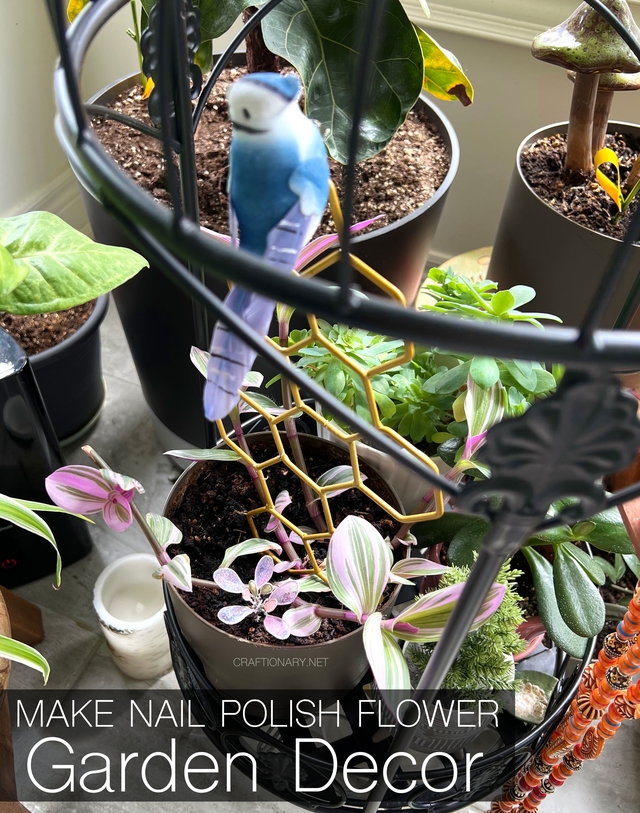
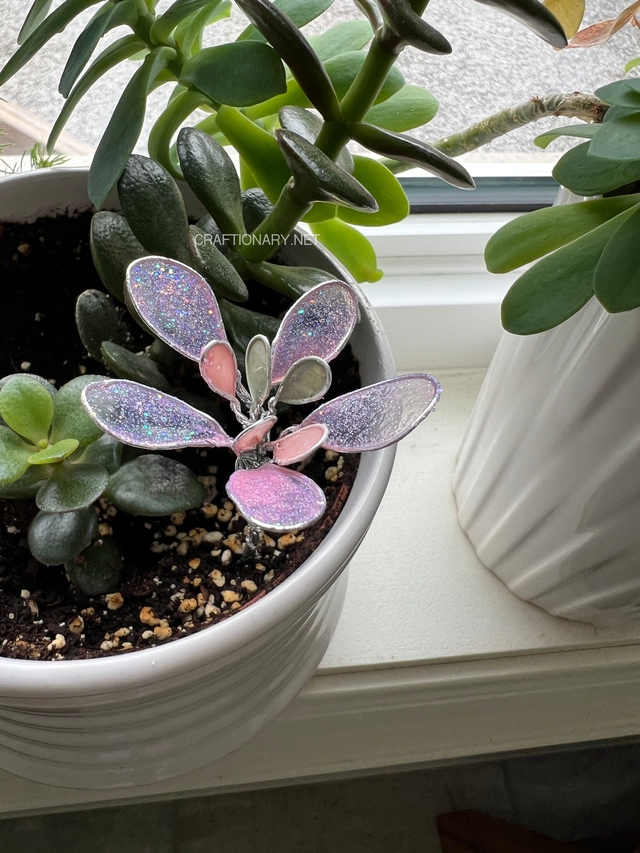
- Garden decor: Use adorable miniature flowers as indoor garden decor by inserting them inside dry-area of soil or wiring them around your houseplants or planters.
How to Make Your First Nail Polish Wire Flower?
Here’s the straightforward process for a simple five-petal flower that anyone can make on their first try.
Materials:
- 26-gauge craft wire (any color)
- A pencil or pen for shaping
- Nail polish in your chosen colors
- Small round-nose pliers (helpful but not essential)
- Wire cutters or strong scissors
- Styrofoam block or floral foam to hold flowers while drying
Instructions:
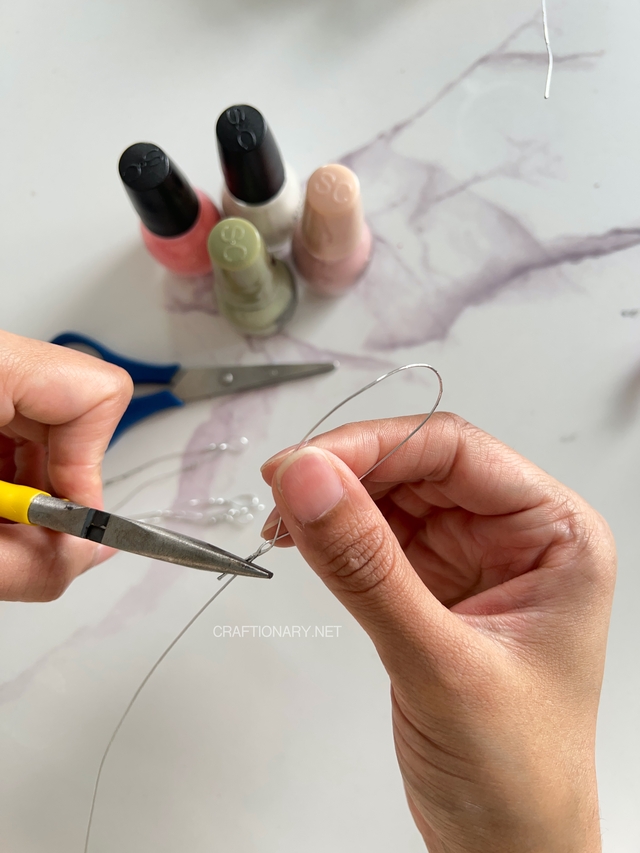
- Cut about 40cm of wire. Starting roughly 5–6cm from one end, wrap the long section around your pencil five times to create five loops. Each loop will become a petal.
- Remove from the pencil. Twist the two wire ends together tightly at the point where the loops meet — this becomes the center of your flower and the start of the stem.
- Thread one of the wire ends back through all five loops to cinch them together. This stops them from unraveling. Twist back down to join the stem again.
- Spread the five loops out evenly into a flower shape. You can gently curve each petal slightly upward for a more three-dimensional look.
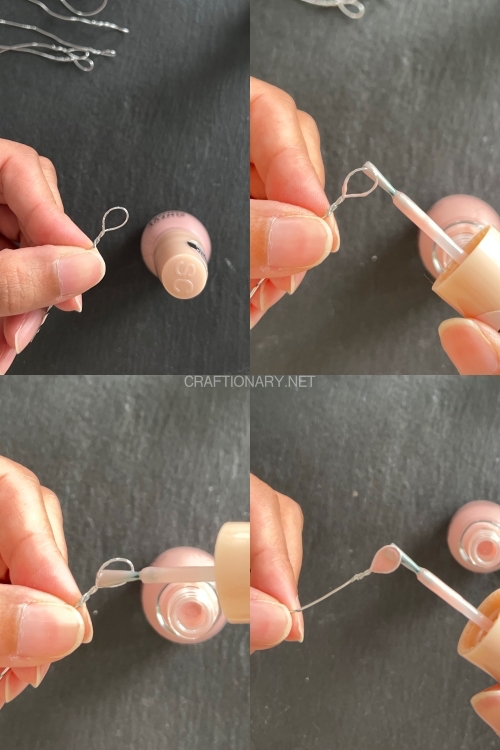
- Hold the flower by the stem. Load your nail polish brush. Touch the brush to the wire at the base of one petal and let the polish flow slowly across. Work from the base outward. Be patient. Don’t scrub. One gentle pass is enough for the first coat.
- Stand the flower upright in styrofoam to dry. This is important — if you lay it flat while wet, the film can sag. Ten to fifteen minutes is usually enough before the first coat is set.
- Add a second coat. This fills any thin spots from the first coat and strengthens the petals. Let dry fully.
- Optional: Add a coat of clear top coat for strength and gloss.
Alternatively:
- You can make individual petals and assemble the flower later to create a dimensional flower with different size stamens and petals.
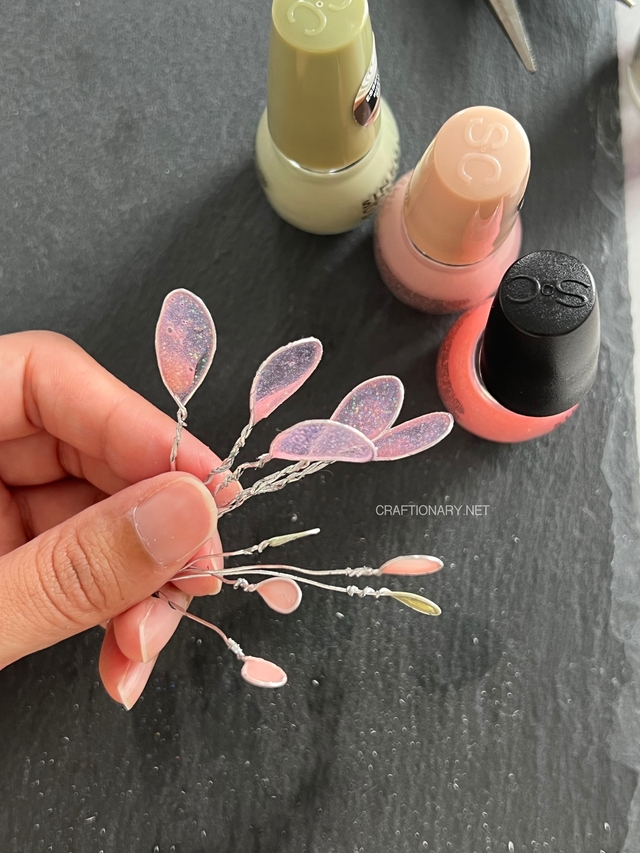
Your first flower is done. Once you’ve made two or three and gotten a feel for the pace and pressure, the process becomes meditative and genuinely enjoyable.
See the instructions in action in this short video:
View this post on Instagram
Troubleshooting: The Problems People Actually Ask About
1. My nail polish won’t bridge the wire gap — it just slides off or drips.
The petal is probably too large, or the polish is too thin. Make smaller petals, or try slightly older thicker polish. You can also try the wood glue pre-coat method.
2. The film keeps bursting when you add a second coat.
The first coat isn’t fully dry. Wait longer between coats — what looks dry on the surface can still be wet in the center of the film. Give it at least 20–30 minutes before adding another layer.
3. My wire loops aren’t even.
This comes with practice. Using a consistent-sized object to wrap around (a pencil, a pen, a specific marker) and counting wraps carefully helps. Don’t stress about perfection on early attempts — slight irregularity actually gives the flowers a more handmade, natural quality.
4. The flowers look flat and artificial.
Try gently bending and curving each petal individually after the polish is fully dry. The dried film is flexible enough to move slightly without cracking if you’re gentle. Curving petals upward and giving the flower a slight dome shape makes an enormous difference.
5. Can you fix a burst petal without starting over?
Yes, often. If the film collapses but the wire is still intact, let it dry completely (any wet remnants need to be gone), then re-coat. The dried residue actually helps the new coat form a membrane more easily. Don’t try to remove the dried burst film first — just coat right over it.
6. The colors look different when dry than when wet.
This is normal and something to factor into your planning. Many nail polishes dry slightly darker or with more opacity than they appear wet in the bottle. Sheer and jelly polishes stay beautifully translucent when dry and look most like stained glass. Test a petal before committing to a whole flower in a color.
7. Can You Use Nail Polish Flowers Outdoors?
Short answer: with care, yes, temporarily. Nail polish film is not weatherproof. UV light will eventually fade the colors, and moisture will weaken the film over time. For outdoor use at events or in a garden for a season, they can be lovely — just expect them to be more fragile than indoor use.
A coat of mod podge or clear UV-resistant spray sealant over fully dried flowers can extend their outdoor life significantly.
Caring for and Storing Nail Polish Flowers
- Store flat in a box lined with tissue, not loose in a bag where they’ll knock against each other
- Avoid direct sunlight for storage — it fades colors faster than you’d expect
- Handle the petals as little as possible; the film scratches
- If a petal gets scratched or dull, a fresh coat of clear top coat restores the gloss beautifully
Wire and nail polish flowers sit in a sweet spot that’s genuinely rare in crafting. The materials are cheap — you probably already have nail polish — and the technique, once you understand why it works the way it does, is surprisingly forgiving. You’ll make burst petals. That’s part of it. But you’ll also make blooms that look genuinely precious, that make people ask where you bought them, and that you’ll be quietly pleased to have made yourself.
The size constraints that seem like a limitation are actually the whole point. Miniature flowers made petal by miniature petal are precisely what makes this craft special. Work with the scale, not against it, and the results will consistently surprise you.
You will also like:
Pipe Cleaner Flowers Guide: (Every Type, Technique and Idea)