This post may contain affiliate links. Please see our full Disclosure Policy for details.
Crafting is fun, creative, and rewarding—but it can also be messy, time-consuming, and frustrating without the right tricks. Whether you’re into painting, sewing, scrapbooking, or DIY home projects, knowing a few time-saving craft tips can make your projects easier, cleaner, and more enjoyable.
This guide shares the 30 best craft tips covering painting, general crafting hacks, organization, and more—plus answers to the most common questions people ask about crafting.

30 Best Craft Tips for Beginners and Experts
So let’s get started:
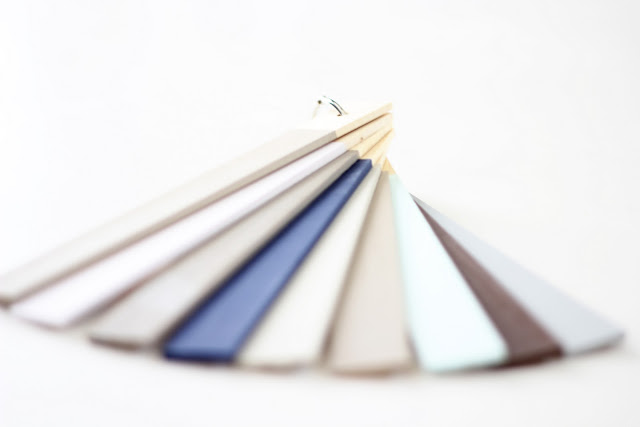
1. Paint Scheme Samples
Paint popsicle sticks the color of every wall in your house. Carry with you on the go to match furniture, curtains, decorations, etc. You can also write the paint brand, and color on the back for reference.
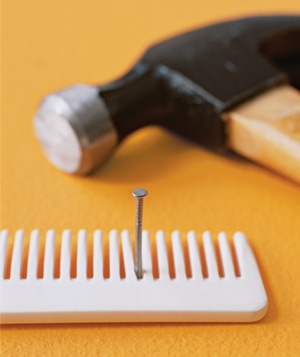
2. Comb as Nail Holder
Protect your fingers when hanging something. Hold the nail in the comb lines.
3. Painting Tips
- Use a Hairdryer to Speed Up Drying – Great for acrylics and crafts with multiple layers.
- Prevent Paint Drips – Don’t overload your brush; apply paint in thin coats.
- Save Paint with Plastic Wrap – Cover your paint tray or palette between coats.
- Clean Brushes with Vinegar – Soak hardened brushes in vinegar to loosen dried paint.
- Use Painter’s Tape for Clean Lines – Press firmly to prevent bleed-through.
- DIY Textured Paint – Add a little baking soda to acrylics for a rustic finish.
- Keep Jars Mess-Free – Rubber band a paper towel around jar rims to wipe brushes.
- Paint Small Objects on Skewers – Stick beads, buttons, or small crafts on skewers for easy painting.
- Revive Dried Acrylic Paint – Add a few drops of water or acrylic medium to bring it back to life.
- Test Colors First – Paint swatches on scrap paper to see how colors dry before applying.
Related: How to paint a room wall perfect the first time?
4. Tips to Prevent Paint From Dripping
- Use the Right Amount of Paint: Dip only ? of your brush into the paint. Overloading the brush or roller is the number one cause of drips. If using a roller, roll off the excess paint on the tray’s ridged section before applying it to the wall or surface.
- Apply Thin, Even Coats: Instead of trying to cover in one thick coat, use 2–3 thin layers. This ensures better adhesion, quicker drying, and no drips.
- Watch Your Brush Technique: Always brush in long, smooth strokes. Avoid dabbing or pressing too hard, which pushes out excess paint. Feather the edges by lifting the brush at the end of each stroke.
- Maintain Proper Roller Pressure: Apply light to moderate pressure when rolling. Heavy pressure squeezes out extra paint, which drips down.
- Control the Environment: Avoid painting in humid or overly hot conditions. Humidity slows drying, while heat makes paint tacky and more likely to sag. Ensure good airflow for faster drying.
- Use the Right Tools: High-quality brushes and rollers hold paint better and release it evenly. Cheap tools often cause uneven application and drips. Use angled brushes for edges and trim.
- Check and Smooth Drips Quickly: Always keep an eye out for drips as you go. If you see one forming, gently brush or roll it out immediately before it dries.
If drips already happened the:
- Wet drips: Smooth them with a clean brush or roller.
- Dried drips: Lightly sand the area with fine-grit sandpaper, then repaint with a thin coat.
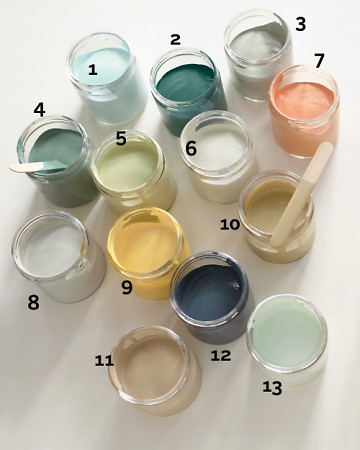
5. Bold color palettes
Hint of bold color that will enliven your space. 18 go-with-everything, paint-anything, put-anywhere hues. These color palettes will work in any room.
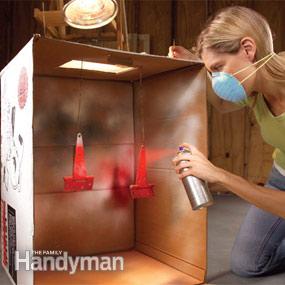
6. Spray Painting Tip
- Use cardboard boxes to spray paint. Great idea to paint thumbprint free projects.
- Cut an opening at the top. Use wire to hang and rotate your objects.
- Freshen up old tape by microwaving for 10 seconds. Heat softens the adhesive for easy release.
- Clean the item thoroughly, lightly sand glossy surfaces for better adhesion. Wipe with a tack cloth to remove fine dust.
- Use a Primer for smooth base and help spray paint stick better.
- Shake the can vigorously for 1–2 minutes before use, and occasionally while spraying. This ensures the pigments and propellant mix evenly, preventing uneven coverage.
- Hold the can 8–12 inches from the surface. Too close = drips and pooling. Too far = uneven, dusty finish.
- Always spray in multiple thin coats rather than one heavy coat. Allow each coat to dry before applying the next (check label for drying times).
- Spray in a steady, sweeping motion. Don’t stop or hold the nozzle in one spot—it will cause paint buildup and drips.
- Use light pressure on the nozzle. If the nozzle clogs, turn the can upside down and spray for a few seconds to clear it.
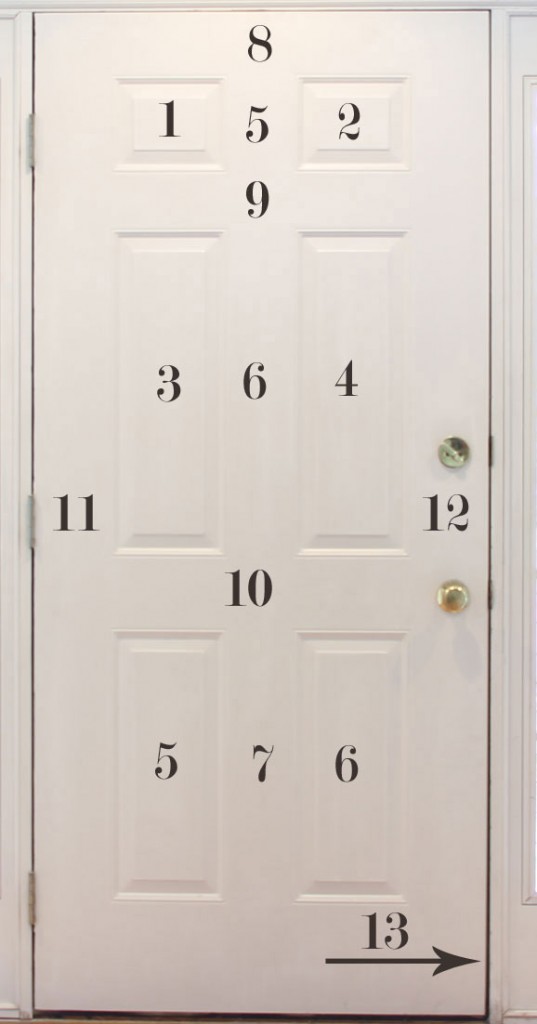
7. Door Painting Tip
How to correctly paint a door! Great image to help you paint.
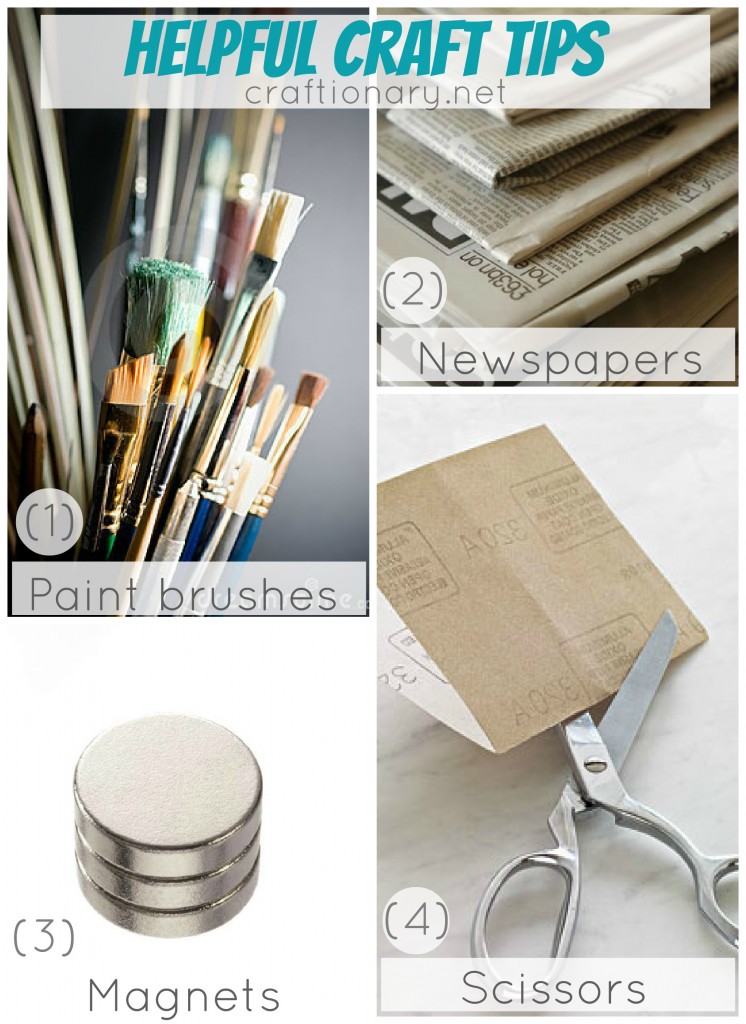
8. Helpful Craft Tips:
- Paint brushes: Soak your paint brushes in fabric softener or hair conditioner for 10 mins. Paint wipes off easily.
- Newspapers: Use newspapers to create huge patterns.
- Magnets: Use a magnet for easy picking of sewing pins.
- Scissors: Cut through sandpaper a few times to sharpen your scissors.
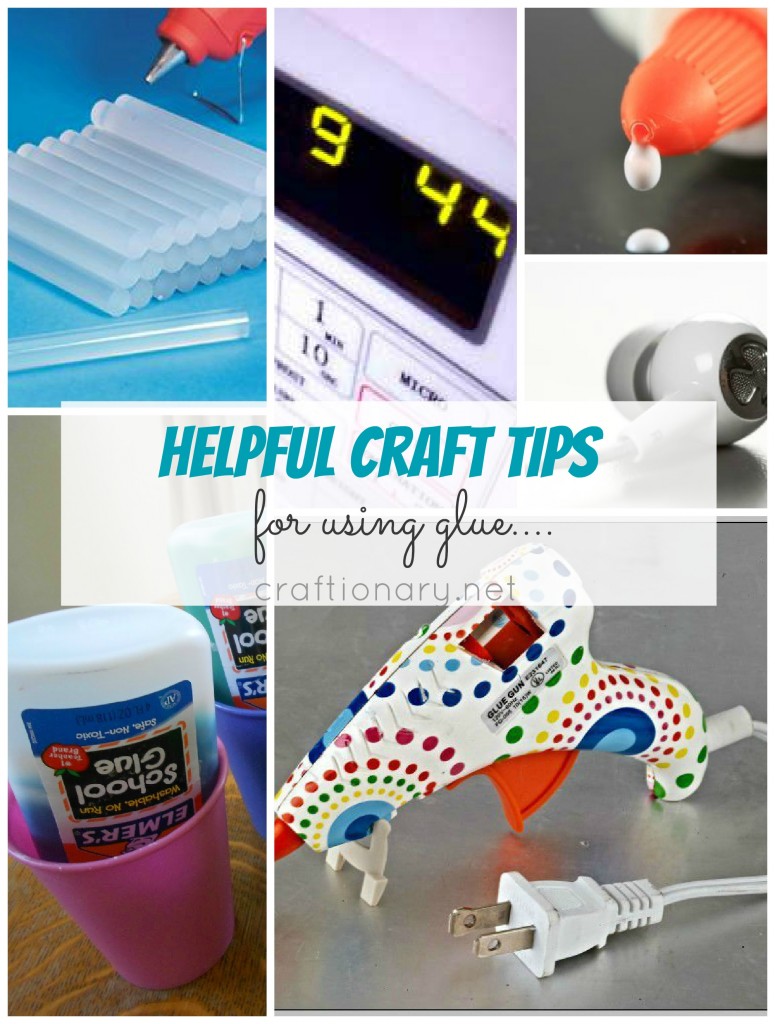
9. Glue Craft Tips
- Keep the glue sticks in the freezer. It prevents long string bands when gluing.
- Microwave glue for 10 seconds. It will help use the last bit of glue from the bottle.
- Blow dry your finished projects to remove hot glue strings. Heat from the hair dryer removes strings.
- Wipe the tip of the glue tube with lotion using a tissue. It prevents it from sticking.
- Store bottles of glue upside down in a jar. You are ready to use without waiting.
- Reposition hot glued items by warming them with embossing gun. The heat will loosen it up.
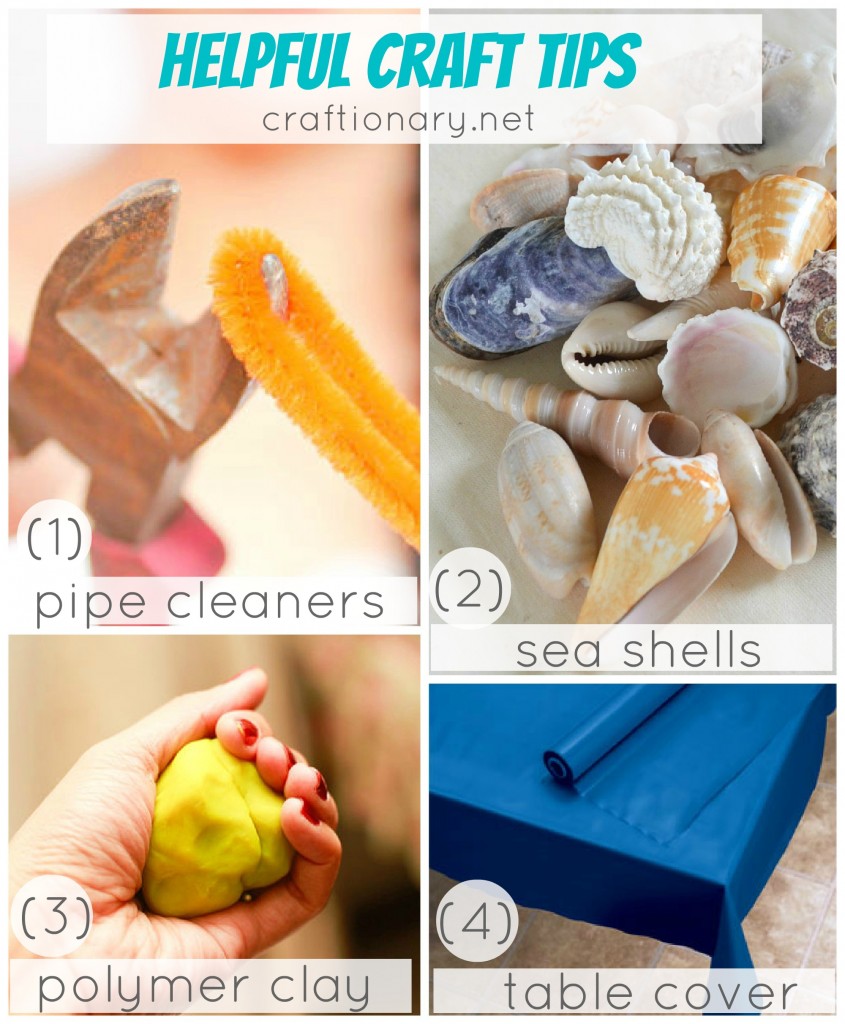
10. Helpful Craft Tips
- Pipe cleaners: Cut pipe cleaners with wire cutter. Scissors are damaged, if used for cutting any type of wire.
- Sea shells: Clean your sea shells for craft projects. Use 1/2 on 1/2 solution of bleach and water.
- Polymer Clay: Soften your hard polymer clay by pouring a few drops of clay softener (or baby oil).
- Table cover: Use plastic party tale covers for craft projects. These dollar store covers are better than newspapers. And can be reused.
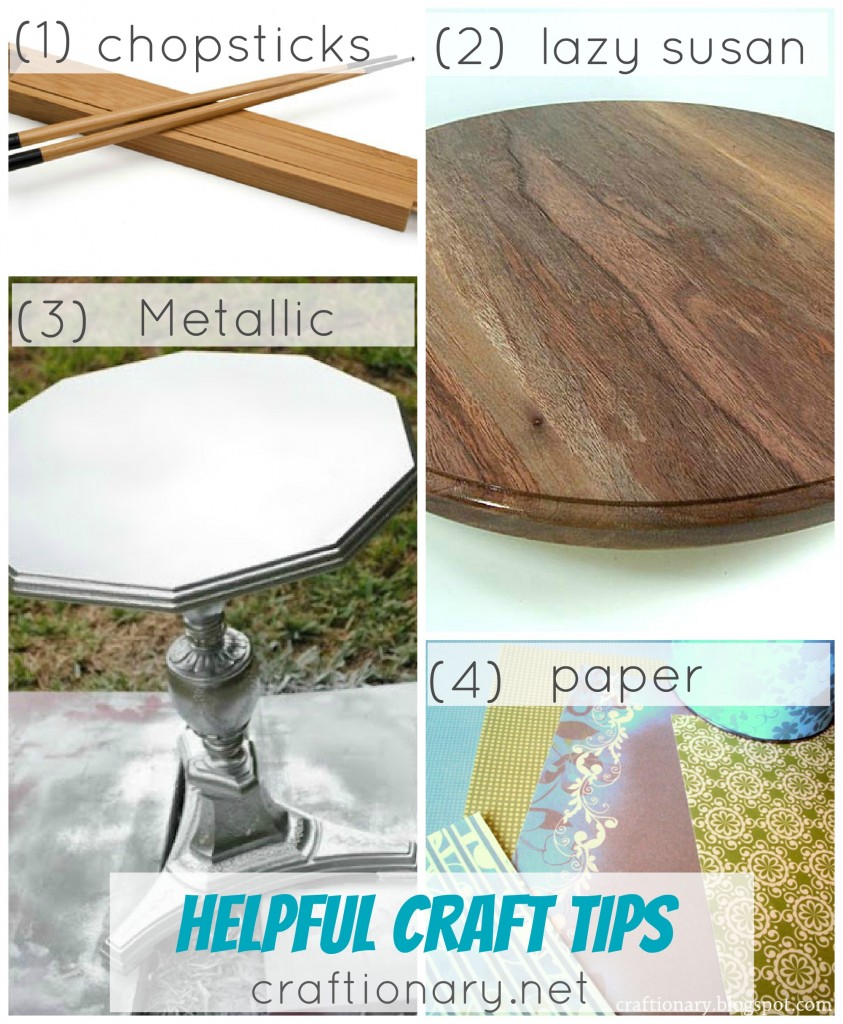
11. Helpful Craft Tips
- Chop Sticks: Use lacquered chopsticks to smooth out air bubbles and wrinkles after decoupaging. Find them in Asian markets or gift shops.
- Lazy Susan: Spray paint small items on all sides on lazy susan. Cover it with newspaper and rotate as you spray paint.
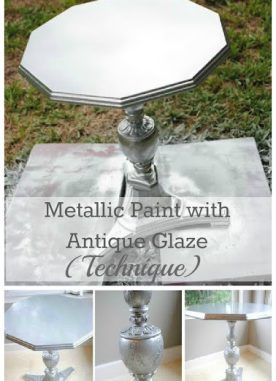
- Metallic Paint: Brush in one direction to cover when using metallic paint.
- Paper: It is much easier to cut paper, if you rotate the piece you are cutting. And not the scissors.
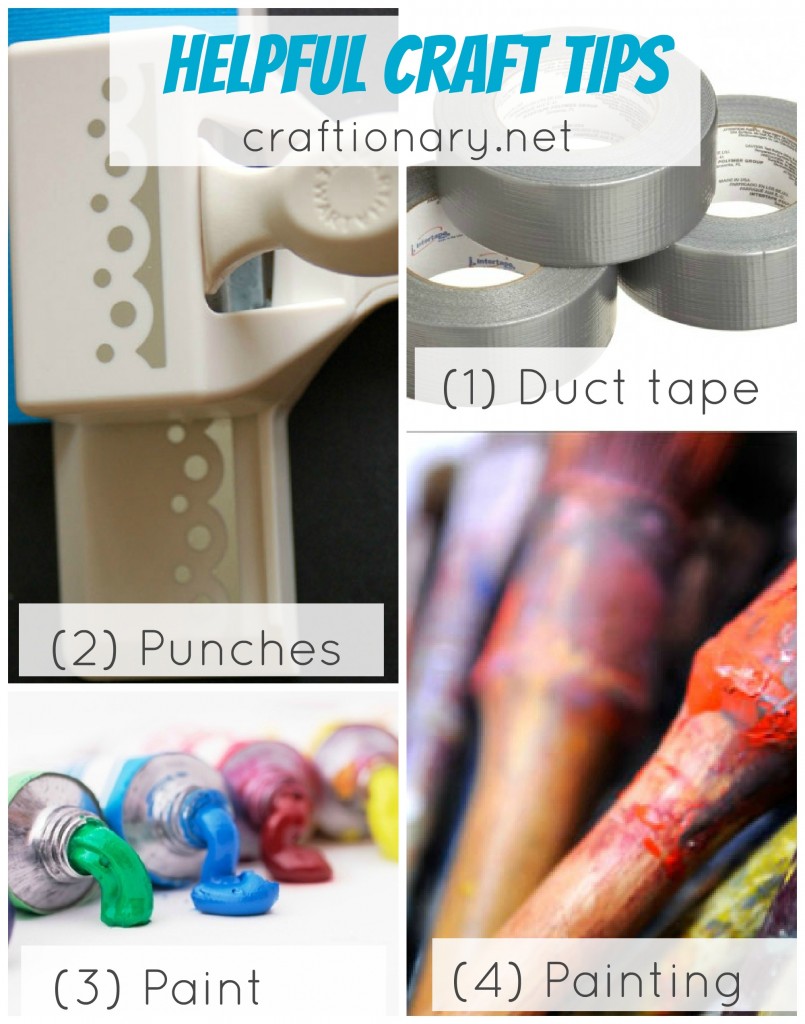
12. Helpful Craft Tips:
- Duct tape: Wipe scissors with baby wipe for easy cutting of duct tape.
- Paper Punches: Punch through aluminium foil for sharpening decorative punches. Punch through wax paper for lubricate punches.
- Paint: Add a drop of liquid soap in acrylic paint. It will prevent it from separating and beading on the surface.
- Painting: Stick small items on double sided tape when painting. Helps keep your fingers clean.
General Crafting Tips
- Use Muffin Tins for Small Items – Great for beads, buttons, sequins, and safety pins.
- Keep Glue Nozzles Clear – Store bottles upside down for easy flow.
- Use Baby Wipes for Quick Cleanups – Wipe hands, stamps, or brushes on the go.
- Sharpen Scissors with Aluminum Foil – Fold foil and cut through to refresh blades.
- Hot Glue Hack – Rub petroleum jelly on surfaces to prevent glue from sticking where you don’t want it.
- Binder Clips for Extra Hands – Hold glued pieces in place while drying.
- Magnets in Craft Rooms – Stick pins, needles, or clips to a magnetic strip for easy storage.
- Repurpose Jars for Storage – Mason jars are perfect for ribbons, markers, or brushes.
- Thread Needles with Hairspray – Spray the end of thread for easy threading.
- Store Yarn in Zip Bags – Cut a hole in the bag to feed yarn tangle-free.
- Use Clothespins as Clips – Hold glued seams or small items together.
- Keep Sandpaper Handy – Perfect for distressing paper edges or smoothing wood crafts.
- Always Test Adhesives – Some glues yellow over time—test before using on special projects.
- Keep a Craft Journal – Record ideas, color swatches, and notes for future projects.
Crafting Wisdom: Smooth Sailing for Every Project
These tips apply to almost any craft you undertake:
- Organize Your Supplies by Category: A well-organized crafting space saves time and frustration. Use bins, drawers, and labels to keep everything in its place.
- Read Instructions Thoroughly: Before starting any new kit or complex project, take the time to read all instructions from beginning to end.
- Start Small: If you’re new to a craft, begin with simple projects to build your skills and confidence before tackling more intricate designs.
- Gather All Materials First: Nothing derails a creative flow faster than realizing you’re missing a crucial item midway through a project.
- Good Lighting is Crucial: Ensure your workspace is well-lit to prevent eye strain and ensure accuracy, especially for detailed work.
- Protect Your Workspace: Use a cutting mat, old newspapers, or a designated craft mat to shield your tables from spills, cuts, and glue.
- Take Breaks: Step away from your project if you’re feeling frustrated or tired. A fresh perspective often helps solve problems.
- Don’t Be Afraid to Improvise: Sometimes, a project doesn’t go exactly as planned. Embrace happy accidents and let them lead you to new creative solutions.
- Repurpose and Recycle: Look for everyday items you can transform into craft supplies, from old magazines to empty jars.
- Invest in Quality Tools: While you don’t need the most expensive items, good quality tools can make a significant difference in the ease and success of your projects.
- Label Everything – Use washi tape, stickers, or chalk markers to identify supplies.
- Rotate Projects – Work on multiple projects to avoid burnout and waiting for dry times.
Common Questions About Crafting
1. What’s the best way to keep paint brushes soft?
Wash them right after use, then store with bristles upright. For stiff brushes, soak in vinegar.
2. How do you keep glitter from making a mess?
- Use a shallow tray when working with glitter. Spray projects with hairspray to lock glitter in place.
- Use a lint roller, a damp cloth, or even play-doh to pick up stubborn glitter particles. A dedicated “glitter zone” can also help contain the sparkle.
3. How do you avoid wasting crafting materials?
Plan projects, reuse scraps, and store leftovers neatly for future use with labels.
4. How do you make my crafts look professional?
Use the right adhesive, keep edges clean, finish with protective sealants, and focus on neatness. Pay attention to detail! Clean edges, neatly tied bows, smooth finishes, and consistent application of color all contribute to a professional look.
5. How do you prevent glue from showing?
Use the right amount of glue – less is often more. For paper crafts, opt for a clear-drying glue stick or a thin layer of liquid adhesive. For fabric, try fabric glue that dries clear. Clamping pieces together while drying also helps.
6. What’s the best way to cut intricate shapes?
For paper and thin materials, a craft knife with a self-healing mat is invaluable. For fabric, sharp fabric scissors or a rotary cutter for straight lines are best.
7. How to fix paint consistency?
- If Too thick? Add a tiny bit of water or appropriate thinning medium.
- If Too thin? Let it sit uncovered for a bit to allow some water to evaporate, or try adding a thickening medium if it’s available for your paint type.
8. What are the most common crafting mistakes?
Rushing, not reading instructions, using dull tools, poor surface preparation, and trying to do too much at once. Patience is key!
9. How to store your finished crafts?
Depending on the craft, use airtight containers, display cases, or acid-free tissue paper to protect them from dust, moisture, and light.
10. What’s the best way to clean up after crafting?
Clean as you go! Put caps back on glues, rinse brushes immediately, and sweep up scraps. Having a dedicated “clean-up” station with wipes and a small dustpan helps.
Crafter’s Question of the Day:
- What’s your go-to crafting tip that you can’t live without? Share it in the comments below!
- Have a question, let us know!
Crafting doesn’t have to be overwhelming. With these 30 best craft tips, you’ll save time, reduce mess, and create projects that look polished and professional. From painting tricks to organizational hacks, these tips are useful for beginners and experienced makers alike.
Whether you’re tackling your first DIY project or adding to your creative toolbox, the right tips can turn a fun hobby into a skill you’ll enjoy for years.
You will also like:
Best Sealer: How to Waterproof Acrylic Paint on Rocks, Wood, Glass Crafts
The Ultimate Guide to Clay Crafts: Air-Dry Clay vs. Polymer Clay?
DIY Resin Crafting: Everything You Need To Know To Get Started


Absolutely an AWESOME post!! THANK YOU THANK YOU THANK YOU~~ I am world’ dumbest person when it comes to this stuff….and then my carpet ends up all covered in paint…lol
Polymer clay doesn’t soften using water. Well warm water can be used to soften it but water does not mix in like it does in play dough
Yeah, like Maria says; water does not mix with polymer and its a bad idea to try and mix the two. Water breaks it down and starts to separate the oils and then eventually the clay. Just use clay softener its not expensive and you can always use a coupon from a craft store to buy it which will drop the price down to around 3 dollars (with the 40% off) plus whatever your state tax may be. Only a drop or two is needed of the softener though so don’t go crazy.
Love your site and all of your great tips and info.
love it thanks so many tips i can use to make my life easier
I used baby oil to soften polymer clay, works great!
I found your tips very helpful, thanks