This post may contain affiliate links. Please see our full Disclosure Policy for details.
Looking for a creative and personal way to store or share your garden seeds? Designing your own DIY seed packets with Canva is not only easy and fun, but it also adds a stylish and customized touch to your seed-saving adventures.
Whether you’re planning a seed swap, gifting garden goodies to friends, or simply organizing your own seed collection, these homemade seed packets are a perfect weekend craft.
Why Make Your Own Seed Packets?
Personal Touch: Add your own labels, garden quotes, and even planting instructions.
Custom Design: Match your seed packets to your gardening aesthetic or brand.
Eco-Friendly Gift Idea: Reusable, beautiful, and practical for garden lovers.
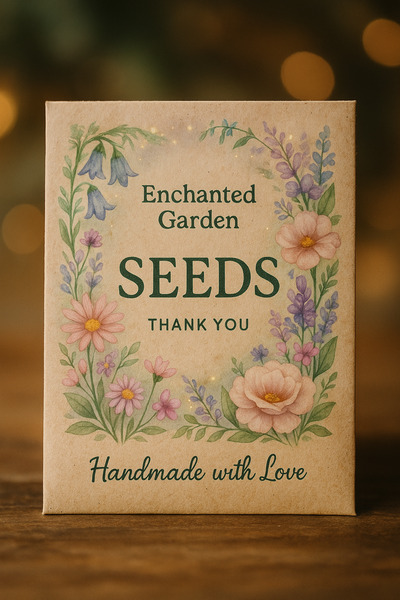
Front of seed packet
What You’ll Need
To create seed packets from your own Canva designs, gather the following:
- Free Canva account – search seed packet designed to choose a design from a collection of pre-made options that you can customize with your own text and add to remove design elements
- Printable paper (white cardstock or linen paper works best)
- Sharp scissors or craft knife
- Glue stick or double-sided tape
- Seeds you’ve saved
- (Optional) Decorative stamps or stickers for embellishment
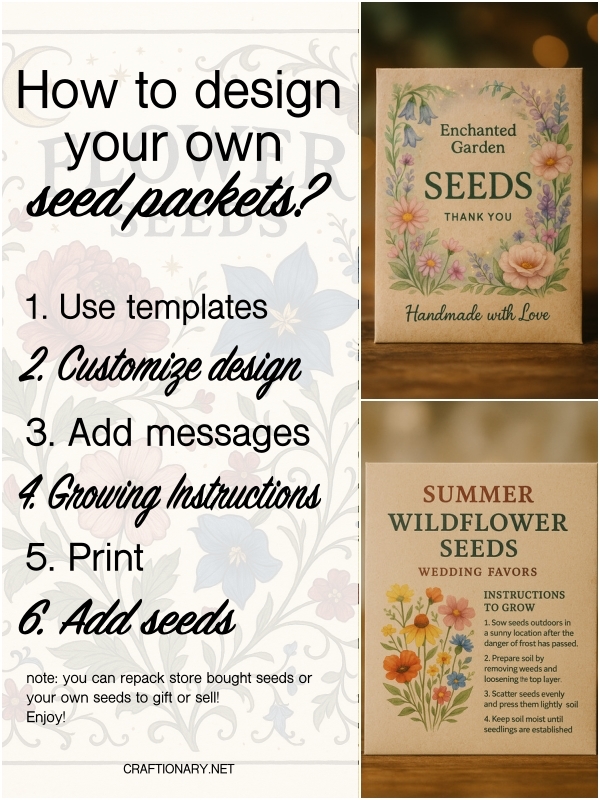
Design Your Seed Packet in Canva
- Go to Canva and start a new design (we recommend a custom size of 5” x 7”).
- Use “Envelope Template” or search “seed packet” in the template bar for a ready-to-edit layout.
- Add decorative elements, plant names, instructions, or even small illustrations.
- Once you’re happy with your design, download it as a PDF for print (choose CMYK (Cyan, Magenta, Yellow, and Key (Black)) if available).
Pro Tip: Leave space for handwritten notes like the harvest date or special care instructions.
Print and Cut
- Print your Canva seed packet designs on sturdy paper—white cardstock or textured linen paper works great.
- Cut just inside the outer lines of your design to create the envelope shape.
- If your printer cuts off part of the border, don’t worry—just make sure the shape is still usable!
Related: Make Fabric Paper for Journal and Artwork
Fold and Assemble
- Use the inner rectangle lines as folding guides for the packet flaps.
- Fold all edges neatly so the printed lines stay on the back side of the packet.
- Use a glue stick to secure the side flaps.
- Once you place your seeds inside, glue or tape the top flap to close it securely.
Related: Custom Seed Packet Ideas: 20 Presentable Ways to Repack & Gift
Ideas for Flower Seed Packets
Label each packet clearly with the type of seed and harvest date. Here are a few favorite flowers perfect for saving and sharing:
- Sweet Peas
- Zinnias
- Sunflowers
- Lamb’s Ear
- Hollyhock
- Snapdragons
- Wildflower Mix
Here’s an example seed packet to guide you that you can include instructions, type of flower, care guide, and even a custom message on the back of each packet.

Back of seed packet
These flowers are not only garden favorites but are also easy to grow from seed—perfect for beginners and seasoned gardeners alike!
Use Canva to Create Coordinated Labels
Design matching labels or stickers in Canva for a cohesive seed-saving kit. Great for farmers’ markets, gifting, or personal gardening journals.
Creating your own seed packets with Canva gives you the freedom to make something useful, beautiful, and sustainable. You’ll be amazed how a few design tweaks can transform your garden seeds into thoughtful, handmade gifts. Whether you’re a gardener, a DIYer, or both—this project is for you.
You will also like:
20 Right Seed Starter Trays and Kits Options To Begin