This post may contain affiliate links. Please see our full Disclosure Policy for details.
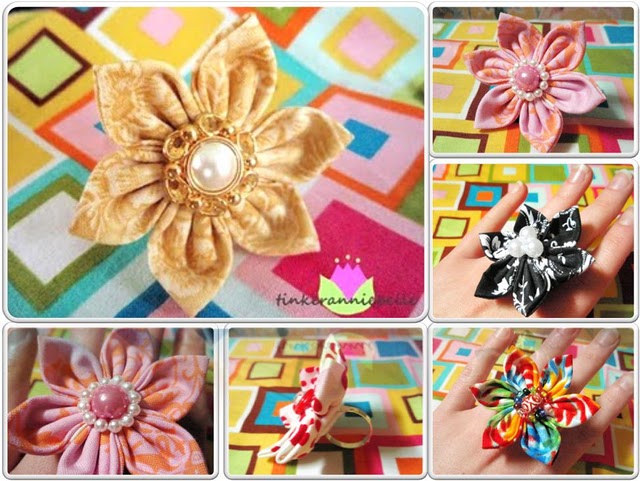
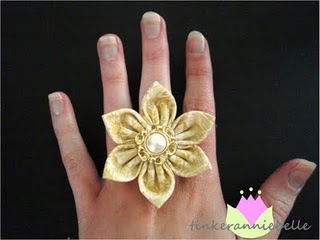
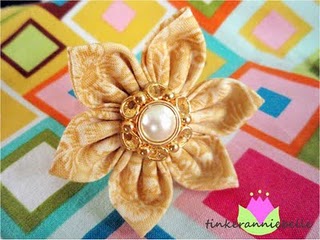
A vintage-inspired fabric flower ring!
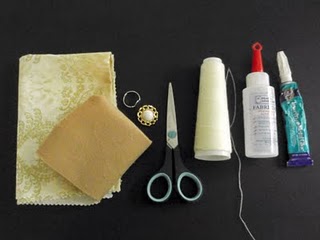
Materials:
- Fabric (I like to use quilting cottons, but you can use other types of fabrics as well)
- Felt
- A ring (to attach the flower)
- Embellishments (buttons, jewelry, beads etc)
- Scissors
- Needle and thread
- Glue (I prefer Fabric-Tac and Allen’s Jewelry and Metal Glue)
Instructions:
Take the fabric of your choice and cut out SIX 2.5 inches circles. I like to use my Sizzix Big Kick
(Circles # 2) for this, but you can cut them with scissors too.

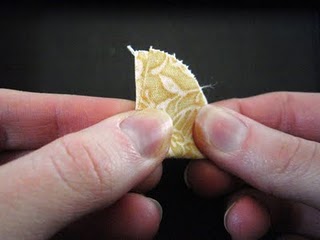
Now take the circle and turn it upside down so that the wrong side of the
fabric is facing up and fold your circle in half

Then fold it in half again
Next, poke your threaded needle (make sure your thread is knotted– I always seem to forget and have to start over) through the edge where the folds come together and using a running stitch
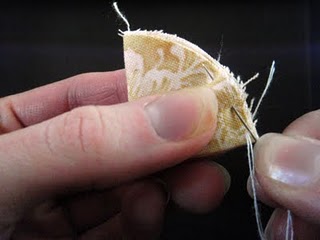
stitch across the rounded side of your folded circles

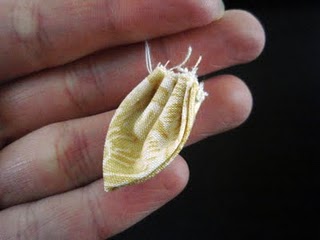
and gather it up to create a petal. Now you have your first petal!
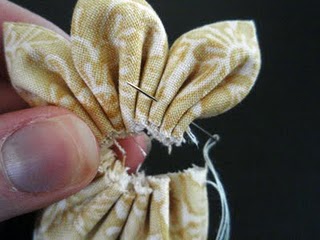
Using your first petal and thread (don’t cut the thread yet!), repeat the process with the remaining five circles
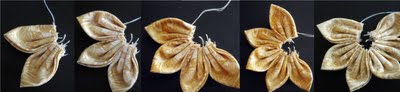
Once all the petals are stitched on, pull and gather them together into a circle to create a flower. Continue stitching through the very first petal to close the centre of the flower
Finish it off by tying a knot in your thread or take three small stitches in the same place.
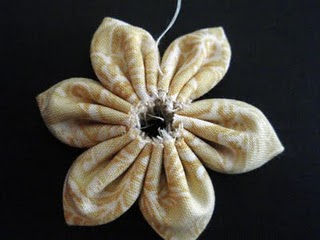
Now your fabric flower is complete!
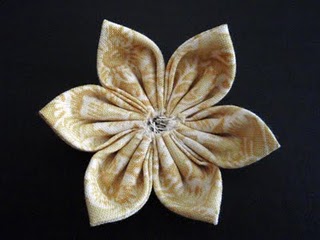
Using the Fabric-Tac (or any glue you like), cover the back of the flower with a small piece of felt.
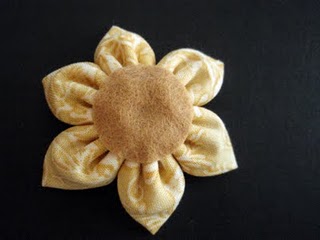
Now cut a small felt rectangle, just big enough to cover the area of the ring where you will place the flower and glue it to the ring using Allen’s Jewelry & Metal glue or any super glue you like.
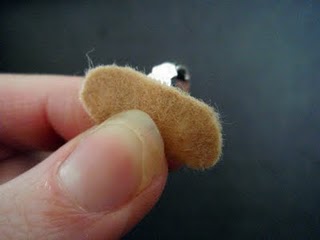
Next squirt some Fabric-Tac on your felt rectangle and attach the flower to it.
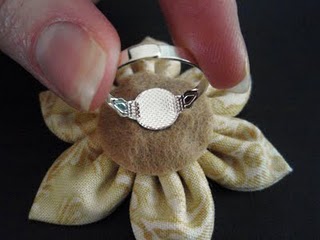
and place another felt piece over the top to sandwich the ring between the two felt pieces.

Finish with an embellishment of your choice (in this case I chose a vintage pearl button, I found in my mother’s sewing room) and glue it to the center of the flower
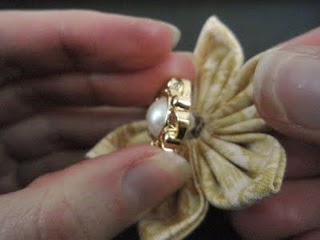
And your done!
A beautiful flower cocktail ring, made in a few minutes– show it off and don’t forget to tell everyone that YOU made it!


WOW!!! I love this!! This template is just the inspiration I needed for my hand made wedding bouquet!!!!! Bookmarked & printed! THANK YOU THANK YOU THANK YOU!!
This comment has been removed by the author.
Hi Hani… lovely flowers and how easy to make .. thanks for sharing
Visit me if you can
http://craftaworld.blogspot.com/
Love
Farah
Those flowers are so cute, great idea! 🙂
DayByDiva.Com
DayByDiva.Com
hey dear..its lovely flowers and how easy to make .. thanks for sharing
Wonderful tutorial! I've made several already, but so far I had the most fun trying this tute with burlap.
Thank you so much for sharing!!
I like your post.I appreciate your designs. Thanks for this post.