This post may contain affiliate links. Please see our full Disclosure Policy for details.
There is an undeniable magic to miniature crochet. Transforming a few yards of scrap yarn into a palm-sized creature brings an instant sense of satisfaction. Whether you are building a pocket-sized army of plushies for a local craft fair, creating whimsical keychains, or just looking for a fast, stash-busting project, cute crochet amigurumi miniatures are the ultimate crafty escape.
The biggest draw? They require minimal yarn, work up in under an hour, and make incredibly heartwarming gifts.
You will find five exclusive free miniature amigurumi patterns:
- buzzing bumblebee
- glowing firefly
- tiny pond duck
- pocket frog
- majestic micro-dragon
We will also dive into expert tips on handling micro-crochet gauges, choosing the best yarn, and achieving perfect tension. Find free crochet patterns to make cute crochet miniatures:
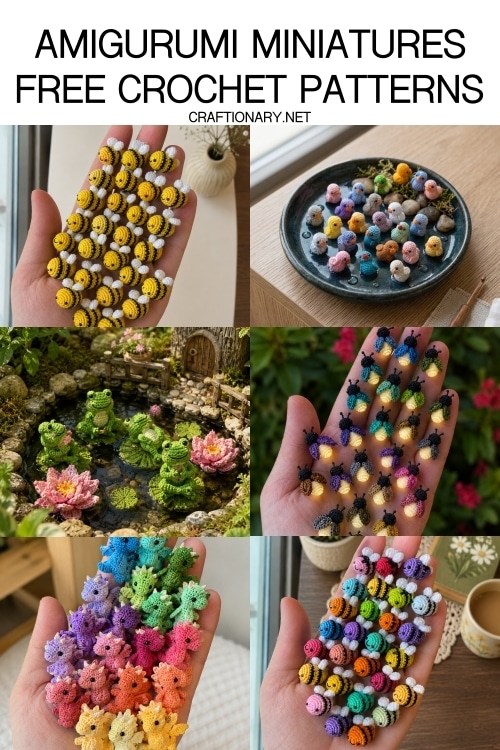
Crochet Miniature Frogs
Here’s a complete and detailed crochet pattern to make your own miniature pond frog.
The frogs feature a distinct rounded head/body worked in one piece, a lighter-colored belly patch, distinct bulging eyes on top, and flexible, chained limbs.
Abbreviations (US Terms):
- MR: Magic Ring
- ch: Chain
- sc: Single crochet
- inc: Increase (2 sc in the same stitch)
- dec: Decrease (sc 2 stitches together)
- sl st: Slip stitch
- st(s): Stitch(es)
- [ ]: Repeat instructions inside brackets the indicated number of times
- ( ): Total stitch count at the end of the round
Materials Needed:
- Yarn: Fingering weight (4-ply) or sport weight cotton yarn in Green (main body) and Light Green/Cream (belly).
- Hook Size: 2.0 mm or 2.25 mm (to keep stitches tight so stuffing doesn’t show).
- Eyes: 4 mm or 5 mm black safety eyes (or black embroidery floss).
- Stuffing: Fiberfill.
- Details: Pink embroidery floss (for cheeks) and black embroidery floss (for the smile).
- Yarn needle, stitch markers, and scissors.
The Crochet Pattern:
1. Main Body and Head (Worked bottom-up)
Using Green yarn. Stuff firmly as you progress.
- Round 1: 6 sc in a MR (6)
- Round 2: [inc] x 6 (12)
- Round 3: [sc, inc] x 6 (18)
- Round 4: [2 sc, inc] x 6 (24)
- Round 5: [3 sc, inc] x 6 (30)
- Rounds 6–12: sc in each st around (30) (7 rounds total for the main body shape)
- Round 13: [3 sc, dec] x 6 (24)
- Round 14: [2 sc, dec] x 6 (18) — Start stuffing here.
- Round 15: [sc, dec] x 6 (12)
- Round 16: [dec] x 6 (6)
- Fasten off, weave the tail through the front loops of the remaining 6 stitches, pull tight to close, and hide the yarn tail inside the body.
2. Frog Eyes (Make 2)
Using Green yarn.
- Round 1: 5 sc in a MR (5)
- Round 2: [inc] x 5 (10)
- Round 3: sc in each st around (10)
- If using safety eyes, insert a 4mm/5mm black safety eye into the center of the magic ring now and secure the back.
- Round 4: [dec] x 5 (5)
- Fasten off, leaving a long tail for sewing. Sew the two eye bumps securely to the top of the head (around Rounds 10–12 of the body), spaced about 2–3 stitches apart.
3. Belly Patch
Using Light Green/Cream yarn. Worked in flat rows.
- Row 1: Ch 5, starting in the second ch from the hook: 4 sc, ch 1, turn (4)
- Row 2: inc, 2 sc, inc, ch 1, turn (6)
- Row 3–5: sc in each st across, ch 1, turn (6)
- Row 6: dec, 2 sc, dec (4)
- Fasten off, leaving a long tail. Sew this oval patch centered onto the lower front of the frog’s body.
4. Legs and Feet (Make 2)
Using Green yarn. The frogs flexible legs that can sit flat or dangle.
- Ch 14.
- First Toe: In the 3rd ch from hook, sl st.
- Second Toe: Ch 3, sl st back into the same base chain stitch.
- Third Toe: Ch 3, sl st back into the same base chain stitch.
- Leg stem: Sl st in each of the remaining 11 chains back to the start.
- Fasten off, leaving a long tail. Sew the legs to the lower sides of the body (around Round 3 or 4) so they can fold forward or out to the sides.
5. Arms (Make 2)
Using Green yarn.
- Ch 10.
- First Toe: In the 3rd ch from hook, sl st.
- Second Toe: Ch 2, sl st back into the same base chain.
- Third Toe: Ch 2, sl st back into the same base chain.
- Arm stem: Sl st in each of the remaining 7 chains back to the start.
- Fasten off, leaving a long tail. Sew the arms to the sides of the body, just slightly above the belly patch (around Round 9 or 10).
Assembly and Details:
- Face Embroidery: Using black embroidery floss, stitch a wide, happy V-shaped or curved smile right below the eyes. Using pink embroidery floss, add two small horizontal lines right under the outer corners of the eyes/smile to mimic the rosy cheeks.
- Posing: Pin the arms and legs into your desired pose (sitting cross-legged, holding a tiny flower, or lounging) before final stitching to get the exact personality you want!
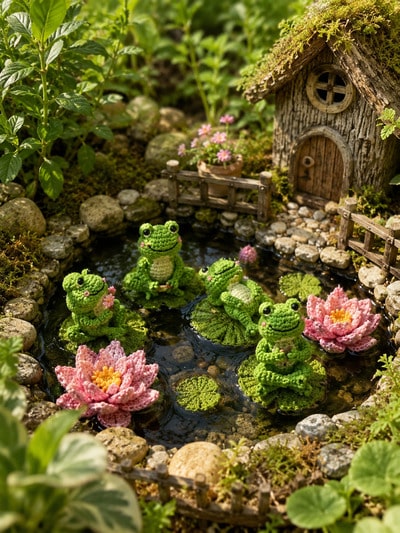
Note: This pattern is written for personal use only.
Firefly Crochet Pattern
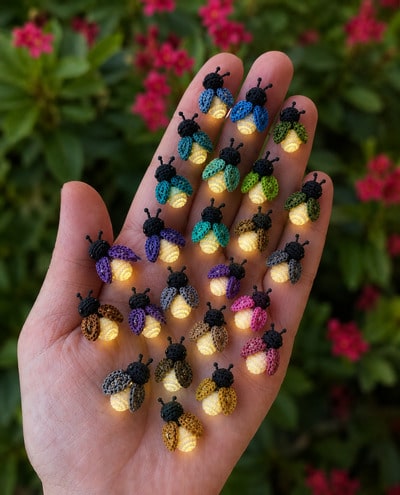
Here is a complete and detailed crochet pattern to create your own micro-amigurumi firefly.
To achieve the magical glowing effect, this pattern leaves the bottom of the glowing abdomen open so you can slip it over a small LED fairy light string, or insert a tiny, twist-on LED balloon light/submersible tea light inside!
Materials and Tools
- Yarn/Thread:
- Black: For the head and antennae.
- Pale Yellow / Cream / Glow-in-the-dark: For the glowing abdomen.
- Assorted Colors: Blue, green, purple, pink, brown, or teal for the wings.
- Note: To get the ultra-tiny size use Crochet Embroidery Floss (Size 10 or 20). If you prefer an easier project, regular sport/DK weight yarn will work, just resulting in a larger firefly.
- Hook: 1.0mm to 1.5mm steel crochet hook (or size appropriate for your chosen thread).
- Fiberfill: Just a tiny pinch for the head.
- Lighting: A strand of LED fairy lights (warm white) to display them on, or individual micro LED bulbs.
- Tapestry Needle and Scissors
Abbreviations (US Terms)
- MR: Magic Ring
- ch: Chain
- sc: Single Crochet
- inc: Increase (2 sc in the same stitch)
- dec: Decrease (sc 2 stitches together)
- sl st: Slip Stitch
- hdc: Half Double Crochet
- dc: Double Crochet
- st(s): Stitch(es)
The Pattern
1. The Head (Black)
- Round 1: Make a MR, 6 sc into the ring. (6)
- Round 2: (inc) x 6. (12)
- Round 3: sc around. (12)
- Round 4: (dec) x 6. (6)
- Stuff the head lightly with a tiny pinch of fiberfill.
- Antennae (Work directly onto the head before finishing):
- Sl st into a stitch near the top front. Ch 3. In the 2nd ch from hook, work a French knot or a picot (ch 2, sl st into the first ch) to make the little knob at the top. Sl st back down the remaining chains. Fasten off.
- Repeat on the other side for the second antenna.
- Fasten off the head, leaving a long tail for sewing it to the body/wings later.
2. The Glowing Abdomen (Pale Yellow/Cream)
To allow light to shine through brightly and accommodate an LED, we want this piece to be hollow and open at the top where it connects to the head.
- Round 1: Make a MR, 6 sc into the ring. (6)
- Round 2: (inc) x 6. (12)
- Round 3: (1 sc, inc) x 6. (18)
- Round 4-7: sc around. (18)
- Round 8: (dec, 7 sc) x 2. (16)
- Round 9: sc around. (16)
- Fasten off and weave in the ends.
- Note: Do not stuff this part if you are inserting an LED light! Leave it hollow.
3. The Wings (Make 2 in Colorful Yarn)
The fireflies have textured, slightly curved wings that hug the body.
- Row 1: Ch 7.
- Row 2: Starting in the 2nd ch from the hook, work: 1 sc, 1 hdc, 2 dc, 1 hdc, 3 sc in the very last chain stitch to pivot around to the underside of the chain.
- Row 3 (Working down the opposite side of the chain): 1 hdc, 2 dc, 1 hdc, 1 sc. Sl st to the first sc to close.
- Row 4 (Optional border for texture): Ch 1, sl st in each stitch around the perimeter of the wing to give it a crisp edge.
- Fasten off, leaving a tail for sewing.
Assembly Instructions
- Attach the Wings: Place the two wings side by side. Sew their top bases together slightly angled outward (forming a “V” shape).
- Join the Body Parts: Sew the black head directly onto the top base of the wings.
- Attach the Abdomen: Sew the open rim of the glowing abdomen underneath the wings and right below the head. Make sure the opening remains clear enough if you plan to stick an LED light inside from the top or back.
- Light It Up: Slide a warm-white micro LED bulb into the hollow abdomen from the opening. Turn it on and watch your firefly glow exactly like the ones in the palm of the hand!
Note: This pattern is written for personal use only.
Crochet Miniature Dragons
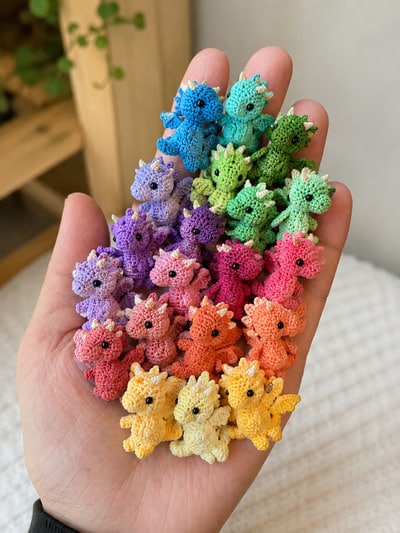
These micro-dragons are absolutely adorable! To achieve this tiny size, you will want to use embroidery floss or size 10/20 crochet thread paired with a very small hook (like 0.6mm to 1.0mm). However, you can easily scale this up using standard amigurumi yarn (DK or worsted weight) and a 2.5mm or 3.5mm hook for a larger, plushie version.
Here is a complete and detailed Amigurumi pattern for the little colorful dragons.
Materials Needed
- Main Color (MC): Any color of your choice (e.g., pink, blue, green, yellow).
- Contrast Color (CC): Cream or white (for the spikes/horns).
- Eyes: 2mm–3mm black safety eyes (or small black beads / black embroidery thread for embroidery).
- Crochet Hook: 0.75mm for micro size (or a size appropriate for your yarn).
- Other Tools: Fiberfill stuffing, tapestry needle, scissors, stitch marker.
Abbreviations (US Terms)
- MR: Magic Ring
- ch: Chain
- sc: Single crochet
- inc: Increase (2 sc in one stitch)
- dec: Decrease (sc 2 together, preferably invisible decrease)
- sl st: Slip stitch
- hdc: Half double crochet
- dc: Double crochet
- […]: Repeat instructions within brackets the indicated number of times
- (..): Total number of stitches at the end of the round
Head and Body (Worked as one piece from top to bottom)
Using Main Color (MC). Stuff firmly as you go.
- Rnd 1: 6 sc in MR (6)
- Rnd 2: [inc] x 6 (12)
- Rnd 3: [sc, inc] x 6 (18)
- Rnd 4–7 (4 rounds): sc in each st around (18)
- Note: If using safety eyes, insert them between Rnds 5 and 6, leaving about 4 stitches of space between them.
- Rnd 8: [sc, dec] x 6 (12)
- Rnd 9: [dec] x 6 (6)
- Rnd 10 (Neck): sc in each st around (6)
- Rnd 11 (Body begins): [inc] x 6 (12)
- Rnd 12: [sc, inc] x 6 (18)
- Rnd 13–16 (4 rounds): sc in each st around (18)
- Rnd 17: [sc, dec] x 6 (12)
- Rnd 18: [dec] x 6 (6)
- Fasten off, weave in the tail, and close the remaining loop.
Snout
Using Main Color (MC).
- Rnd 1: 6 sc in MR (6)
- Rnd 2: [sc, inc, sc] x 2 (8)
- Rnd 3: sc in each st around (8)
- Fasten off, leaving a long tail for sewing. Stuff lightly and sew onto the face between the eyes (around Rnds 6–8 of the head).
Arms and Legs (Make 4)
Using Main Color (MC).
- Rnd 1: 5 sc in MR (5)
- Rnd 2–4 (3 rounds): sc in each st around (5)
- Fasten off, leaving a tail for sewing. Do not stuff. Sew two to the upper body as arms and two to the lower body as legs so the dragon can sit.
Tail
Using Main Color (MC).
- Rnd 1: 4 sc in MR (4)
- Rnd 2: [sc, inc] x 2 (6)
- Rnd 3: sc in each st around (6)
- Rnd 4: [2 sc, inc] x 2 (8)
- Rnd 5: sc in each st around (8)
- Fasten off, leaving a tail for sewing. Stuff lightly and sew to the back of the body at the bottom so it helps the dragon balance.
Wings (Make 2)
Using Main Color (MC). The wings are worked in rows.
- Row 1: Ch 5, starting in the 2nd ch from hook: sc 4, ch 1, turn (4)
- Row 2: sc 2, hdc, dc, ch 2, turn (4)
- Row 3: Skip the ch-2, sl st into the dc, sl st down the side of the wing to create a ribbed, pointy shape.
- Fasten off, leaving a tail. Sew both wings to the upper back of the dragon.
Spikes and Horns
Using Contrast Color (CC).
Head Horns (Make 2)
Attach thread directly to the top of the head (around Rnd 3) or crochet separately and sew on:
- Ch 3, sl st in 2nd ch from hook, sc in next ch. Fasten off and secure.
Back Spikes
- Join CC thread at the back of the head, centered between the horns.
- Working down the spine toward the tip of the tail: Sl st into a stitch on the back, ch 2, sl st in 2nd ch from hook, sl st back into the same spine stitch to form a small picot spike.
- Skip 1 stitch down the spine and repeat the process until you have 4 to 5 small spikes running down the back and tail. Fasten off and weave in all ends.
Note: This pattern is written for personal use only.
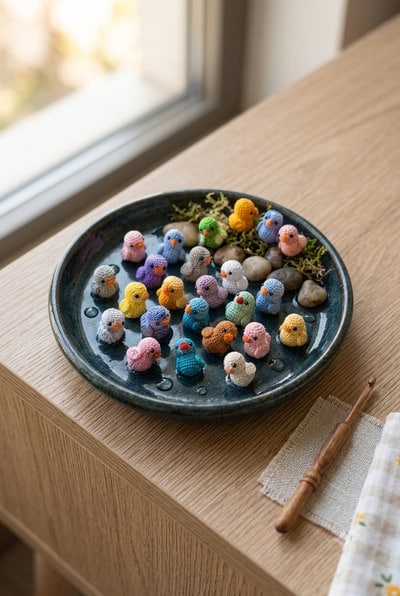
Crochet ducks
Here is a detailed, beginner-friendly amigurumi pattern to make incredibly cute, micro-sized little ducks. Because they are so tiny, they are worked as a single piece from the head down to the body to minimize sewing, with just a tiny bit of embroidery for the beak and eyes!
Abbreviations (US Terms)
- MR: Magic Ring
- ch: Chain
- sc: Single crochet
- inc: Increase (2 sc in the same stitch)
- dec: Invisible decrease (sc 2 stitches together)
- sl st: Slip stitch
- Following numbers in brackets, e.g., (12): Total stitch count at the end of the round.
Materials Needed
- Yarn: To get the ultra-micro look in the photo, use Embroidery Floss (all 6 strands) or Size 10 Crochet Thread in your choice of duck color (yellow, pink, blue, mint, etc.).
- Beak Color: A tiny scrap of orange thread.
- Eye Color: Black sewing thread or 1mm micro-beads.
- Hook: 1.00mm to 1.50mm crochet hook (depending on your tension).
- Stuffing: A tiny bit of polyester fiberfill (or yarn scraps).
- Tools: Tapestry needle, scissors.
Step-by-Step Crochet Pattern
1. The Head and Body (Worked in one continuous spiral)
- Round 1: Start with your main body color. Make a MR, work 6 sc into the ring. (6)
- Round 2: [inc] in each stitch around. (12)
- Round 3: [sc 1, inc] repeat around. (18)
- Rounds 4–6: sc in each stitch around (3 rounds total). (18)
- Round 7: [sc 1, dec] repeat around. (12)
- Stuff the head lightly right now.
- Round 8: [dec] repeat around. (6)
- (This forms the neck indentation. Do not fasten off; we are moving straight into the body!)
- Round 9: [inc] in each stitch around. (12)
- Round 10: [sc 1, inc] repeat around. (18)
- Round 11: [sc 2, inc] repeat around. (24)
- Rounds 12–14: sc in each stitch around (3 rounds total). (24)
- Round 15 (Shaping the tail): sc 18, [dec] 3 times. (21)
- (The decreases should sit at the back to create that slight upward tilt for the duck’s tail).
- Round 16: [sc 5, dec] repeat around. (18)
- Finish stuffing the body firmly.
- Round 17: [sc 1, dec] repeat around. (12)
- Round 18: [dec] repeat 6 times. (6)
- Finishing the body: Cut the yarn, leaving a short tail. Thread your needle through the front loops of the remaining 6 stitches, pull tight to close the hole, knot securely, and hide the yarn tail inside the body.
2. The Wings (Make 2)
If you look closely, the wings are incredibly subtle—just a small raised pop on the sides.
- Row 1: ch 4.
- Row 2: Starting in the second chain from the hook: sl st, sc, hdc.
- Fasten off, leaving a tail for sewing.
- Assembly: Sew one wing to each side of the body between Rounds 11 and 14, pointing slightly backwards.
3. Facial Details
Because these ducks are micro-sized, embroidery is your best friend here!
- The Beak: Thread your orange floss. Insert the needle from the back of the head out through the front center (around Round 5). Make 2 or 3 small horizontal stitches over a single crochet stitch to create a tiny, raised triangular bump. Secure and hide the yarn ends.
- The Eyes: Use black thread. Make a French knot (or a couple of tiny stitches) 1 stitch away from either side of the beak.
Pro-Tip for the Multi-Colored Look: To recreate the bowl of ducks aesthetic, make them in soft pastel tones like lavender, mint green, dusty blue, salmon pink, and soft primrose yellow!
Note: This pattern is written for personal use only.
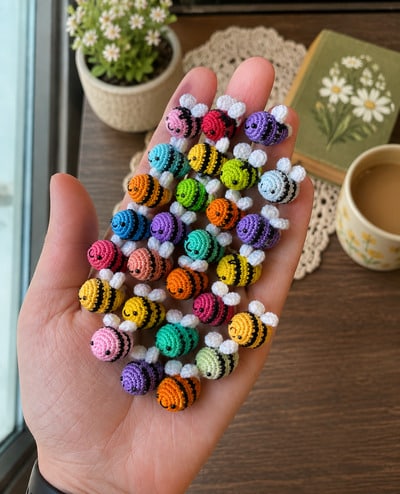
Crochet bees
Here is a detailed, beginner-friendly micro-amigurumi pattern to recreate these adorable, colorful tiny bees.
Materials Needed:
- Yarn/Thread: Size 10 crochet thread or embroidery floss in White, Black, and your choice of Main Color (pink, purple, yellow, orange, mint, etc.).
- Crochet Hook: 1.0 mm to 1.25 mm (for a micro size) or a 2.0 mm hook with sport-weight yarn if you want them slightly larger.
- Eyes and Face: 2mm black glass beads (or black embroidery floss to sew French knots) and a thin black sewing thread for the smile.
- Stuffing: A tiny bit of polyester fiberfill.
- Tools: Tapestry needle, scissors, and a stitch marker.
Abbreviations (US Terms)
- MR: Magic Ring
- Ch: Chain
- Sc: Single crochet
- Dc: Double crochet
- Inc: Increase (2 sc in the same stitch)
- Dec: Invisible decrease (sc 2 stitches together)
- Sl st: Slip stitch
- St(s): Stitch(es)
Step-by-Step Crochet Pattern
1. The Body:
Worked in continuous rounds from the head to the tail. Do not join rounds unless specified. Carry the yarn or carry floats inside the body when changing colors.
- Round 1: With your Main Color (MC), make 6 sc into a MR. (6 sts)
- Round 2: [Inc] in each st around. (12 sts)
- Round 3: [Sc in next st, inc] repeat 6 times. (18 sts)
- Round 4: Switch to Black, sc in each st around. (18 sts)
- Round 5: Switch to MC, sc in each st around. (18 sts)
- Round 6: Switch to Black, sc in each st around. (18 sts)
- Round 7: Switch to MC, sc in each st around. (18 sts)
Stop here to assemble the face: Attach the 2mm bead eyes (or embroider French knots) between Rounds 2 and 3, leaving about 3–4 stitches of space between them. Use thin black thread to embroider a tiny “v” or “u” shape for the smiling mouth right between the eyes.
- Round 8: Continuing with MC, [sc in next st, dec] repeat 6 times. (12 sts)
- Stuff the body firmly with fiberfill.
- Round 9: Switch to Black, [dec] repeat 6 times. (6 sts)
- Fasten off, leaving a short tail. Thread the tail through the front loops of the remaining 6 stitches, pull tight to close the gap, knot securely, and hide the thread inside the body.
2. The Wings (Make 2)
Using White thread.
- In a MR, chain 2.
- Work 4 dc into the ring.
- Chain 2, then sl st back into the ring.
- Pull the magic ring tail tightly to form a small, rounded teardrop wing.
- Fasten off, leaving a long tail for sewing.
Assembly
- Position the two white wings right on top of the bee’s back, around Round 4 or 5 (the first or second stripe segment behind the head).
- Sew them down securely right next to each other so they flare slightly outward.
- Weave in all remaining loose thread ends into the body and snip.
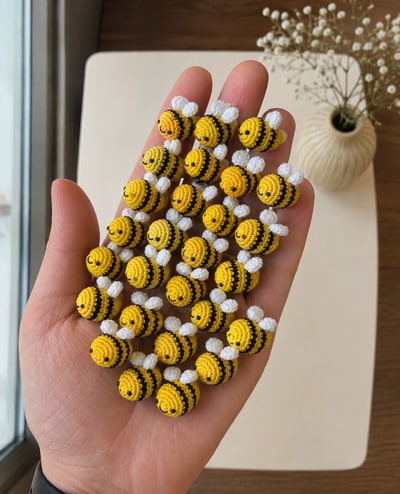
Feel free to mix and match your palette to create a whole rainbow hive!
Note: This pattern is written for personal use only.
Genius Ways to Use Your Amigurumi Miniatures
Once you have crocheted your tiny ecosystem, what do you do with them?
- Desk Companions (Terrariums): Arrange your pocket frog and duck in a small glass terrarium bowl with fake moss and stones. It makes the perfect low-maintenance desk accessory.
- Chunky Yarn Scaling: Want a massive plushie instead? Use these exact same patterns but swap the thin cotton for Super Bulky Chenille Yarn and a 6.0 mm hook. The proportions scale up automatically into an ultra-squishy, giant toy!
- Essential Oil Diffusers: If you use 100% natural cotton yarn, you can drop a single drop of lavender or peppermint oil directly onto the back of your miniature. Hang it from your car’s rearview mirror as an eco-friendly air freshener.
Common Questions Answered:
1. What is the best yarn for miniature amigurumi?
Mercerized 100% cotton yarn (Sport or Fingering weight) is the absolute best option. It has zero halo (fuzziness), which keeps your stitches incredibly clean and prevents small parts from turning into a blurry mess.
2. How do you prevent holes in your miniature crochet?
Always drop your hook size down by 1 mm to 1.5 mm smaller than what the yarn label recommends. Additionally, look up the Invisible Decrease (inv dec) technique. Decreasing through the front loops only eliminates the gaps that traditional decreases leave behind.
3. Are these patterns beginner-friendly?
Yes! The bee, duck, and frog are completely beginner-friendly because they rely entirely on the single crochet stitch. The firefly and dragon introduce minor chain adjustments but are highly manageable if you take them row by row.
You will also like:
50 Free Amigurumi Crochet Patterns that are love