This post may contain affiliate links. Please see our full Disclosure Policy for details.
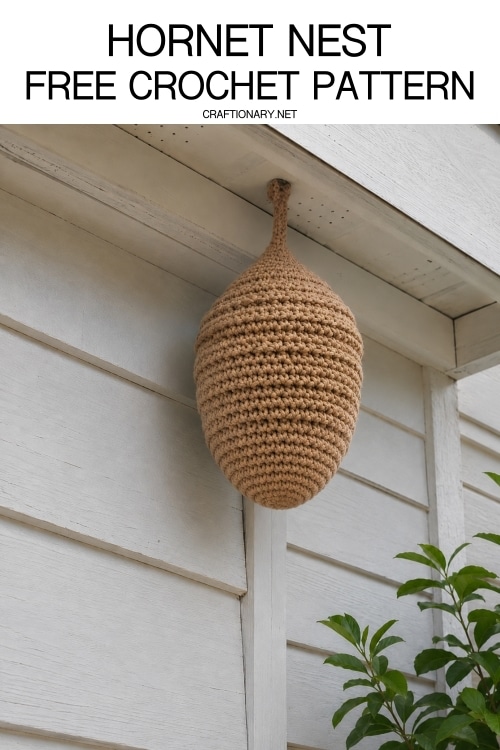
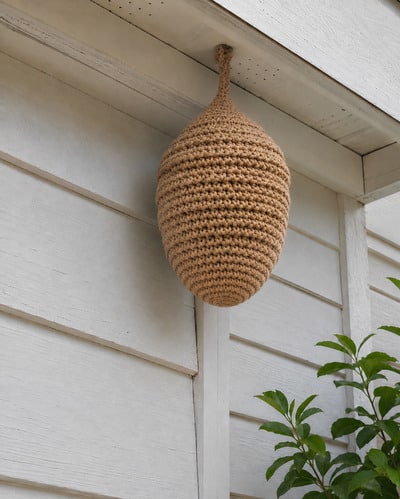
This chunky, textured fake wasp nest makes an excellent natural deterrent (wasps are highly territorial and will generally avoid building a nest near an existing one!).
The nest uses a thick, sturdy yarn and is worked from the bottom up, ending in a narrow hanging stem.
Materials and Tools:
- Yarn: Bulky (Size 5) or Super Bulky (Size 6) yarn in tan, beige, or light brown. Tip: You can also hold two strands of standard worsted weight (Size 4) yarn together.
- Hook: 6.5 mm (US K-10.5) or 8.0 mm (US L-11) hook.
- Stuffing: Poly-fil stuffing or crumpled plastic grocery bags if you plan to hang it outside (plastic won’t hold moisture or mold!).
- Notions: Stitch marker, tapestry needle, and scissors.
Pattern Notes:
- Terminology: US Crochet Terms.
- Working Style: Worked in continuous rounds (a spiral). Do not slip stitch to join or chain at the end of rounds. Use your stitch marker to mark the first stitch of each round.
- Texture: To replicate the ridge-like texture, you can work all single crochets into the Back Loops Only (BLO), though standard single crochet worked tightly also works beautifully. The pattern below is written for standard stitches, but feel free to use BLO for extra ridges!
Step-by-Step Crochet Pattern:
1. The Base (Increasing)
- Round 1: Make a Magic Ring (MR) and work 6 single crochet (sc) into the ring. (6 sts)
- Round 2: 2 sc in each st around. (12 sts)
- Round 3: 1 sc, inc repeat around. (18 sts)
- Round 4: 2 sc, inc repeat around. (24 sts)
- Round 5: 3 sc, inc repeat around. (30 sts)
- Round 6: 4 sc, inc repeat around. (36 sts)
- Round 7: 5 sc, inc repeat around. (42 sts)
- Round 8: 6 sc, inc repeat around. (48 sts)
2. The Main Body (Working Even)
- Rounds 9–24: Sc in each st around. (48 sts for 16 rounds)
- Note: This builds the height of the nest. If you want a longer, more oblong nest, add 2–4 more rows here.
3. The Tapered Top (Decreasing and Stuffing)
- Round 25: 6 sc, dec repeat around. (42 sts)
- Round 26: Sc in each st around. (42 sts)
- Round 27: 5 sc, dec repeat around. (36 sts)
- Round 28: Sc in each st around. (36 sts)
- Round 29: 4 sc, dec repeat around. (30 sts)
- Round 30: 3 sc, dec repeat around. (24 sts)
- Stop and Stuff: Firmly pack your nest with your chosen stuffing material (plastic bags or fiberfill). Make sure it holds its round, egg-like shape well before the opening gets too small.
- Round 31: 2 sc, dec repeat around. (18 sts)
- Round 32: 1 sc, dec repeat around. (12 sts)
- Round 33: Dec around 6 times. (6 sts)
4. The Hanging Stem
- Rounds 34–39: Sc in each st around. (6 sts for 6 rounds)
- This creates the narrow funnel/rope look at the top.
5. Finishing and Hanging Loop
- To create the loop: Chain 8, then slip stitch back into the opposite side of the top round to create a loop.
- Fasten off, leaving a 6-inch tail.
- Thread the tail onto a tapestry needle, weave it securely through the top stitches to reinforce the loop, and hide the yarn tail inside the stem.
Hanging Tip
To hang your decoy nest exactly like the picture, secure an outdoor cup hook or an adhesive hook to the underside of your porch or eave, and slide the crochet loop right over it!
Note: This pattern is written for personal use only.
You will also like:
Crochet Realistic Hydrangea Bouquet: Free Pattern Instructions
Crochet Home Decor Projects: DIY Chain to Finished Masterpiece
Beginner Crochet Plant Free Pattern for First-time Crocheters