This post may contain affiliate links. Please see our full Disclosure Policy for details.
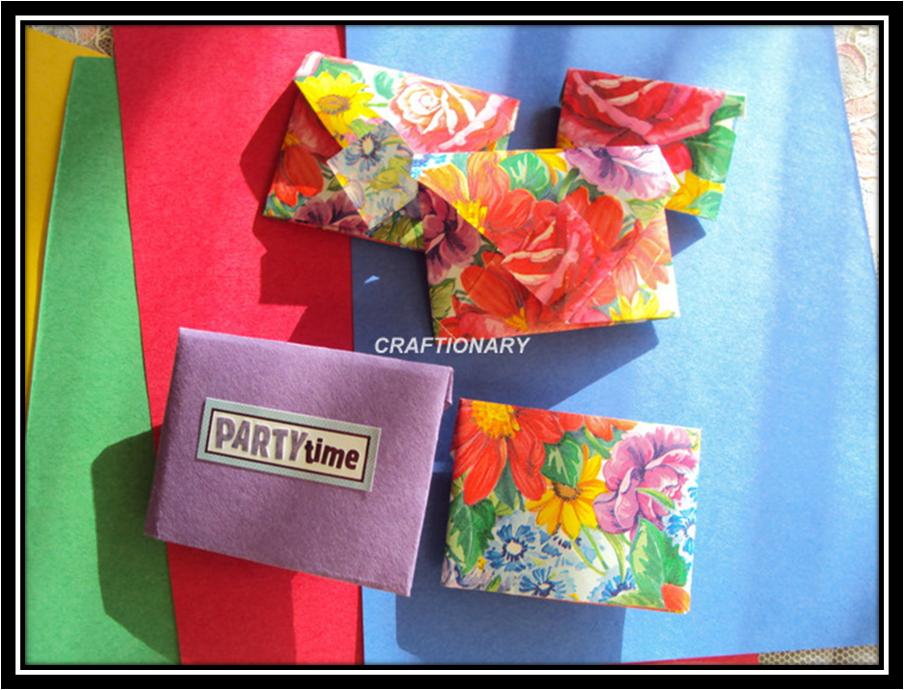
Don’t we all use envelopes? Won’t it be fun giving gift cards in envelopes or inviting people
with personalized theme based invitation cards? You can always add embellishments to
make them look even more prettier.
I think there is a very fine line between giving something and presenting something. But it does not mean that we have to spend a few extra bucks just for the look. We can make our gift cards, greetings, invitations etc look nicer by making beautiful enveloped at home. There is a huge variety of pretty papers with patterns, glitter, emboss and what not. They are fun, instant and require very little effort and can actually serve the purpose of being different and catchy.

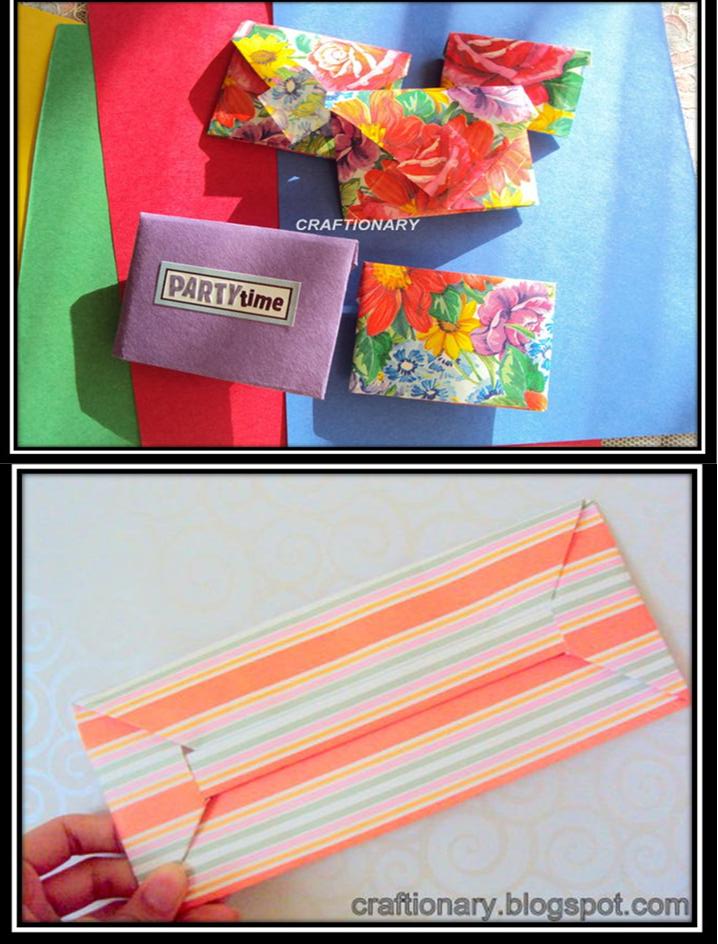
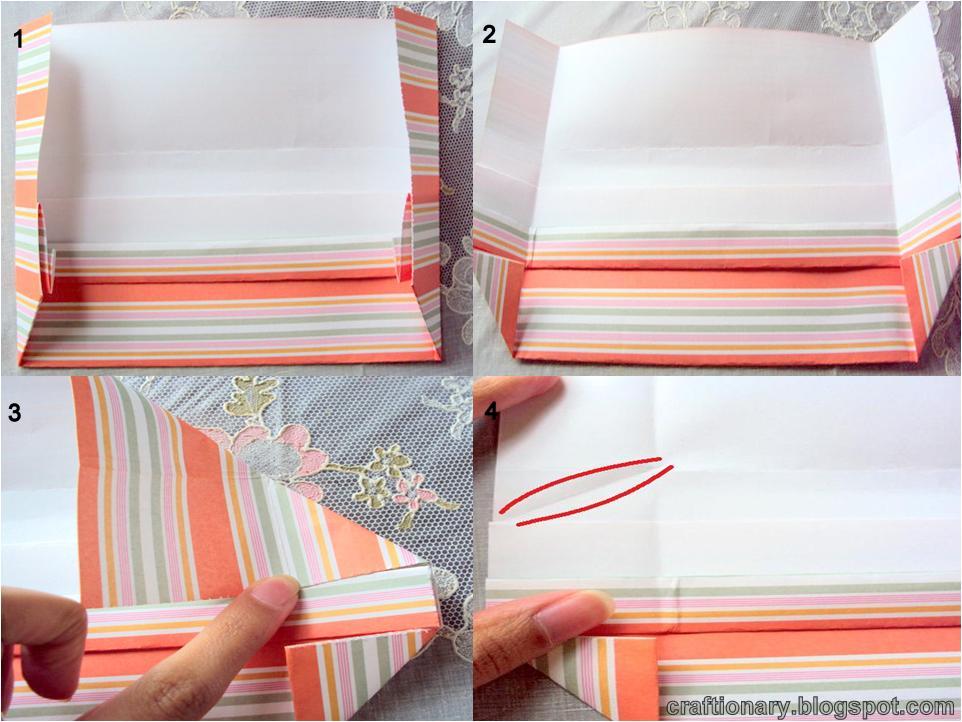
- Take a square paper according to the size of the card or invitation you want to keep inside.
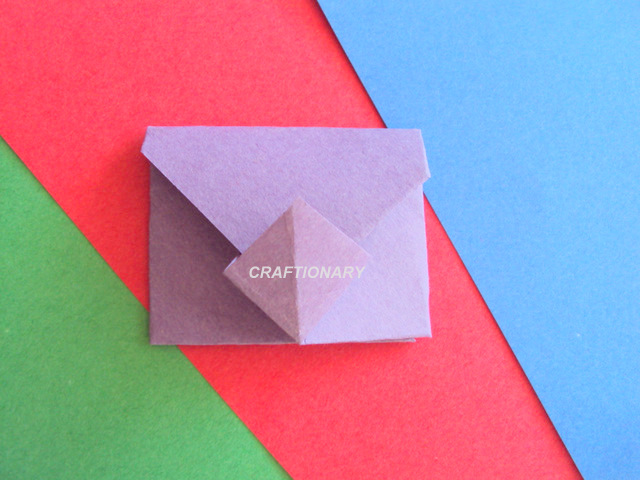
- Fold into a triangle, then fold again at the centre to form the second half triangle. Rotate the side and fold the left flap over (doesn’t matter where you fold; your instinct will guide you).
- Now fold the right flap over the left, make sure the mark matches with the left flap. To make the lock, fold the edge of the right flap towards right and then open it, as shown in the picture.
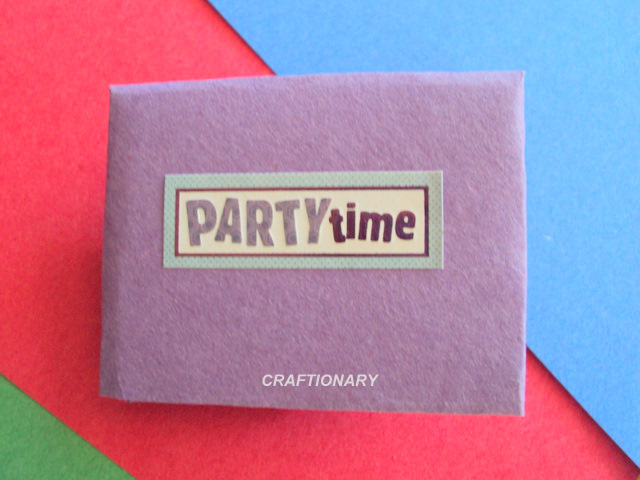
- Fold the top and lock it in place. Your envelope is ready in a minute.
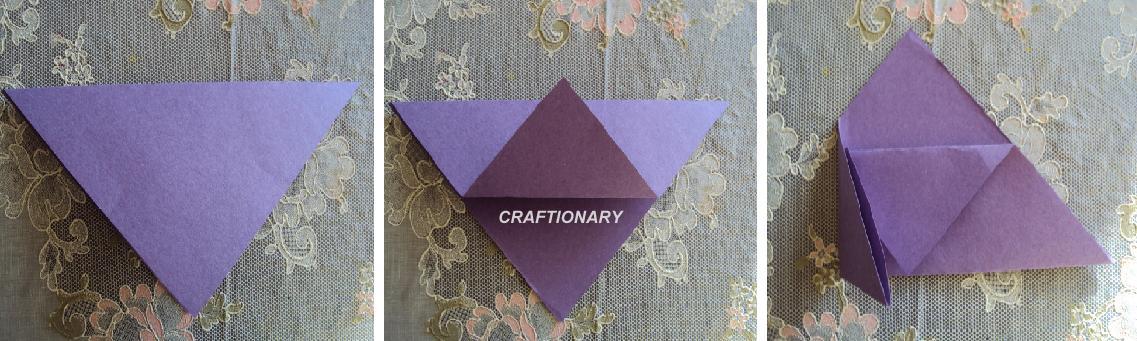
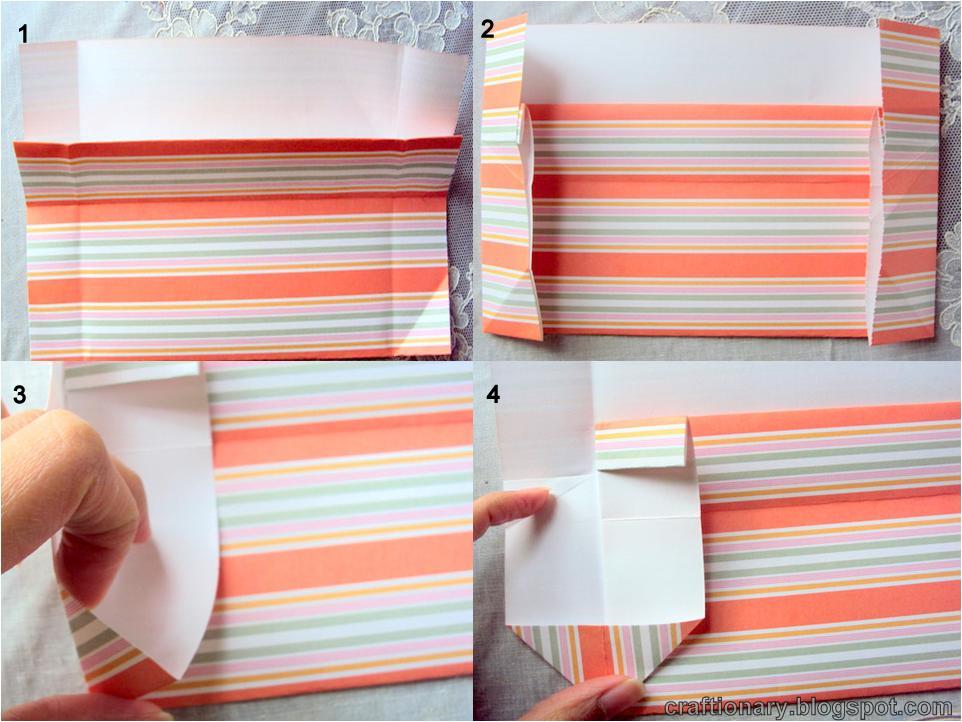
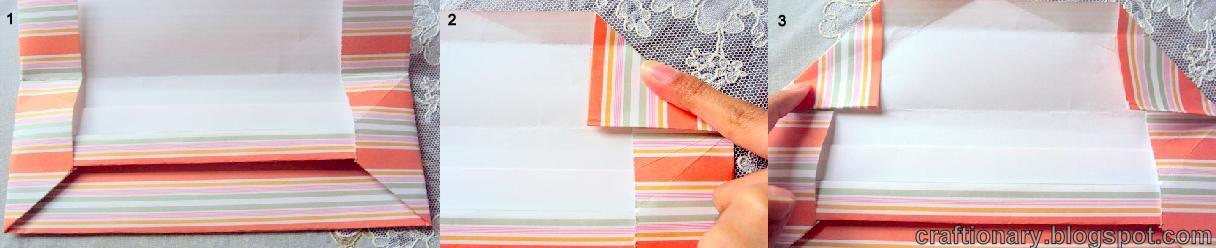
- Fold the square in half. Then again fold over to semi-half and again fold to another half. I know I wrote it way to confusing but see the picture you will understand it best that way.
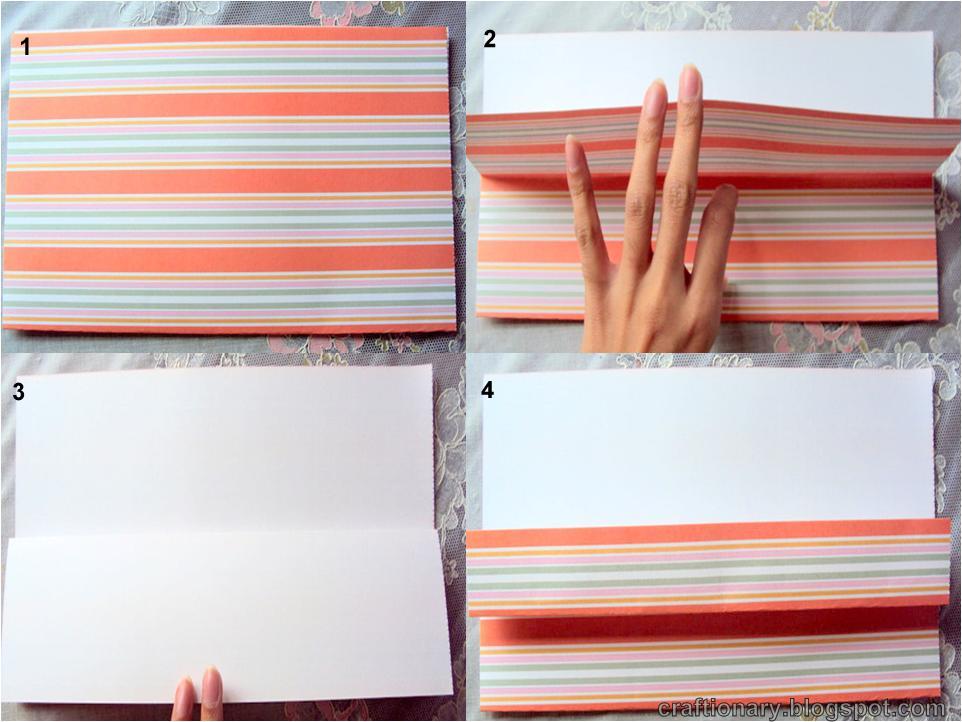
Open the last fold. You will get the crease shown by arrow. Now fold the bottom right corner and fold it inside. Do the same with the left side.

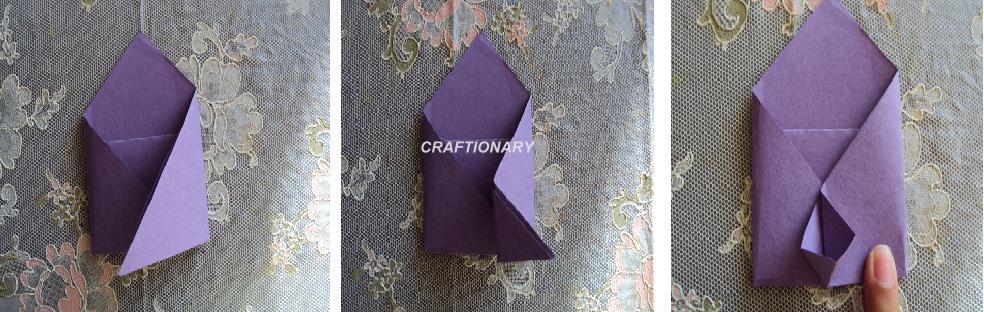
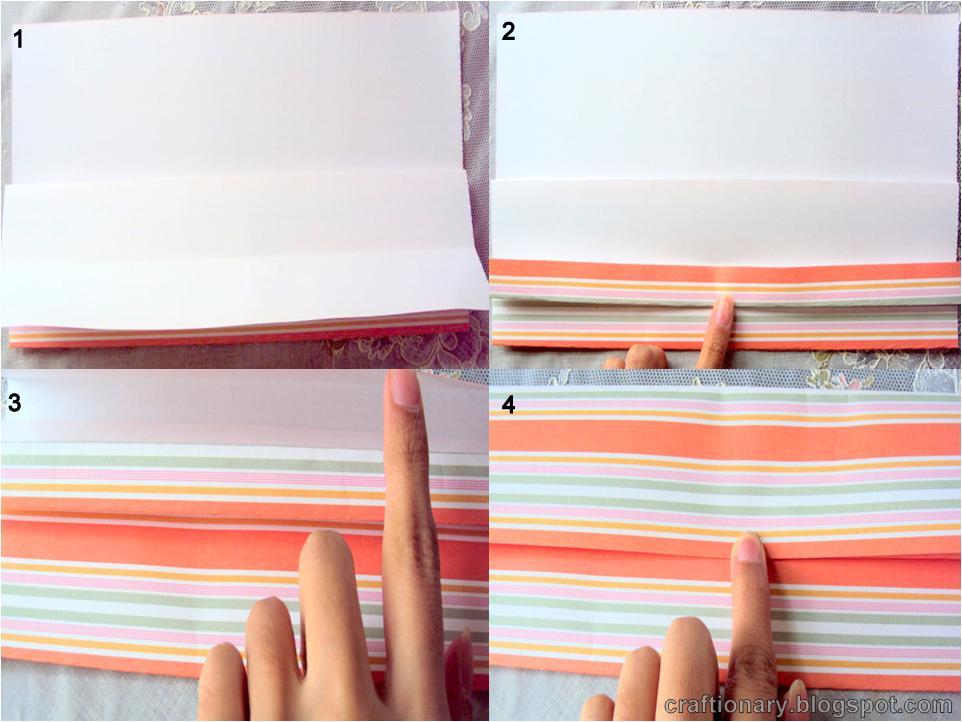
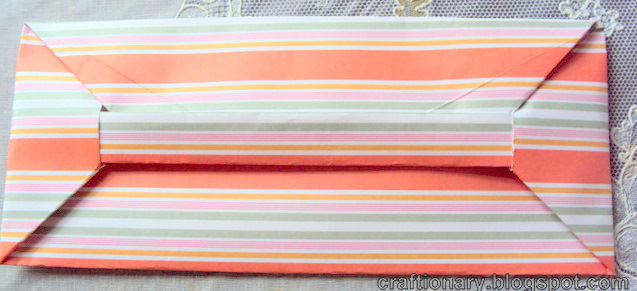
- Open the bottom fold and fold the sides. Open the left fold and crease to form a triangle as shown in the (3) and (4) picture
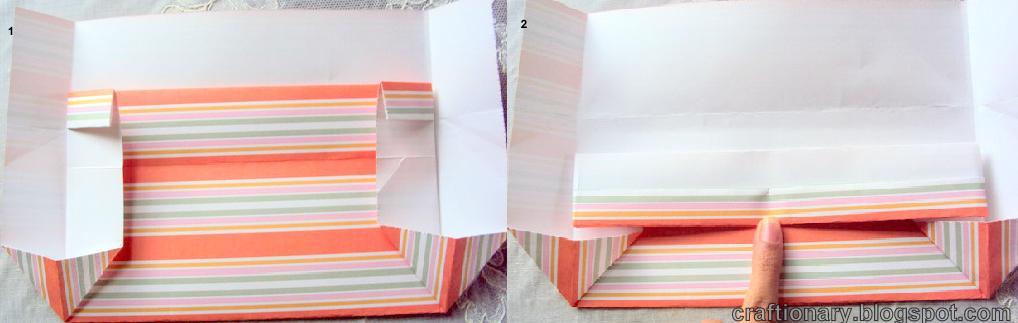
- Now close the right flap over. Fold and tuck in to lock the envelope in place.
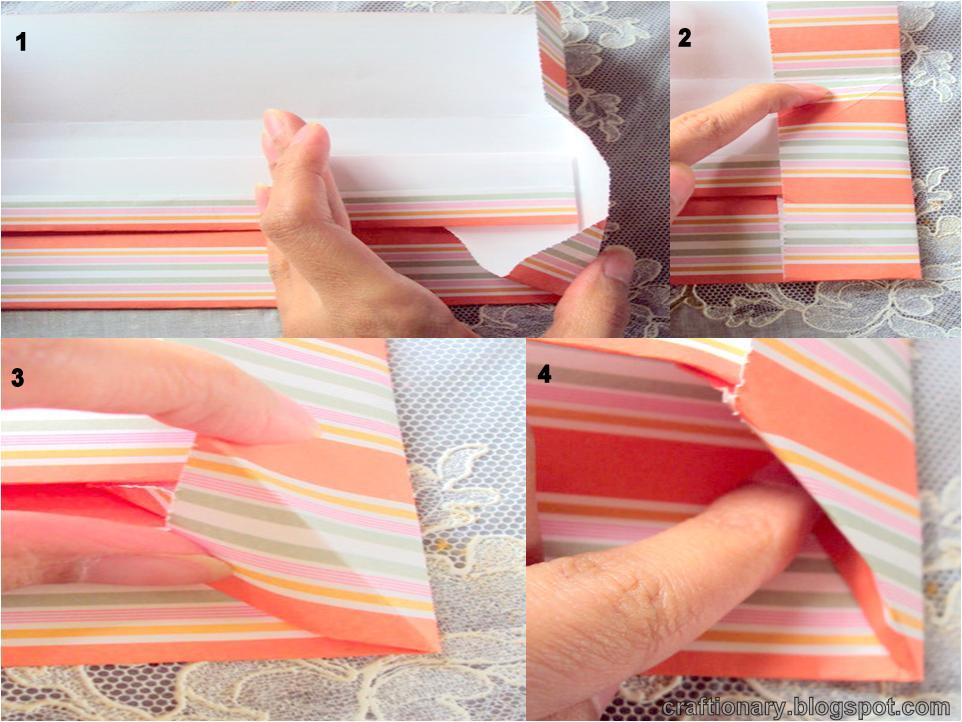
- Your done! I hope you enjoyed and liked the tutorial.


Hi, I just found your blog and wanted to let you know that I am a new follower! 🙂 love your blog!Erin
http://www.purplebookbloggingmommy.blogspot.com
great tutorialfollowing from the blog hop
Very understandable tutorial Hani… I am fond of making envelops your last one is great.. sure will try soon…Hope you like to pay a visit to my new spring arrangement saved in a clochehttp://craftaworld.blogspot.com/LoveFarah
lovely
WOW! Those are SO very cool!! Fantastic job!
Thanks for linking up to Making It With Allie! I can't wait to see what you have for next week!
AllieMakes.Blogspot.com
super cute!I can't wait to see more of you blog.I love paper crafts. Last year I did a shirt for fathers day….really fun 🙂
Thanks friends!@Diane. Yep! paper crafts is so much fun and interesting stuff to do. A shirt for father's day seems like a really cool idea.. :)Lovehani
Hello Hani! I admit it! I am an obsessed paper crafter and I love your envelope!!! Thank you for sharing such beautiful ideas!!!
Sussana @ Dulce Sobremesa
Great Job, Happy to see you here !