This post may contain affiliate links. Please see our full Disclosure Policy for details.
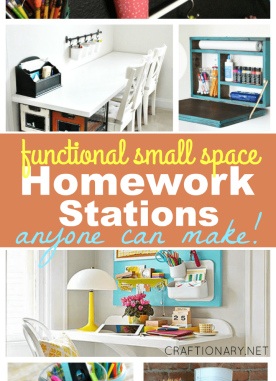
Organize craftily with origami is an origami paper folding compartment flower made to store crafts or office supplies in a handy way. Make this organizer to organize craftily in a stylish and have some fun with origami paper folding art. It is great for organizing stationery items for kids. Display it on kids homework station and check out these functional homework station ideas while you think!
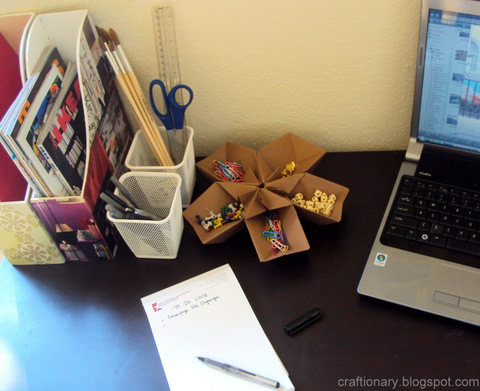
Organize craftily with stationery Organizer
I have always been obsessed with craft, when I was a child I used to climb up my cupboard to keep my things safe from my brothers and now I work when my little man is sleeping. Sometimes it’s challenging to find time too but I just can’t quit crafting.
Now lets have a look at the origami organizer to organize craftily all the stationery needs and so much more. This flower is a very useful organizer for all the small things we need everyday and don’t know how to keep them handy. Not something to keep forever but it can be useful for kids and small temporary projects.
- Kids can keep crayons and color pencils organized on their study table or when they are drawing and coloring
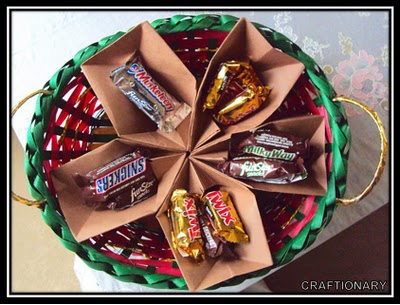
- Place it in a nice basket so that it movable once it has weight in it
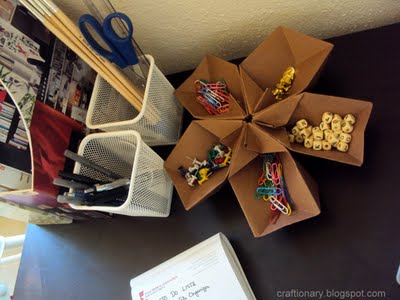
- Place it in your drawers organizing your office supplies.
- Use it as a temporary holder for your projects that require use of small things like beads, crystals or buttons; you can keep them organized likewise and safe time as well.
Make organizer with compartments
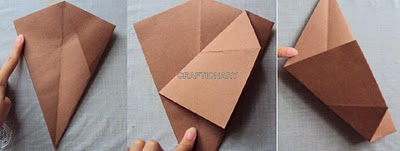
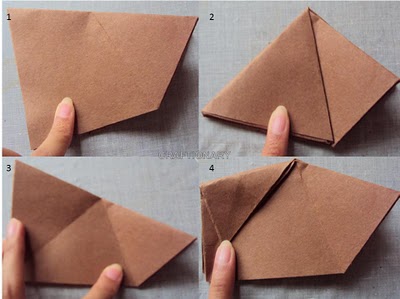
- Take a square paper (9″ x 9″) and fold it into a triangle. Fold both the sides of the triangle in halves shaping as shown below. Pattern side down.
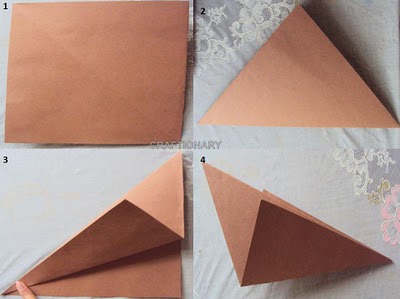
- Open the paper from the centre and fold the flap upward forming the triangle. Now open the side flaps and fold the paper at the centre again.
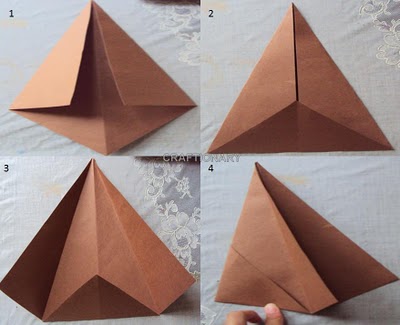
- Rotate the above model into the shape shown below. Now fold the top-left corner towards right side and do the same with the other side.
- Now fold the left and the right flaps into triangles as shown and unfold them. Unfold the flap facing down followed by folding the left flap over to form an envelope shape. Now finally fold the flap below upward again.
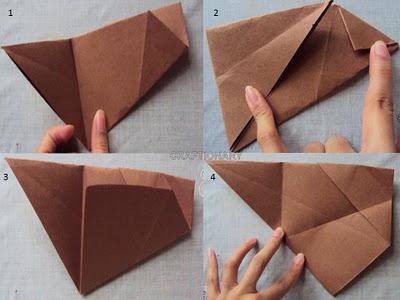
- Open the shape at the top and fold in the smaller triangle.
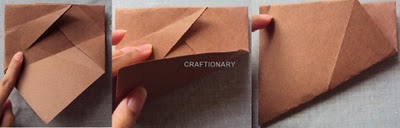
- Fold the top left corner and bring it down right, forming a triangle and unfold it. Again fold the top left corner, but this time form a small triangle meeting at the nearest line. Now fold the small triangle upward into a smaller triangle and unfold all.
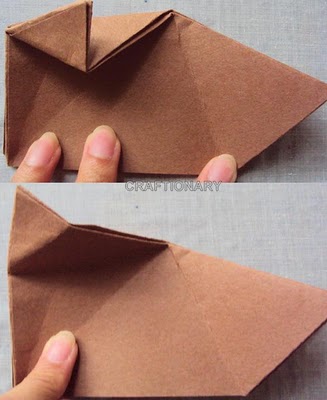
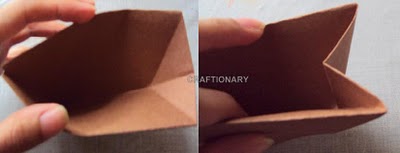
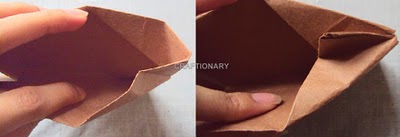
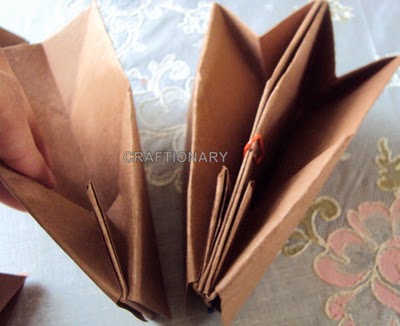
- Open the top and fold the above formed folds inside to complete the model.
Paper folding origami organizer
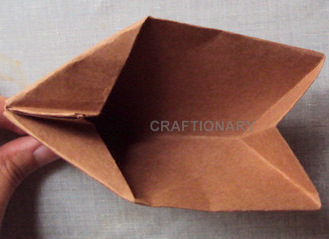
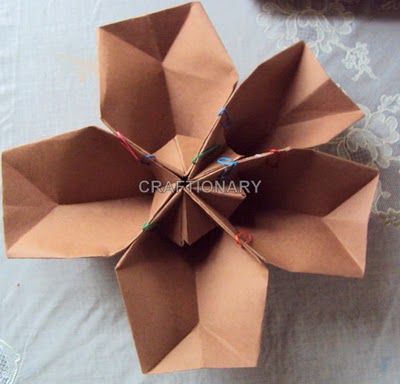
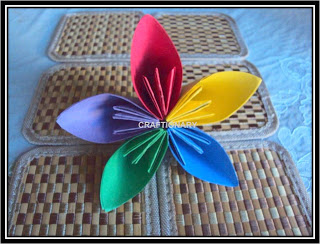
- Glue them all together at the center only and use paper pins to hold them together till the glue dries. You can also use double-sided tape.
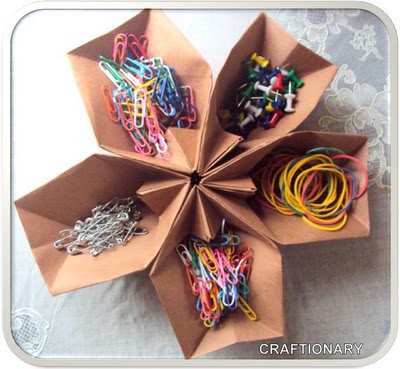
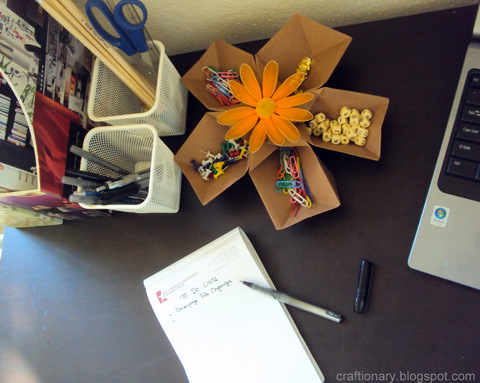
- The final shape looks like this. Remove the paper pins
- Keep your office supplies handy in this organizer. You can also use it to keep different colored beads, candies and small similar things organized and handy.
Hope you enjoyed this crafty organizer with me. I would love to see yours, so keep it coming.
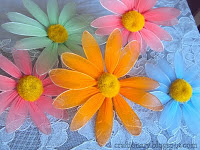
Here’s a little feminine girly touch to the organizer. Just a last minute picture thought.want to make the orange cute flower for organizing decor?


I like this!
This is so creative and unique! I love it. I'm a new follower 🙂
http://www.theelephantstrunk42.blogspot.com
thanks..LoveHani
Very lovely project Hani… and very practical too
http://craftaworld.blogspot.com/
Love
Farah
Super, I like this!!!!!
this is way super awesome! i tried my hand at origami once and it wasn't half bad for my first try. But then I just had some paper shape sitting around useless and taking up space. I love that you turned this into something practical. I'll definitely by trying this out!!Thanks for sharing!! I'm your newest follower!!
Kelsey @ Scrappy Ideas
http://kelseysscraps.blogspot.com/
Cool idea thanks for sharing
thanks friends.. :)origami is really fun to work with but when you are making things just keep the project in mine like if your making flowers make them for a gift or try hanging them up on the bulletin boards.. so it doesn't go waste..
We featured this project today from the Fancy This Fridays link up! Thanks for linking!! Hope you'll check it out and grab a featured button! 🙂 http://trulylovelywiththelaneysisters.blogspot.com/2011/01/fancy-this-features-9-award.html
This is fantastic…what a fun way to stash supplies. I am a new follower and thank yo for linking to tickled pink!
This is such an amazing idea! I have been looking for something creative to put on your wedding tables (we're bringing the candy bar to each table) THANK YOU THANK YOU THANK YOU!! Bookmarking and following you now 🙂
What a great idea…just wanted to say I'm a new follower and love your blog and your origami theme in particular!
This is a very good idea to sort those little things on table.
Brilliant Hani
Smile from Belgium
M
this is v cute. I was thinking about using it for separating beads as I work with them.
I wonder if you could leave the last side un-glued and put either a ribbon or hook&loop to attach it into a star. Then it could fold up if you're not using it.
I think I'll go try that now.